An even more basic infusion tutorial

The other vacuum infusion tutorial has lost it’s images so I decided it’s time for a new one. This forum already contains pages of great information so I’m keeping this tutorial simple.

If you’ve never worked with a wet layup I suggest vacuum bagging first. It’s a more forgiving process and it’s more hands on so you learn faster in my opinion. But if you want to skip it read on.

The infusions below are for a flat 6x6 inch square. This is literally the simplest layup possible.

A quick rundown of my equipment and materials

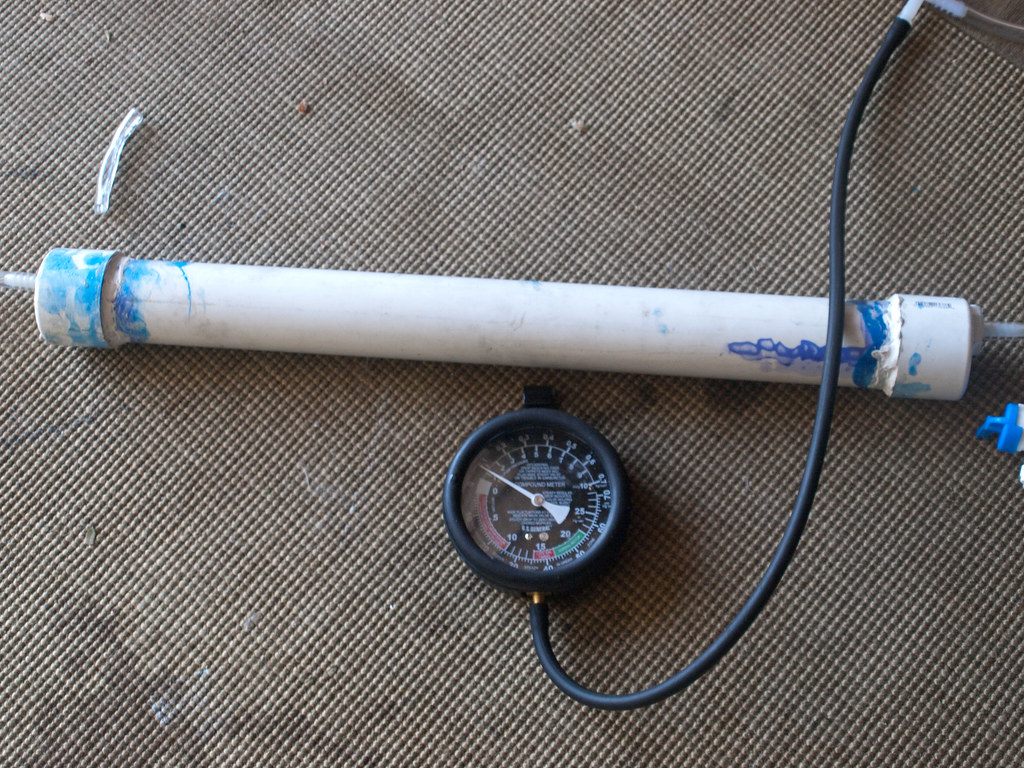
Vacuum Gauge - With infusion it is critical that you monitor vacuum pressure, not only to see what it is but also to notice leaks.
Resin Trap - If your vacuum line fills up the resin will collect in the pipe and not get sucked into your pump. Pressure pots are frequently used here but for me it was cheaper to build mine out of PVC pipe and nylon fittings.

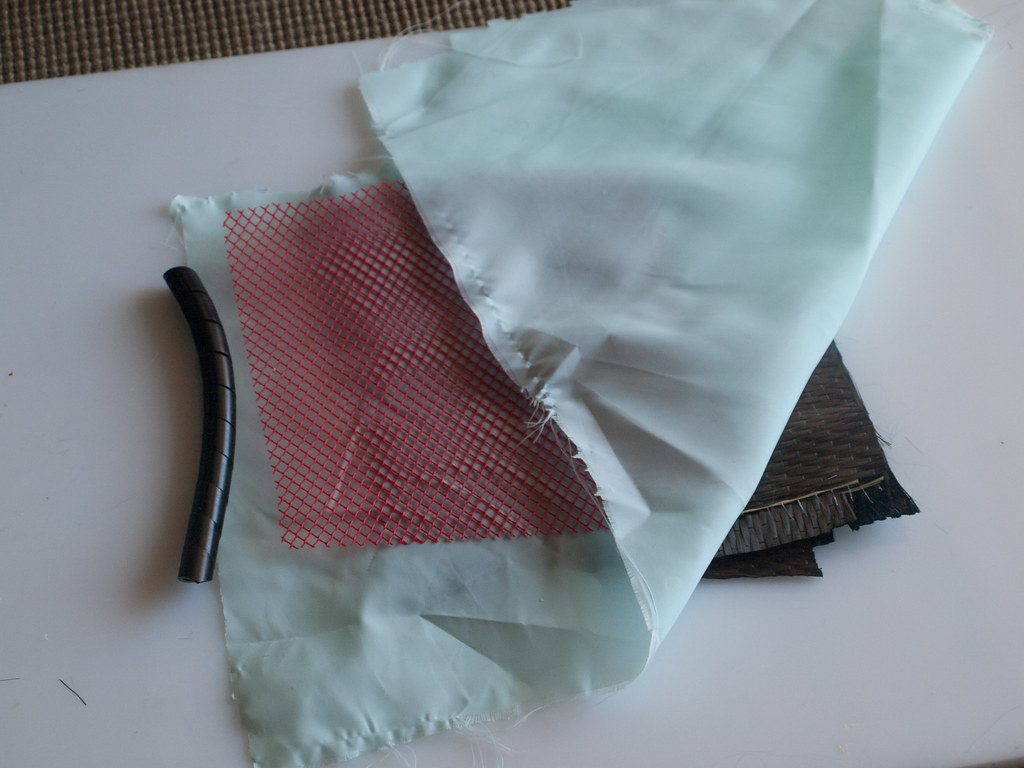
Here are most of the consumables. From left to right we have spiral wrap, peel ply (green cloth), infusion mesh (red mesh), and carbon fiber. The spiral wrap isn’t even necessary for small infusions like these. Before I had the wrap I punched holes in the tubing itself.

This mold in particular required no release agent but in most cases you will need to apply PVA, Wax, a semi perm or a release agent of some sort before laying up.

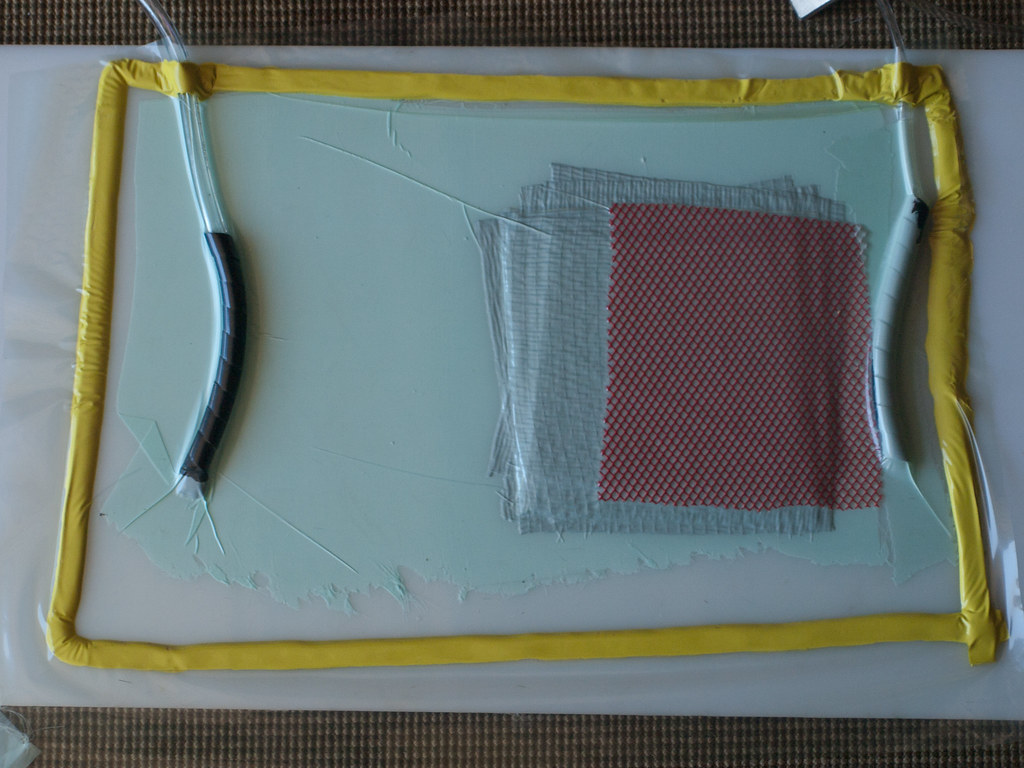
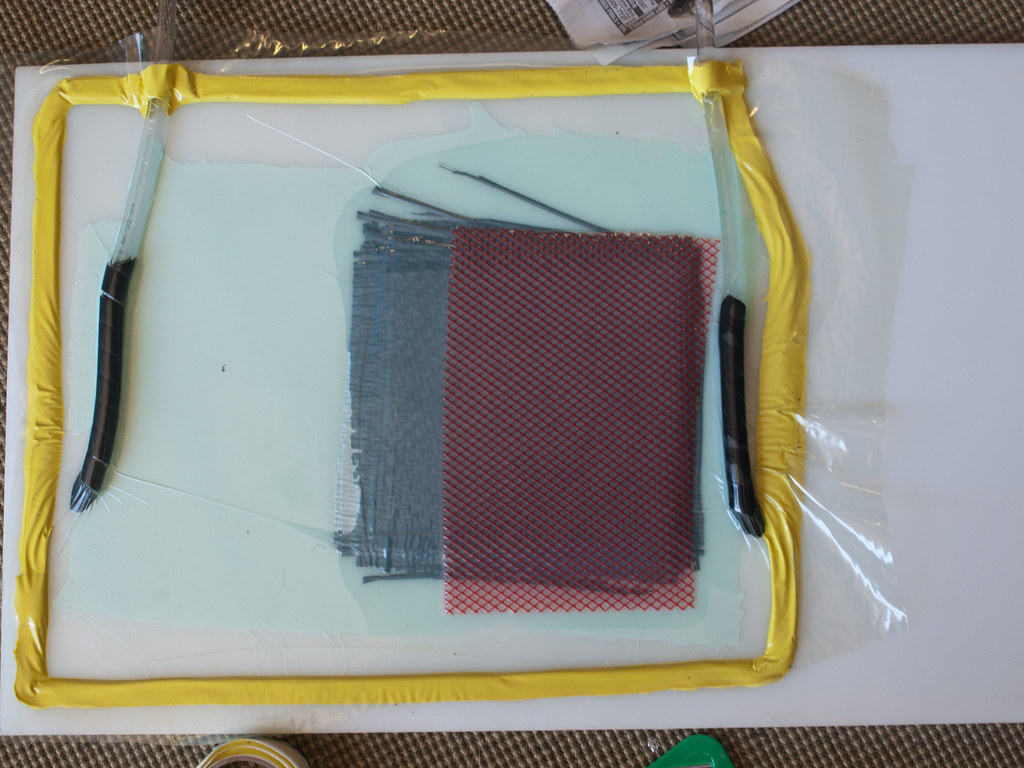
The tubing, tacky tape and vacuum film have all been added. Some quick tips, when you lay down the vinyl tubing all you need to do is cut about half an inch and stick it on top of the tube. Press down on the tape to seal it with the tape on the bottom.

Leave a large peel ply break. I went a bit overboard with these infusions, but all you really need is about 3/4s of an inch to 2 inches.

I cut the infusion mesh an inch short because it slows down the resin considerably. In my short experience it seems to reduce pinholes and create a much better part. Some people have it run up all the way to the edge to ensure total infusion. I don’t know which one is better but you can always experiment.

IT IS ABSOLUTELY CRITICAL TO HAVE NO LEAKS. One small leak will destroy your infusion. In this particular case one thread of peel ply was sticking out from under the tape filling the bottom side with bubbles. Test for leaks by pulling a vacuum and clamping both lines. Check the pressure, drink a beer, come back and see what the pressure is. If it’s the same you’re good to go. If it’s not try finding the source of the leak and fixing it. With this particular piece I could cut off the ruined portion since it was going to a lab for tests. However if you’re laminating a hood, or a wing you can’t really cut half of it off.

Lastly I degassed the resin. After mixing I placed my cup of resin in a larger cup of hot water and let the little air bubbles come out. Some people put their resin into a vacuum chamber but I found for this particular resin that step doesn’t help . For a previous resin I used it did. Learn the properties of your materials if you want a repeatable quality process.

And here’s the most fun part, the actual infusion. The resin inlet is on the right side. You can see that the resin has traveled most of the way but not all. I clamp off the resin inlet at this point. This is not a problem because the resin travels about an inch or two even after the vacuum line is clamped and the pump is turned off.

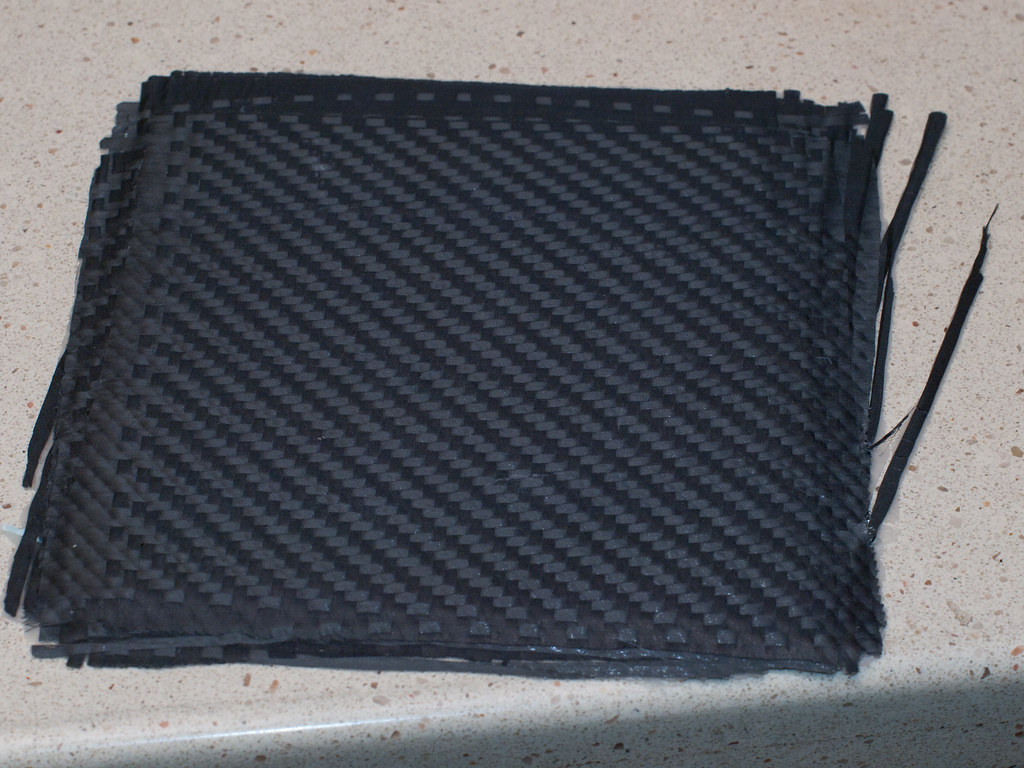
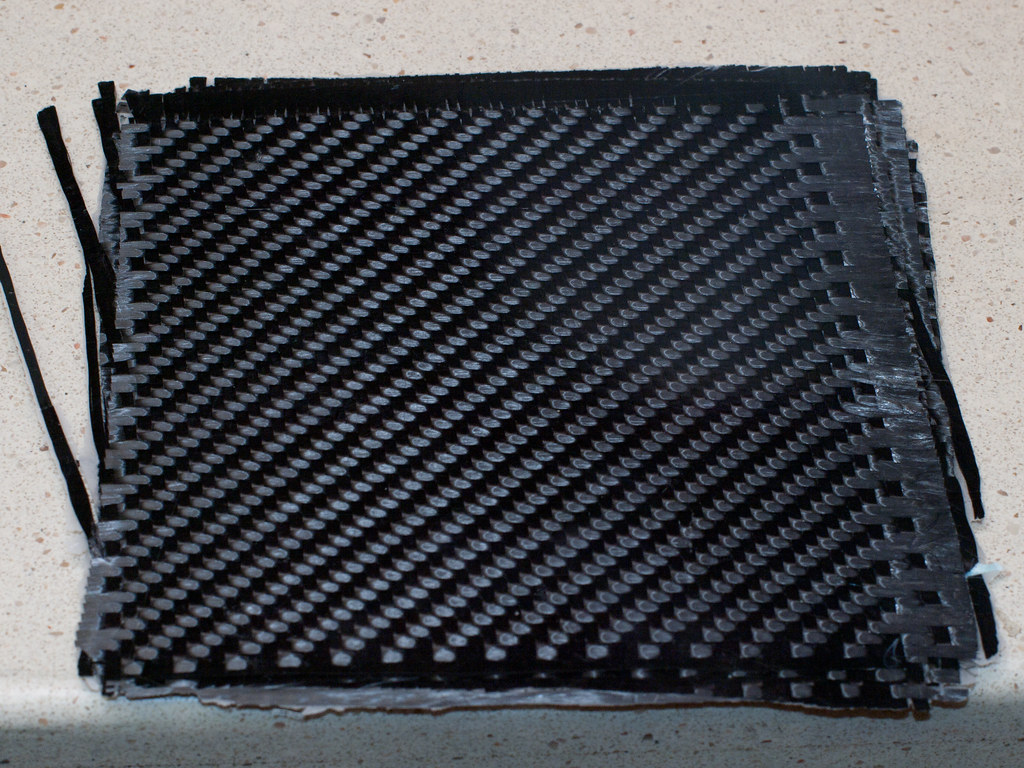
Here are the final parts. The top picture is of the peel ply side. The bottom is of the mold side. Not how flat the piece looks compared to other carbon fiber parts. This part had no gel coat so the weave got flattened to the mold. If you want that nice 3d look a gel coat is needed.

That concludes my super simple infusion tutorial. This covers the bare minimum for vacuum infusion. Hopefully this helps you get started with this process so you can start adapting it to your own needs.

I find it best to have the transfer medium touching the inlet as it allows the resin to flow faster. Also wrapping the spiral tube with the peel ply helps stop the bag crushing in and sealing it off, plus it filters out air and other debris.

Stopping the transfer short allows to the resin front on the mould face to catch up to the top. This is very important on thick laminated. As I found out on a 30mm thick plate the first time.

I like this thread. I agree with Moke 110%. Make the inlet tube touch the distro media, else what is the point of it, when it takes so long to GET to the distro media. Wrapping peel ply around the spiral is good so the bag doesn’t get cut in the spiral slice. Rare, but it happens. I believe in peelply delay lines with carbon. Depending on my part, I have a 2-4" delay. Also, I’m not sure about clamping and turning off the pump…I’d leave the pump on until the resin cures, or at LEAST gels. Even if you have a perfect bag.

Once I get a better quality vacuum pump I’m going to do this. Right now the one I have smokes like crazy even if there isn’t any leaks.
Also yea you’re both right, having the infusion media touch the part is the best idea. The materials shifted around a bit and messed it up on this one.

I agree, run the pump for the full cure time. Install a resin trap so your pump doesn’t suck in resin. I wrap my vacuum suck line under the bag with breather cloth. I still always get resin in the vacuum line but with a resin catch pot it’s no big deal. Unless you do what i did yesterday lol…

I infused a floor pan for a racing go kart yesterday. Used Huntsman RenInfusion 8604 epoxy. Red flow Airtech flow medium. Nylon peel ply under the flow medium. The tubing I used is polyethelene 1/4" ID. The vacuum pump is that Amana refrigerator compressor. It pulled down to 28"hg.

I opted not to use the super-sticky yellow bag tape… instead I’m using the black AT199 bag tape. It works perfectly fine and i had no air leaks.

Only problem i had was my own fault… i ran the vacuum gage and ball check valve between the mold and the vacuum resevior so some epoxy got into my vacuum gage and valve… oops! Working 11 hour days little things get overlooked when tired.

The laminate seems a little on the dry side ( guessing it has around 25% resin content). That may be from the peel ply i was using or the red flow medium. This is the first time i used the red. I will probably switch back to the green when i buy more.

I used 3 layers of 3K cf twill, 1 layer 6K cf twill, and two smaller inserted plies of 6K twill where the drivers feet rest.

The vacuum pump works well for infusion and there was zero noise or smoke coming from the pump. However the pump did get hot to the touch. I may hook up a fan to it to help keep it cooled down. It would be cool, pardon the pun, if it had a water cooling system built around the pump.

Have you used blue Enkafusion. That’s all I have used but find myself wanting to try something new. Just wondering what the pros/cons would be between the three.

I would try some if i had it… I may buy a couple yards if possible to try it.

‘Not how flat the piece looks compared to other carbon fiber parts. This part had no gel coat so the weave got flattened to the mold. If you want that nice 3d look a gel coat is needed’
I’ve tried apply gelcoat to prevent the carbon flaten. but it still flat. vacuum 25-28"Hg. any idea?

To prevent the flat look you have to get a lower VF so that the fabrics “swim”. Therefor you have to infuse more resin.

What do you mean by lower VF?
Vacuum Force? Or Viscosity Flow?
Thanks

Fiber-Volume fraction.

In other words: you need more resin. Use less vacuum. Or instead of closing the resin feed after infusion, close the vacuum, and leave the resin open.

Or use MTI hose…

This has helped a lot in understanding. I wish I would have ran into this process before I had laid a bunch of parts.

Just finished this PDF Tutorial on how I make a Longwood Cigar pen for those who may be interested.

Les

Hi, i have make an order for resin and i’ll start infusion.
It’s crazy to read all the posts on this and my head is satured about all i had read everywhere.
I 'll try with MTI hose.
For the depression,it’s -1 bar right?

Full vacuum, which tends to be read in mm/Hg rather than bar; but yes it’s around -1 bar. 29.9mm/Hg is what you will likely see written a lot.

Thank Hanaldo,i will make a panel first for see how works my set up and then finish another mold for test on a real tiny parts…
I will post pictures!!

Hi ,i have received my leak detector greisinger 200-14 and i think try infusion next week…
I look every video about infusion and i saw something that i can’t really understand/

Why some peoples put or not a perfored film between peel ply and the the green mesh?
Is it just for remove easily the green mesh to the peel ply?
Thanks

Yes, it helps removal of the mesh. If you have a released coated nylon peel ply don’t really need it. If using natural peel ply then you are better to use it. You can also use the release film with no peel ply under it. Only need peel ply for secondary bonding, or if you prefer that type of B side part finish

Hi,
Today i have made a test with my new leak detector gdh 200-14

I have put the detector just after the pump and close the valve for keep the vaccum…
My vaccum was to 0.030mbar (or 0,225 HHmg)and after 20 minutes,my vaccum was to 0,049mbar…is it a too big leak if i have with my bag the same thing???

First, best to place the gauge is at the resin inlet (That way you are reading what the pressure is at the part). Second, your leak of 19mbars/20mins is too big for infusion. If you cannot find the leak, then you should either replace the bag, or put a second bag on, with flow media between the bag films. Good luck