Ok, there’s a few reasons I did this but mostly it has to do with my “BAD” experiences leaving electrical equipment running unsupervised for long periods of time.
See photo: 
The challenge was to add some sort of on/off control over the vacuum pump so that it wouldn’t have to run continiously. Now this probably doesn’t seem like a problem to some of you guys who do small parts with prepregs, fast curing resins and post cures but for me I’m heading towards a full scale infusion of a boat hull that’ll be 30.5’ long by 10’ beam by 6’ deep with a full keel and that means on the outside of the hull approx. 70 sq. yrds in one shot!
http://www.fram.nl/workshop/controlled_vacuum_infusion/cvi.htm
The whole process isn’t really all that different from what you fella’s are doing with your car and motorcycle parts just on a much larger scale. When you start mixing up 10’s of gallons of very expensive epoxy for a single infusion you have to be very aware of what you’re doing, hence my experiments. I’ve learned enough from you guys here to feel confident enough to do this on our project.
The long run times for the pump are a result of the ULV epoxy resin used for the infusion of these large scale projects. The working time is over 5 hours with a 24 hr required wait till peeling the bag off. Post curing can speed up the process and that is possible but not very practical for such a large object. Some builders have been able to get upwards of 120 deg F with tents & propane heaters. As much as I enjoy watching the infusion process happen I find watching the epoxy till it kicks somewhat boring! 
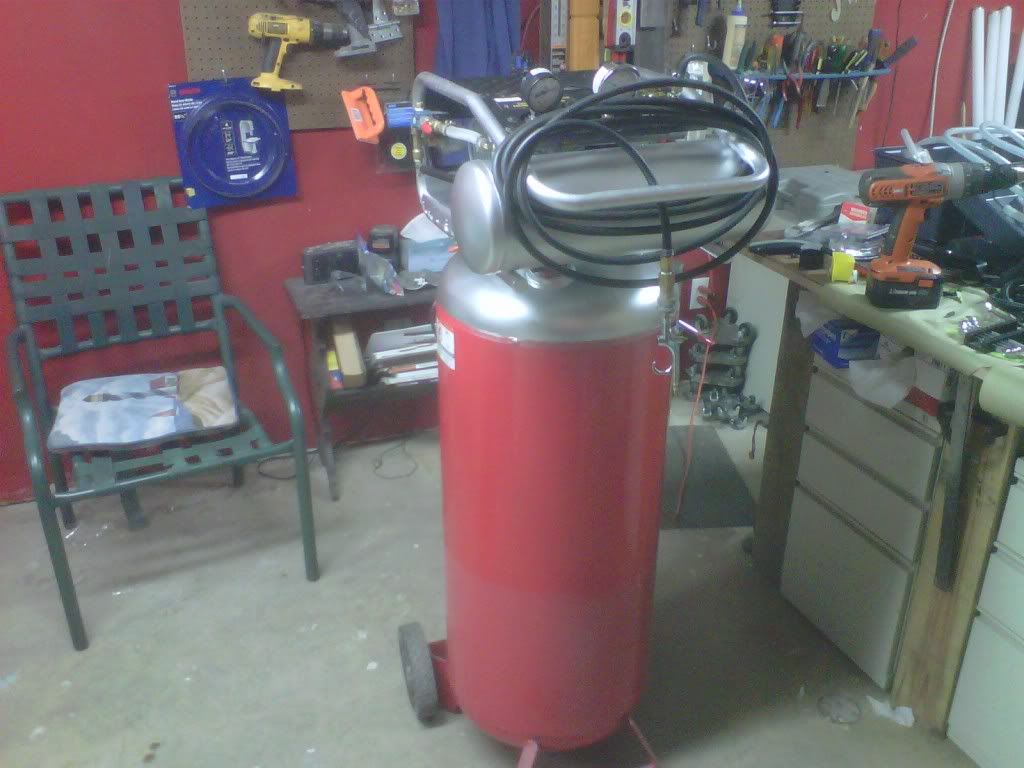
Ok, here’s what I did. On the joewoodworker.com web site they specialize in wood veneering supplies. They also promote the use of a “vacuum press” to ensure proper adhesion of the wood veneer to the substrate. Sound familiar? My brother is a cabinet maker and was looking for better results from his veneering projects when I found that site.
The full vacuum press plans are on the Joewoodworker site: http://www.veneersupplies.com/vacuum_press.php
The veneer press’s use a vacuum switch to turn on/shut off their pumps. This helps with wear and tear on the pump while allowing the layup to remain under adequate vacuum unsupervised. In order to achieve this setup there are a few considerations.
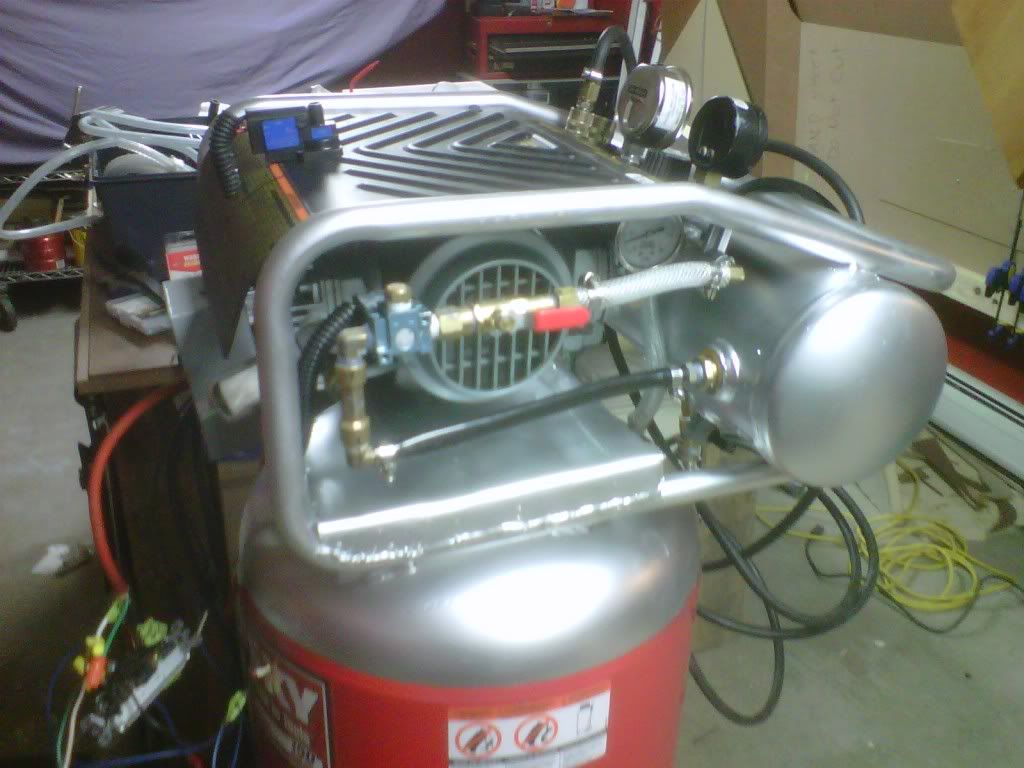
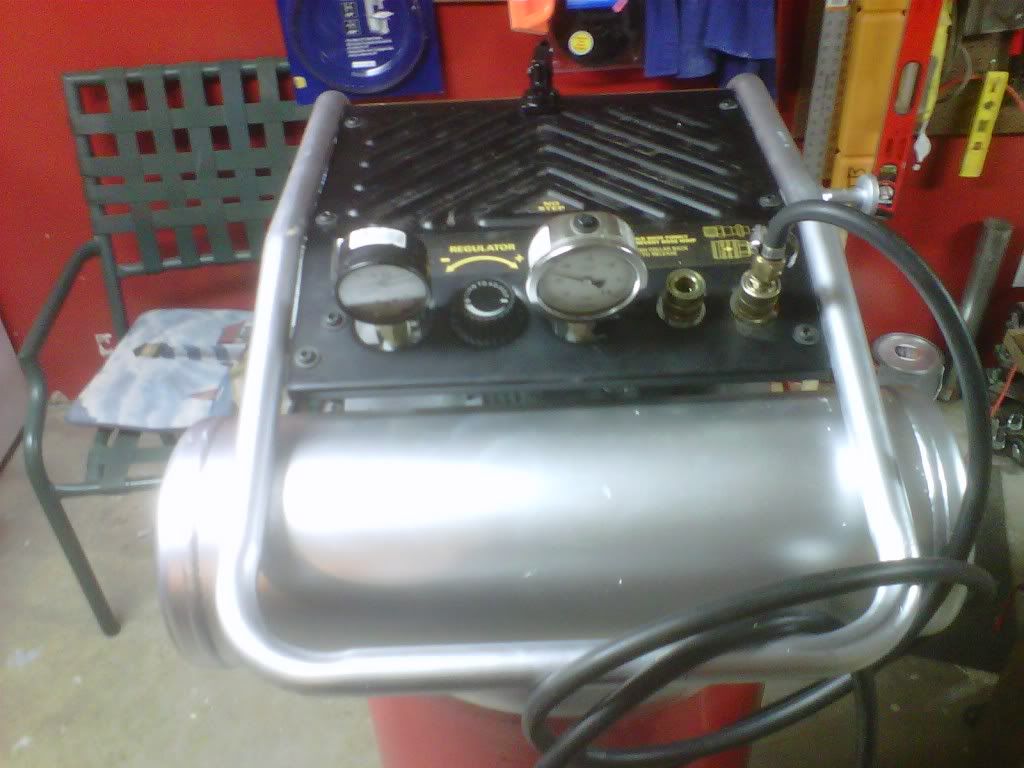
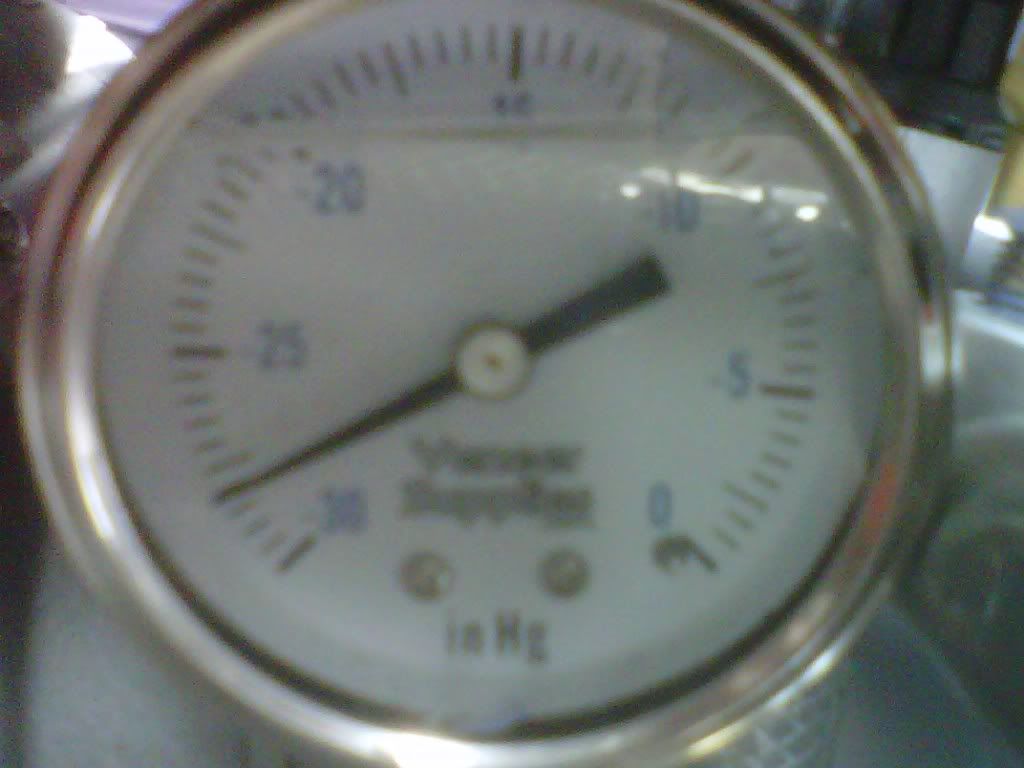
The Vacuum Switch: The vacuum switch is very sensitive. Fluctuations in the vacuum within the manifold (see pic) can cause the switch to flutter. This isn’t good for the equipment so there’s two things required to correct this. Firstly the switch should be as far from the main flow in the manifold as possible, preferably on your main reservoir or catch pot. The switch is adjustable from about 8" HG all the way up to about 29" HG. According to the mfgr it’ll require about 4" drop in vaccum to trip the switch for a restart. Mine is about 2" right now but I expect it to loosen up a bit with use. So for example, you have the switch set to stop at 29" it’ll restart when vaccum reaches 25" and pull it down again till it hits 29" again. It’ll cycle this way continiously for as long as you want.
Vacuum Dampener: A vacuum dampener plumbed just ahead of the vacuum switch prevents fluctuations of vacuum in the high flow areas from causing the flutter. It is simply a fitting with a very small venturi in it that restrict high flow to the switch.
The MAC valve: The MAC valve is nothing more than a solenoid controlled Y valve. In the normally closed config (w/o power) it allows air to flow through a filter into the low pressure side of your pump. It allows air in down to about 4" of HG then shuts closed. This keeps a small vacuum against the low pressure side of the pump which is, as I’m told, ideal for rotary vane type pumps for startup. The idea is to keep high vacuums away from the pump on startup which minimizes high amp draws on startup. When in the open config (w/power) the valve allows a straight draw of vacuum from the pump to the manifold drawing down your system to whatever level you have the vacuum switch set.
The Relay: Larger pumps (over 5CFM) can have significant amperage draw at startup. Anything over 10AMPS will fry the vacuum switch (yes I learned this the hard way). In order to still use the vacuum switch (they make higher amperage switches but apparently they aren’t as sensitive) on larger pumps you’ll need an alternative way to start and stop the pump. This is achieved by adding a relay. (I’ll post a schematic of the wiring when I get a chance). The relay is now controlling the MAC valve and the power to the pump. Wire in a wall switch and you’re good to go!
The small reservoir: From what I’ve been told is required on larger pumps to help the pumps get started under a low vacuum. Apparently it’s better for them than starting against a high vacuum or no vacuum. Hence the MAC valve as mentioned earlier. It’s nothing more than a 1’ length of 1-1/2" ABS with end caps and fitting.
The parts list:
[ol]
[li]MAC Valve $25.20
[/li][li]Vacuum switch $24.50
[/li][li]Relay $20.75
[/li][li]Dampener $10.90
[/li][li]Breather fitting (for MAC valve) $2.50
[/li][li]Pump Filter $14.95
[/li][li]Check Valve $12.95
[/li][li]Total: Approx. $115 w/shipping
[/li][/ol]
All parts available from: http://www.veneersupplies.com/default.php?cPath=60_36
You’ll also need a couple of rolls of 12 ga. stranded wire and crimp on fittings. Approx. another $10 unless you’ve got them kicking around.
All in all I felt this was a good mod to the vacuum pump for a number of reasons; no req’t to run the pump constantly plus you can set it and forget it, increase longevity of the pump, reduced fire hazard etc. My old grandpa, who was a master craftsman, always told me to look after my tools and they’ll look after me! Wise ole’ fella he was!
 let me know and ill do a trade with you…tape for parts to get my pump setup like that