More pinhole problems!

I know this has been discussed pretty exhaustively on here and i have read most of those threads but please hear me out.

We are making aerospace components and have had a constant problem with voids and pinholes.

We currently measure exact amounts of resin required for the layup, aiming for a 50% Vf though we would like to move up if possible to reduce the weight even further. Our peel ply is not perforated and we cure under full vacuum ~ 23inHg. The layup schedule is: 3k plain weave, 3.7oz uni, 3.7oz uni. The uni does not have any binder threads in it.

I have not seen anyone referring to the amount of epoxy or Vf they use when they achieve pinhole free parts. Nor do they seem to commonly use unidirectional. All of our parts are almost exclusively unidirectional fabric which i think could cause a large problem with attempting to free any kind of air bubbles from the surface, especially at full vacuum?

We do have a fish eye problem when laying up but because we clean the mold after every application we apply new release agent, mostly max only. Is this unnecessary even when cleaning the mold with acetone? The molds are cut from aluminum and/or renShape. or is the fish eye even an issue when using non perforated peel ply?

So here are the things we think we could try in order to fix our surface finish problem without increasing the weight of the parts:
1 - degas resin before laying up and be very careful with brushes or non absorbent rollers when placing fabric into the mold
2 - let the first layer gel without vacuum and then lay in all remaining layers and bagging.
3 - better release agent to stop the paint from tearing off into the mold during demoulding. We are very okay with the paint bridging over pin holes if that is possible. The goal is minimum weight here.
4 - let paint dry COMPLETELY before laying up into it. ~12 hours.

I would love to hear what you guys think as far as how we should move forward from here.

-Thanks
Carlos

You will always have problems with vacuum bagging.
Rewaxing is necessary, after cleaning with acetone. When parts are good no resin will be on the mould surface, so no need to clean them or wax everytime. I would suggest a semipermanent if you pulling a lot of products from a mould.

Read the MTI hose tread. switching over to vacuum infusion an easy way to get void free parts. MTI hose is easy, and pretty fool proof. It is a bit more expensive, but a lot less then your current surface quality.

And the first layer whitout bagging could be an easy solution, but laminating pin hole free, by hand, takes some skill and practice.

50% resin ratio isn’t optimal… you could probably do better with infusion. Obviously it’s another ball of wax to change your process but, wet layup has it’s own issues. You’d probably get a better surface with infusion.

Those voids look like air entrapment. How are you wetting the plys out? do you put resin then the ply? Or do you have a wet out table and then transfer it to the mold? Are you using rollers?

As far as fixing the problem with out adding more resin. I think a 50/50 ratio is a lot of resin to begin with so you shouldn’t be adding any more.

and you say non-perf peel ply… but peel ply is permeable anyway so that’s sorta a non issue. If you’re using release film, you would have a non or perforated type as release film is non-permeable and so no resin/air would flow through it.

If you are using a lot of uni then, maybe the air isn’t able to travel through at all because it’s trapped by uni? Probably though, as Susho said, it’s likely a technique issue.

Think of your laminate like a sponge. If you partially fill a sponge with water and squeeze it, both air and water come out. How hard do you have squeeze it before air stops being expelled? How much air and water remains in the sponge? Who knows? If you submerge the sponge in water and massage it so no air remains and squeeze it only water comes out. Squeeze as hard or as soft as you like but the remaining result contains only sponge and water…no air. It’s the same thing with your laminate. Compacting/debulking (bladder, vacuum bag, press) is like squeezing the sponge. Ideally you fully fill the spaces between the fibers with resins while it’s in it’s BULK state. The when you debulk it (press the fibers closer together) the spaces between the fibers only contain resin. The excess resin is expelled from the system as the laminate is compressed to a thinner state. If there is air in the laminate it will collect in areas of lower compaction pressure like weave intersections.

Controlling the resin content on the front end is very difficult. How do you know that you used enough resin fill up all the spaces when the laminate gets compacted? You can’t. Fill it up on the front end, press the laminate, and determine the Vf by controlling the amount of excess resin you let out of the system during compaction. Perf-ply and bleeder are your tools to control how my you let out in vacuum bagging.

Many of my processes start out with 60% of the volume being resin. They end up with 60% of the volume being fiber after compaction.

Great explanation WW.

Hi like Susho said MTI is the way to go and it will solve all your infusion problems. I had the same issues as you “voids and pinholes” all over, the first part i pulled out using MTI was flawless i couldn’t sleep that day but kept on taking a look @ it in disbelief :), the only thing i did was ditch the normal spiral and replaced it with MTI.

Thanks for all the responses guys! This is easily the best place on the internet to learn about composites thanks to you people.

Here is how to WERE doing it, just laying down epoxy on the surface placing the fabric on it then brushing epoxy onto it and every successive layer.

Also sorry about that whole non pref peel ply. The correct term is release film like you said. my fault for that. We have thought of putting holes into the release film by hand to control the flow of resin but as nothing we do is high volume >5 parts per mold, we unfortunately don’t have the time to figure out the perfect amount of holes per mold. We are basically looking for the most flexible method possible to get great looking parts the first time out of a mold. Which i know is asking A LOT from composites especially from newbies like us :D.

This is where my initial goal of 50% Vf came from:
http://www.compositescentral.com/showthread.php?p=39589#post39589
There is a line in there where you mention autoclaves with prepreg are 50-70 so i figured the low end of that was a good place to start, we will definitely start moving the number up from there once we get this whole process figured out.

We actually have some MTI tube here and have tried using it a few times but find it is very hard to get unidirectional fibers to infuse, if you guys have any advice about that i would love to hear it! Also maybe a link about how to better use it would be nice? As far as i could tell it is as simple as pulling vacuum through the MTI hose, popping the resin feed line and waiting until it is 2/3rds of the way across before clamping it again and hoping for the best. Most every time we try we end up with dry spots below the unidirectional layers, ESPECIALLY on the thicker layups with 3-5 layers of uni above the woven surface fibers. Oh and some of our more complex molds don’t lend themselves to infusion very well. And we are using low viscosity infusion specific resins when we try that.

Now that being said we made some progress on our last layup. Changes we made:
Let the paint dry very well (accelerated it with heat)

degassed the epoxy before layup ~10-20 minutes

very gently measured out enough epoxy for a 50% Vf (again) +10% extra for waste. We do this by cutting all the carbon measuring it’s weight and calcing the correct amount of epoxy.

applied epoxy to the mold surface by pouring it on and spreading it with brushes, very gently, taking care to minimize introducing any air.

Placed each layer on, poured epoxy on it and gave up on the brushes, just mushed it around with our hands.

Used pore-less release film and bagged it.

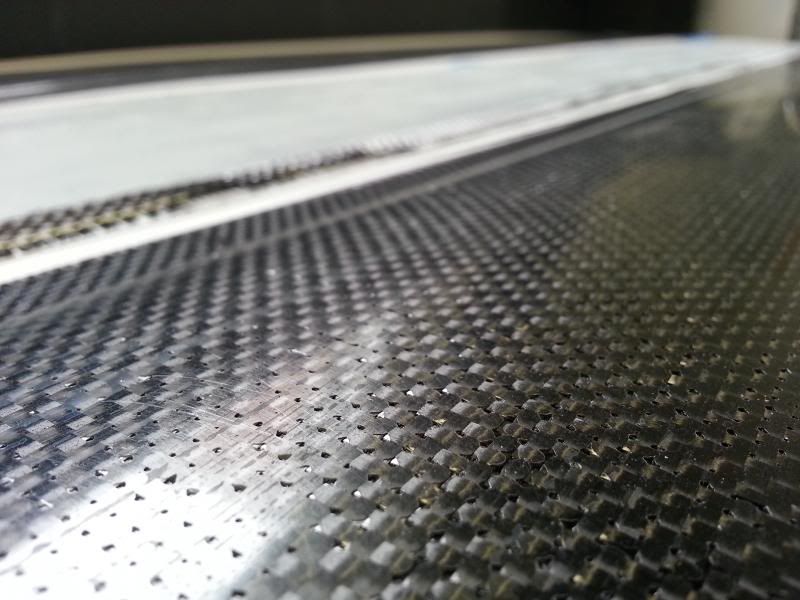
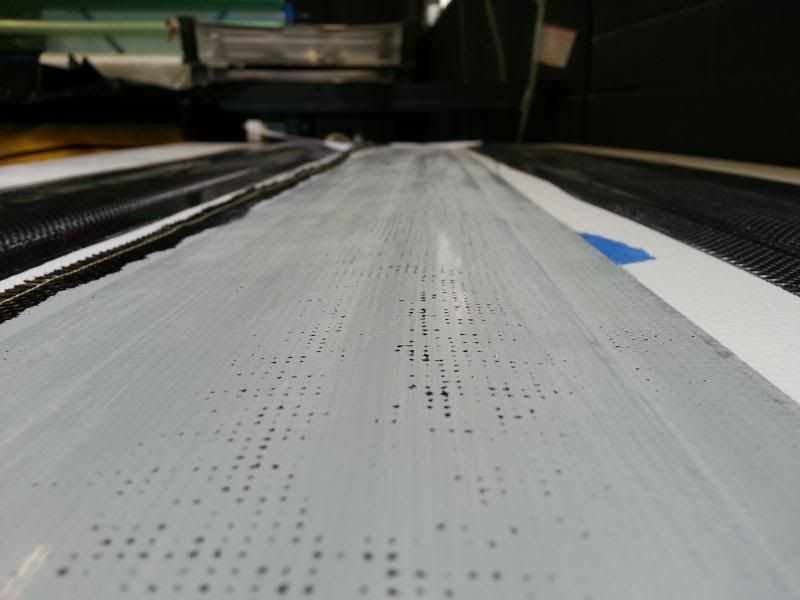
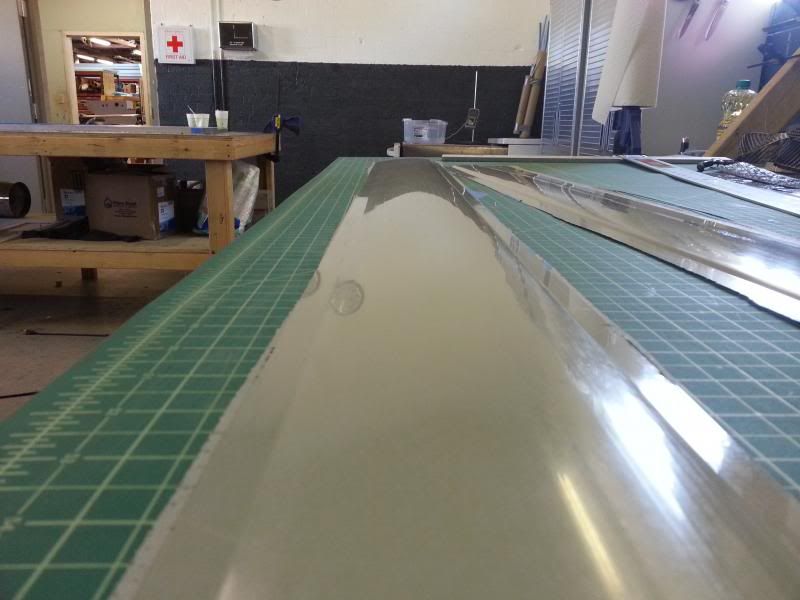
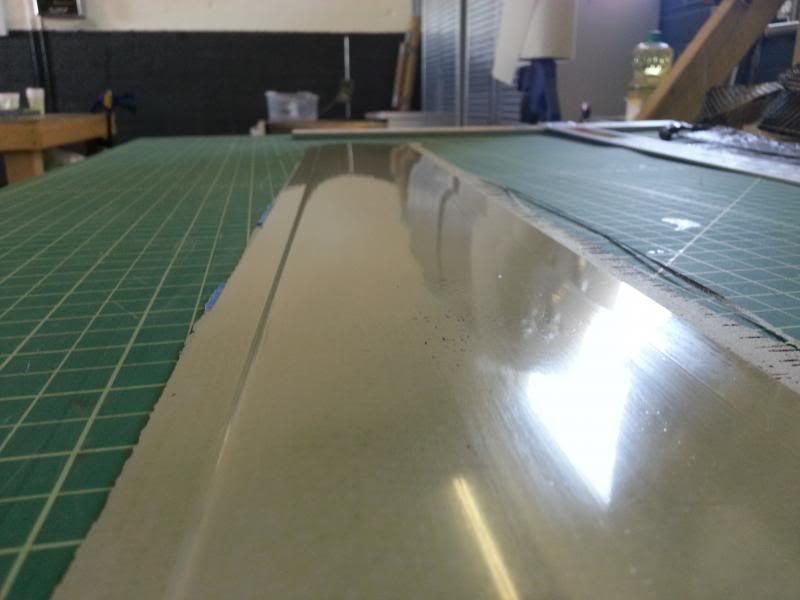
here are the results:

The second image shows the ONLY pin holes in the whole thing.

Definitely going to move to rollers as was mentioned and continue to measure and degas the epoxy. I believe the uni probably plays a huge roll in trapping air at the surface of the molds, and obviously our switch to release film vs peel ply isn’t helping which makes the degassing pretty vital I think.

Lemme know what you guys think and what else we might be able to do to improve. We are probably going to try cutting the Vf to 60% and see if we can pull it off with the wet layup! We will see…

speaking of rollers, would some one be so kind as to explain the different uses of these crazy roller heads they have here:
http://www.fibreglast.com/category/Supplies_Tools_Rollers_Squeegees

are they used post vacuum bagging to push epoxy/bubbles around?

Have you measured the thickness of the laminate after cure? If so you can calculate the porosity of the laminate. If you know the fiber volume and resin volume then you can calculate the thickness. If the part is thicker than the calculated thickness then you know you have some porosity (or made a calculation error)

If you clamp your resin feed after 2/3 of the part are filled it is no wonder that you get dry spots.
If you infuse like mentioned in the MTI hose thread you should not have that problem. Read the thread
http://www.compositescentral.com/showthread.php?t=6530
and than it should work.

Hi, when using MTI hose there’s no need to worry about clamping off after 2/3 of the part is infused just wait till the part is fully infused then you can go ahead and clamp off, no more hustles, no more catch pots :slight_smile:

hmmmm we have tried both ways and the resin seems unable to push down through the unidirectional fabrics. the top will look fine but the face against the mold will have dry spots near the center of the unidirectional sections. Slowing down the flow front helps but doesn’t solve the problem. Has any one else seen this or are we just doing something very wrong?

That being said when we infuse woven only layups it goes great, and we get awesome surface finishes with MTI tube making it far easier. We just very rarely use only fabric.

Yah uni is a pain like that.

There are some uni materials that are designed for infusion. Haven’t used them but have used others that aren’t designed for it. We had stacks with uni and fabric mixed together. Also as you said, controlling the resin flow to try give as much time as possible for uni to wet out. I think it’s doable but much consideration has to be put into the ply scheduling and infusion setup.

I’m not sure what the max thickness the resin will penetrate might be. Probably in need of some testing if and when I do these sorts of layups again.