Ok, I will try that as well. I have been using that silicone insert that is a positive of the mold and I thought that would have taken car of my problems , but not yet. I cant pull too much vac out here in Utah because we are almost a mile high. the most ive seen was 22 inches.
Thank you for all the advice guys I really appreciate it.
I got rid of most bridging by cutting the fabric in (or just around) to the corner. Then applied a second piece(about an inch or smaller) in to the corner(or overlap the first piece). Same with the second (12K + syntactic) layer. (only two layers in most body parts)
That way the materials don’t have to move around a lot, and in multiple angles. That way you can really push the fabric into the corner, without pulling it from another corner. And it makes the corners (stresspoints) a bit stronger. This is offcourse a lot easier with stable materials like prepreg. (or wet layup on baking paper )
K so yesterday I did a wet lay up with reinforcements/extra material in areas where bridging commonly accured, I then used my silicone incert and vac bagged it, useing brand new tube vac bag (which is now my new favorite) then pulled vac but I still have a slight leak so I think it might be in one of the fittings that im using. I left the pump on for about 4 hours. everything looked good so far. Im going to pull it out of the mold here in a few to check the results. Few things that I did differntly is i never let the vacuum drop all the way to 0 and I didnt use PVA, just a simple wax.
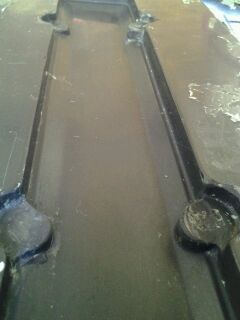
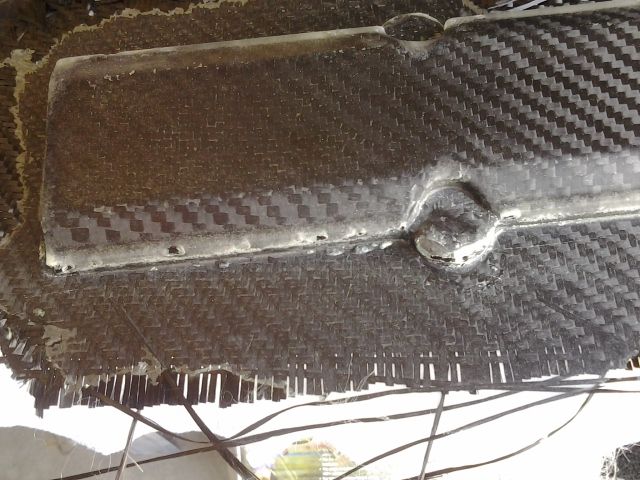
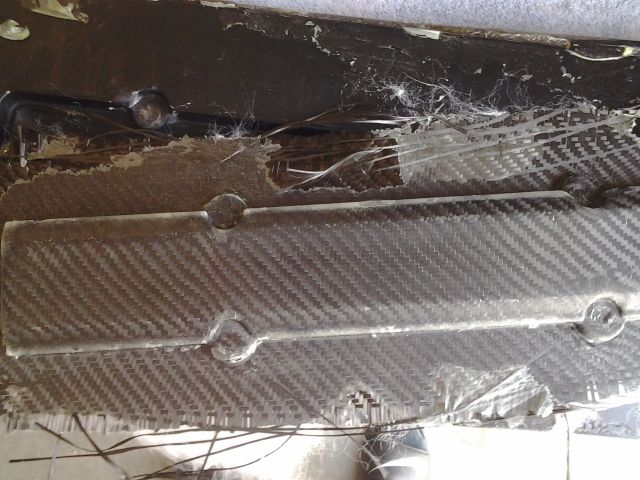
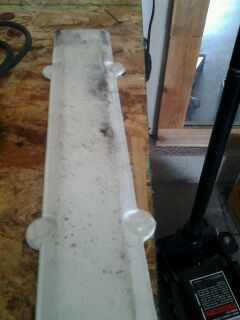
Well the results of yesterday didnt turn out so well. there was still alot of bridging and i F’ed up my mold and broke the tooling gel on a couple of corners, so i was fixing that last night. Ill post up a pic and see how you folks would attack it. Im thinking since its just a cosmetic part i might just do a wet lay up.
Yeah im using epoxy. yeah that was a mistake ha ha ha i thought something in the PVA was helping it to bridge, but i guess not. Mold should be ready to rock by the end of the day after sanding down… Pictures will be posted shortly.
Yeah im using epoxy. yeah that was a mistake ha ha ha i thought something in the PVA was helping it to bridge…
Epoxy releases can be more tenacious than VE or PE. There is quite a bit of advice out there against using PVA. The outcome is very often like you experienced. What works with some resins doesn’t work with all resins.
So after a few more tires, I still suck!!! Ive tried it even using a infusion technique buy not using any breather cloth on the inside of the mold just on the out side, and letting the pressure of the vac to push it to the outside, although I can only get 20 inces of mercury today (im guessing cuz of the weather) the part still come out like xxxx. Here are some pics of my last failure and mold.
Anyone got any other suggestions? Im thinking I might wrap some popsicle sticks in Mylar and wedge them down on the sides because of the 90 Degree bend on the mold. i thnk that will help get in those corners. Also I am going to check my couplers today to see where my small leak is coming from.
That is just an ugly shape to do with a hand layup. If that shape where truly designed for composites it would look differently. Almost all those sharp corner are unnecessary.
I’m not sure what to tell you. Infusion may work best…but you’ll still have lots of resin in some of those corners. Make sure that your bag isn’t bridging, work it into position with very little vacuum, and then apply full vacuum.
Here is how carbon tow can be used in the corners with a hand layup (45 psi bladder assisted).
Its a pain in the ass shape is what it is. I have used rolled up pennies in the slots in the sides to keep it from bridging, silicone insert, the whole 9 yards. funny thing is i have less bridging with PE then i do with Epoxy
It would also help if you placed your 1st layer of material so that it was at 45dg to the 90 deg sharp corners, as the dry material will sit better without trying to flatten itself out and lift away from the inner part of the corner.
Yeah its curing under vacuum at room temps. well around 85 degrees. now this is the lay up.
tooling gel mold
releasing wax
PVA
3 layer of 2x2 5.7 carbon
epoxy resin
I have experamented with the silicon incert and with out and still get bridging
peel ply
breather
and vac bag @ 25-26 inches of merc
I am not using perf bleeder could that be one of my causes? I have made about 15 parts and cant get a single one right.
Any one got any suggestions??? Im thinking that Gel coating the face of the mold might help, really where it counts in those 90 degree corners. Im out of Ideas ha ha ha
I do have similar problems at times… it is lack of technique I guess… I use polyester for much of my work. These small parts have steep sides and are stepped too. The radii can trap air or I can get bridging on the sharp corners and it is just practice that has helped me… I do gel coat the moulds too but that is for cosmetic purposes although I do find with some moulds having a slight tack to the gel coat helps when I put the surface layer down dry and carefully work it into the mould as it will hold it down avoiding bridging. I also bag the parts and spend almost as much time working the bag as I do laying up the part…
Got a question. Did you use a peel ply? If so, how did you lay the peel ply down? One piece? Or as several peices?? I had found one piece peel ply increases the risk of bridging as it sticks to the side of the mould. It bridges and the carbon does not get pushed down so easily or at all. but using several pieces lets the overlaped areas slide over each other and you get less bridging.
 )
)