Hi folks, new to the forum here and hoping to see if I can get some information on what I should attempt next in this. I have worked with composites before but this is my first attempt in using the pressure bladder techniques. Searching here on the site revealed that this issue I’m having is not uncommon, but I haven’t seen people post about it being this bad as I have encountered here.
First the pics:
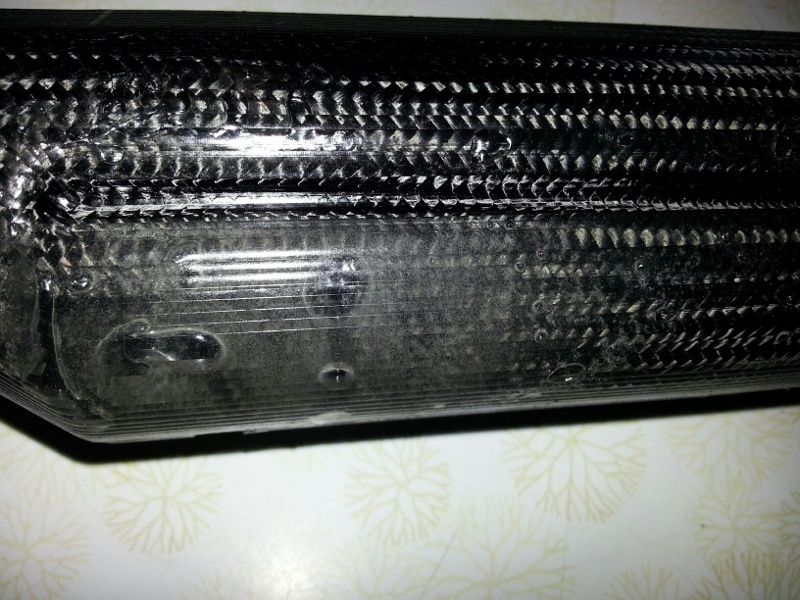
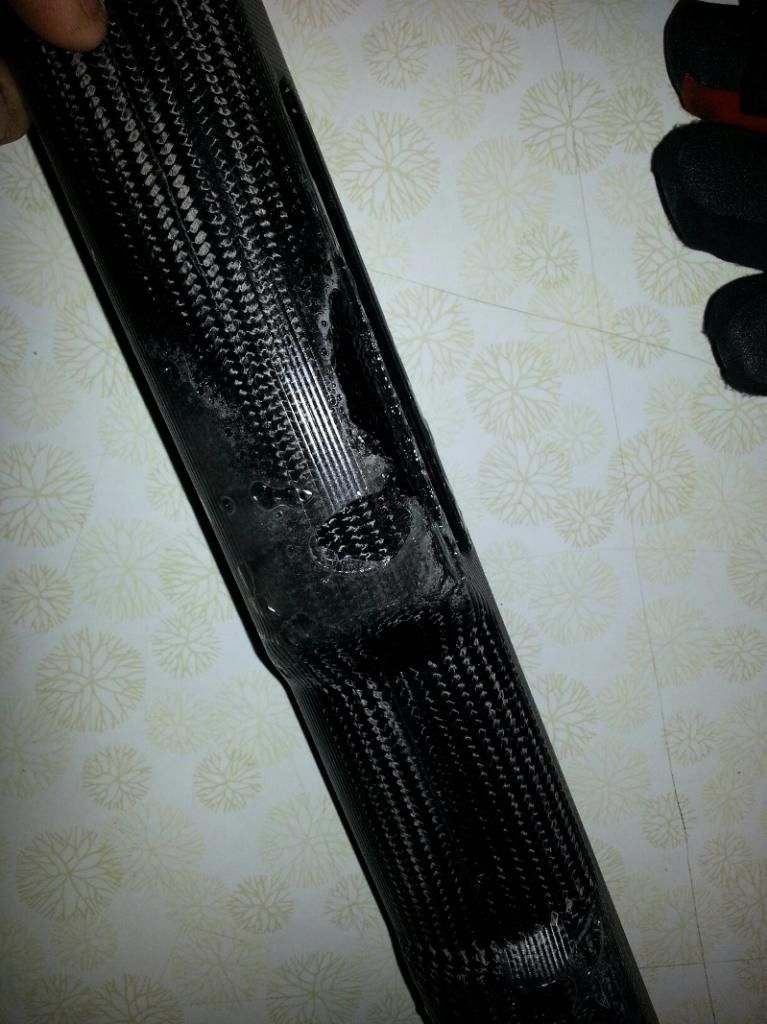
What I have here is a composite tube structure made from four layers of biaxial carbon sleeve with strips of UD running lengthwise between the 2nd and 3rd biaxial layers. those strips of UD overlap ~1/2" and allow slippage between the layers.
The mold is a two piece phenolic(acetate) type mold that I CNC’ed on my mill. Mold is waxed and coated with PVA( both Partall materials). Inside the mold is a silicone rubber bladder on a hard mandrel that I inflate to ~60psi for final cure pressure.
I unfortunately am doing this in the wet layup process as follows:
1)Bladder is waxed and wrapped with a layer of bleeder cloth and release film
2)Two layers of biaxial slipped over the bladder, wet out, and excess resin moved off using shaped rubber squeegees.
3)Wet out UD strips and layered onto the bladder circumference.
4)Final two layers of biaxial are wet out over another mandrel(helps to open it back up after wet out), removed from that mandrel and slipped over the bladder.
5)Material is adjusted and positioned on the bladder for aesthetics and then placed into the lower half of the prepped mold. top half is lowered into place and loosely bolted. I maintain about a ~.020" parting gap at this point.
6)Bladder is inflated to ~25psi at this point and left in this state for ~10 minutes. After that time, I close the mold up tight and increase the pressure to ~60psi for the remainder of the cure time of about 9-12 hours. This is a non-autoclave/over cure.
The flat surfaces of the part are damn near perfect. Great surface quality and density and no voids/pinholes. It’s mainly in these lower contour areas.
I am using West Systems 205 resin with WS 207 hardender.
The bladders are made from silicone rubber.
So…Where do you think I’m going wrong and what can I feasibly work on to reduce/eliminate this problem? I’ve read a bunch of posts regarding this on the forum and have read some good techniques.
Is degassing the epoxy a must-do in this scenario? I haven’t been doing this as I assumed the pressure coupled with the breather cloth would force the air away from the composite surface.
Would brushing a layer of epoxy onto the mold surface prior to inserting the mandrel/carbon matrix help to eliminate some of the smaller voids and pinholes?
Is this an over-saturation issue I’m dealing with, with too much resin getting trapped in these areas with nowhere to go?
Should I cut channel into this mold surface to allow resin to travel into?
Kind of at a loss on this one. I’ve been working with composites for many years with great success in the VB and infusion processes but this is definitely new to me.
I’m open to any an all suggestion right now so lay it on thick! 
Thanks folks!!!