I am looking towards my next project, which is a cowling for a Yamaha Wave blaster. I will be producing them out of carbon, and due to the recess at the back of the cowling, this will have to be a two part mold (My first).
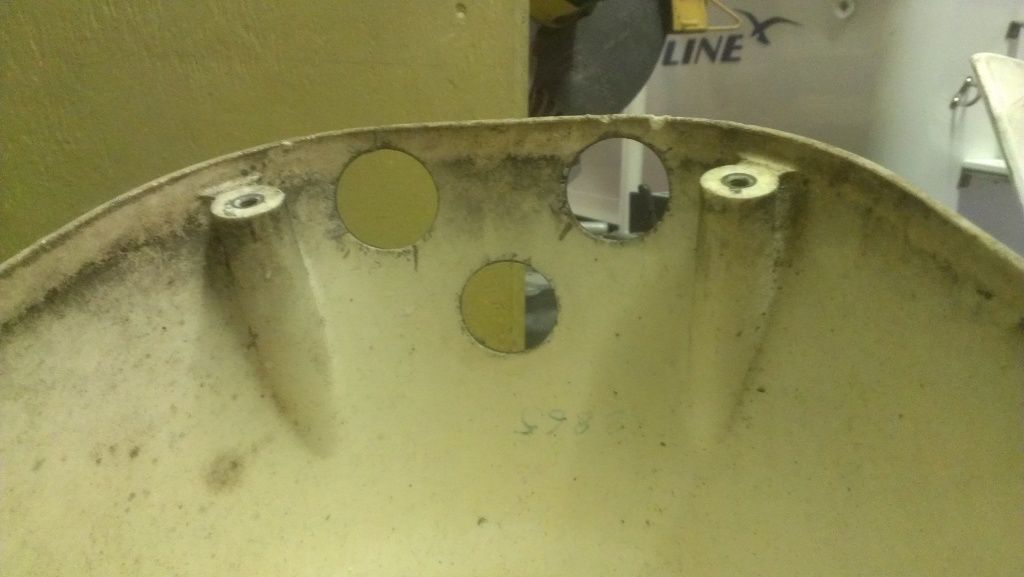
The cowl bolts onto a lower hood section, and the factory cowl has threaded inserts in it.
I would like to find a way to add these inserts into my parts without making things too complicated. See pictures below. Any advice is greatly appreciated.
I haven’t even started to work or prep this plug I’m still planning.
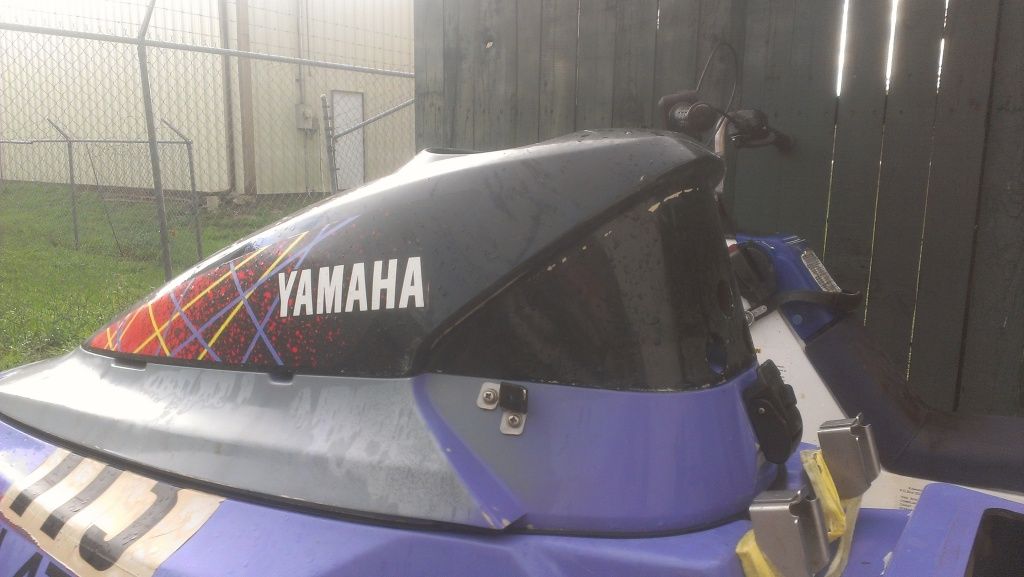
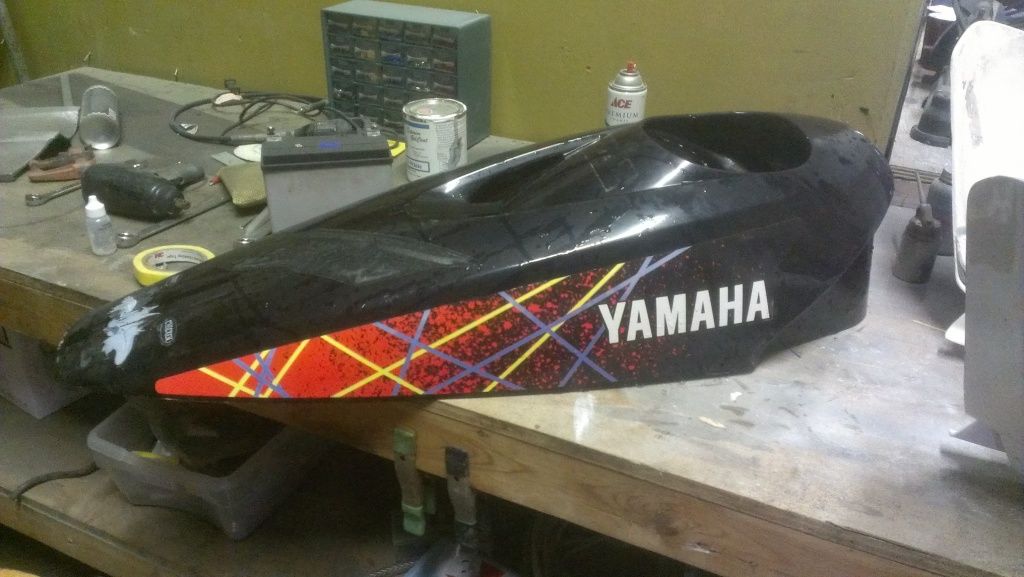
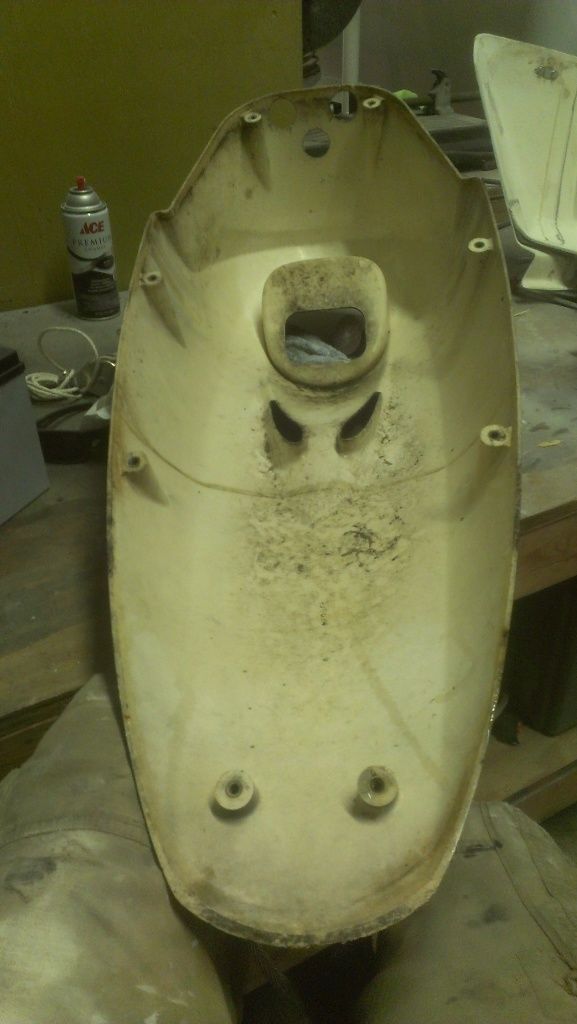
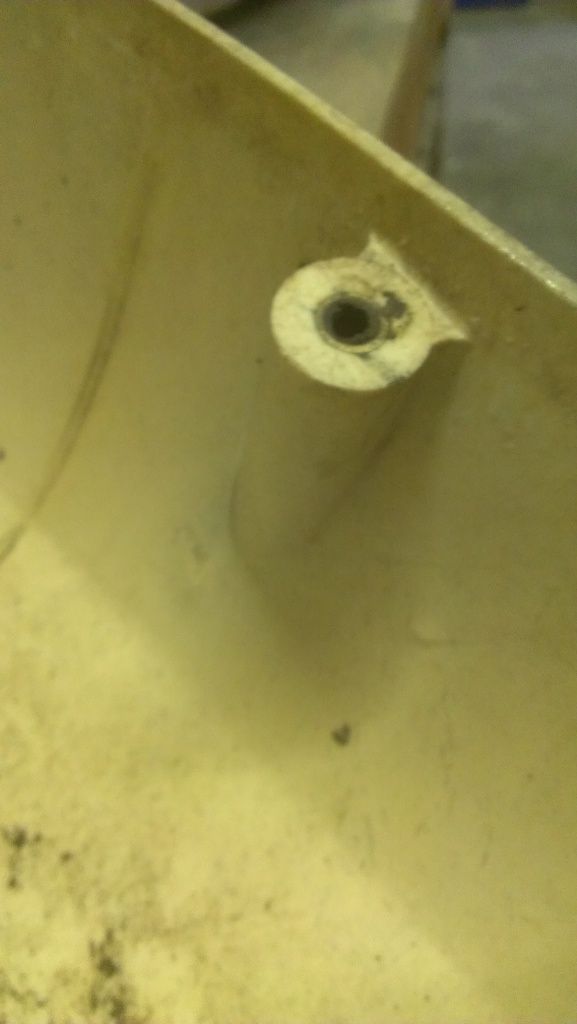
Replicating injection moulded parts is a pig to do.
However, there are several options for inserts. Look into www.bighead.co.uk, or the threaded inserts of Tissa: http://www.tissa.ch/site.php?sprache=e&content=42
Click Bond and Swiftbond might have something. They have imbeddable inserts, but you would have to either build up the area, and secondary bond it, or create something in-part, such as a block of foam/plastic, with the insert already in it, and then mold in shape.
Your hardest part about doing in-part inserts, would be the alignment. You would need a make a fixture to keep them in the right place during cure. But I think adding them after would be easy, even with out a template fixture.
I’m trying to avoid just globbing thickened resin and drilling an insert into it. I was hoping to find a clean professional looking solution
If you can incorporate a tab that protrudes toward the inside , an automotive style U nut will work well .

Creative. Thanks…I’m still brainstorming
Absolutely zero carbon fiber fabrication experience here, but lots of shop experience otherwise. For what it’s worth, I’d be inclined to fashion blocks of baltic birch plywood to act as the posts and inserts. One could cut, trim, and fashion any desired geometry that would allow the wood blocks to be embedded in the cowl. Then, I would mark and drill the holes to take the screws. This solves the problem of threaded insert alignment. As far as baltic birch goes, it takes machine screws extremely well. Actually all hardwoods do. In fact, I have been using machine screws exclusively in wood in my shop for many years. If the threads are well formed, the thread walls will stand up to hundreds if not thousands of cycles. The trick is to drill the hole slightly undersize and power run a machine screw in to form the threads. I’d do some testing on scraps to get the right feel. You can bandsaw the screwhole scraps in half and use a jeweller’s loupe to inspect your threads. Use only graphite as lubrication. Greases and oils do not work well on wood.
Virtually all exposed wood could be sealed with epoxy, and I think any little bit of water that might wick in if the cowl was immersed for a long time would be negligible. New stainless screws would also be advisable.
I’m just as interested to know how you would align everything…?
I’m looking at doing something similar. I was going to use a trick from the model airplane world, pretty sure that I saw this in one of wyowindworks videos. He produces the fuselage section in one piece - but then how do you attach the wings?? Pretty neat solution - during the layup something like a little aluminium block is added at a specific point, or a length of block could be added so the customer can choose which position to use for wing position etc. They get a spec sheet with the fuselage, which will tell them where the block is located eg. 20-24cm from the rear of the fuselage. Then the customer just drills their hole and taps a thread, bolts on the wing. Done!
Not sure if an aluminium thread would be strong enough for your part, but you could just as easily use steel or anything else. Just drill your holes and tap your threads. Then again, tapping all those threads may not be viable depending on how many parts you’re planning to make??
You need to make a placement jig off the original part. Then use this jig to locate and glue your new insert blocks or brackets in to the correct location.
If you checked the link of Tissa, you see the next (crappy) picture:

See the metal posts bottom right? Put these in the inserts of your master, with a little plasticine as “glue”. Now make your inner mould. This has the metal post incorporated.
Slide a threaded insert on the post, which now is in the mould, and laminate over. The part now has the insert incorporated.
This works best on double sided moulds, as the mounting posts usually are not on the pretty side.
However, you could make some small moulds (say 2"x3") of the mounting, with the metal post in them, and make small mounting pads, which you can glue to a part which has been made in an outer mould only. MS polymer glue should be enough for that. Just make sure you align them properly.
I take back what I said about tapping a thread into a block of aluminium in the job. Well, not take it back because that still has it’s uses, but I didn’t realise that BigHeads had threaded female collars as well. I think I’ll be using them on my project now. Neat stuff!
The above picture is Tissa, not Bighead.
But take a look at Bighead as well. They have a perfect website, where you can “build” your own inserts.
