Split Molds?

I am experimenting with molds in order to fabricate some carbon parts for my track bike, my first couple of parts are coming along nicely and I am repeating early mold prototypes to perfect the techniques, finish etc.

However, my early parts and molds are simple brackets so there are no complex shapes or angles to deal with.

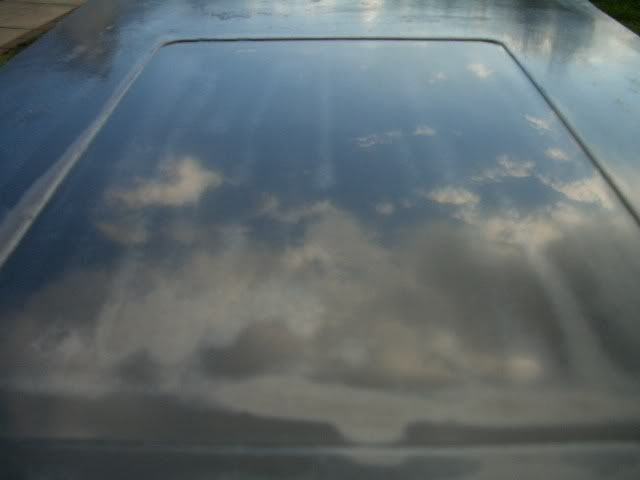
I’ve just formed a mold around a rear fender as a trial and the mold has turned out surprisingly well.

However, this test mold has highlighted that it would prove quite difficult to form a good carbon part using wet lay up techniques due to the tight corners. More specifically, there is a fixing hole in the original part which can be seen in the top centre of the mold in the image above which will be impossible to lay carbon into and achieve a good finish.

So I have the following question, should this part (and others of similar shape and complexity) utilise a 2 part (or multiple part) mold???

I’m already wondering if I should split this mold as a trial and have a go at forming 2 parts which are then resin bonded together.

In this instance, an ideal parting line would be (when viewing the image) from left to right along the back recess just below the centre fixing hole, since the upper part of the mold would not be viewed on the finished part once installed.

I’m also starting to practise with some vacuum forming, but this doesnt detract from the need to split a complex mold - I dont think!

Any advice welcome, here is the original part out of interest (in pre mold preparation)

First of all id say u want biger flanges loose the plasticene.

second its not complex and you need bigger flanges for vacuum bagging. use cardborad and foil tape.

All i can recomend is read on here. and when you done reading read some more. The infomation on this website is so vast every anser will be in here some where.

plus on ur first mold looks like you have a massive void in the corner, take time when laminateing make sure you get rid of the air. The easyist way to sucseful carbon part is a well made mold.

yeah ,MUCH bigger flanges,like 3 inches wide is the first step.
practise on something easier…i did my first practise parts using a small section of a drain pipe corner from B+Q until i was confident enough to waste materials on proper parts,there are so many flaws on that green mold its not going to be fit to make a carbon part from :frowning:
this is a mold i made,very very simple part but still a LOT of work to get the mold fit for what i needed…and it taught me an awful lot about how to do everything right.
it took me maybe 2 years to learn how to produce one succesful part and several thousands of pounds but stick with it as its the most satisfying thing in the world when you get it right!
so throw that mold away and put it down to a trial and start again :slight_smile:


(reflection of the sky!)

Thanks for ther tips guys,

Bigger flanges - got it!

that mold was never intended to be used, it was a trial to see how the process would work and make sure I could get the original part out unscathed!!!. For what I wanted to achieve it was a reasonable start. I now realise from further reading that the molding process would have benefitted greatly from 2 or possibly even 3 coats of the tooling gel. This mold had only 1 - not to worry, lessons being learned at every step.

When I removed the pattern, some of the mold was fragile and broke in a couple of tricky locations.

Here is the first part I decided to mold from, its a small simple bracket off the bike - well I thought i was simple but the process so far - as has been suggested - as far from it!
This is the bracket with clay added to form the first mold

Having formed the first mold I immediately realised it was wrong - I couldnt get the original part out again!!

So I made a bigger mold with bigger flanges

Still not big enough, but as mentioned earlier, still learning!

I’ll make the next mold using carboard flanges as suggested.

Thanks again

card covered in aluminium sticky tape works GREAT :slight_smile:

I’m really enjoying seeing your progress. It’s really neat how you try different things and research before posting here. It makes helping you easier because you have tried already, it makes your progress faster because you have experience and it makes everything better overall.

I’ve never tried making such a small and shapely part so I’m paying close attention to your mold design. Great work and keep telling us how it going!

good tip - thanks

for that bracket it would make more sense to have an oversized bracket that gets trimmed down to size after rather than trying to mold the way you are doing it. Basically having your flange extend to your part and having no recess inbetween part and flange. you can have a scribed line in the mold that transfers to the part everytime for post trimming.

Are the vacuum tubes in the back of the picture collapsed? That would mean no vacuum is getting pulled from the part. Might want to get a LDPE tube (white, and stiff, won’t collapse) or something else that can handle the vacuum.

yes it was partially collapsed,all part of the learning curve :slight_smile:

Use smaller diameter tubes. Try 3/8".