New to the forums and composites, but desperately need help

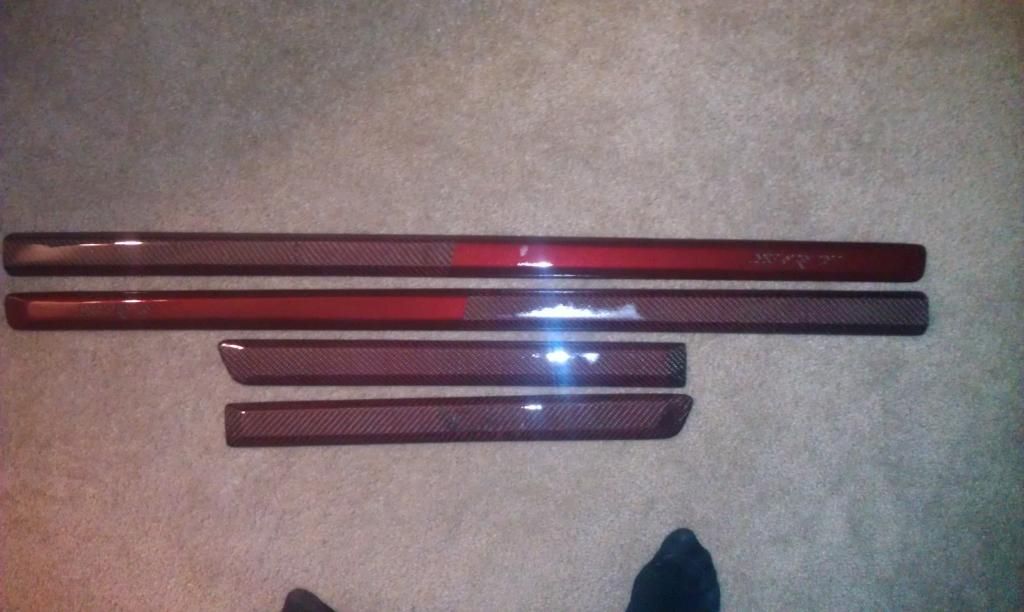
Hey guys! I’m new to the forum, and new to composites in general. My first project involved using a Red CF/Kevlar Fabric to hand lay up some side Moldings on my Jeep Grand Cherokee SRT8. It took me a couple tries to figure out how to get it to stay tight on the part, and wait for the perfect time to lay down the cloth. I finally got that down, and thought I was doing everything correctly. Followed all instructions, advice, etc. Anyway, after I got the finish perfectly smooth and scratch free, I looked at all four panels in the light and to my disgust, it was cloudy in the majority of places, with little white specks everywhere. I don’t know what I did wrong to get this cloudiness and specking. It also looks like it goes all the way through to the CF weave. I’m dumbfounded and don’t even want to try again, if after all that hard work it’s going to come out looking like this again. Is there any way to save this project, or would I have to start again? I used Foam Applicators from Solar Composites, the epoxy and hardner were from carbonmods.com, and I finished it with a clear gelcoat from carbonmods.com, and then cleared it. I posted a picture of what I’m talking about. It looks way worse than the pictures show, the cloudiness is horrible when it’s actually on the car in the sunlight. Any advice?
Thanks in advance,
Cody

You can see the cloudiness I’m talking about to the Right of the panel

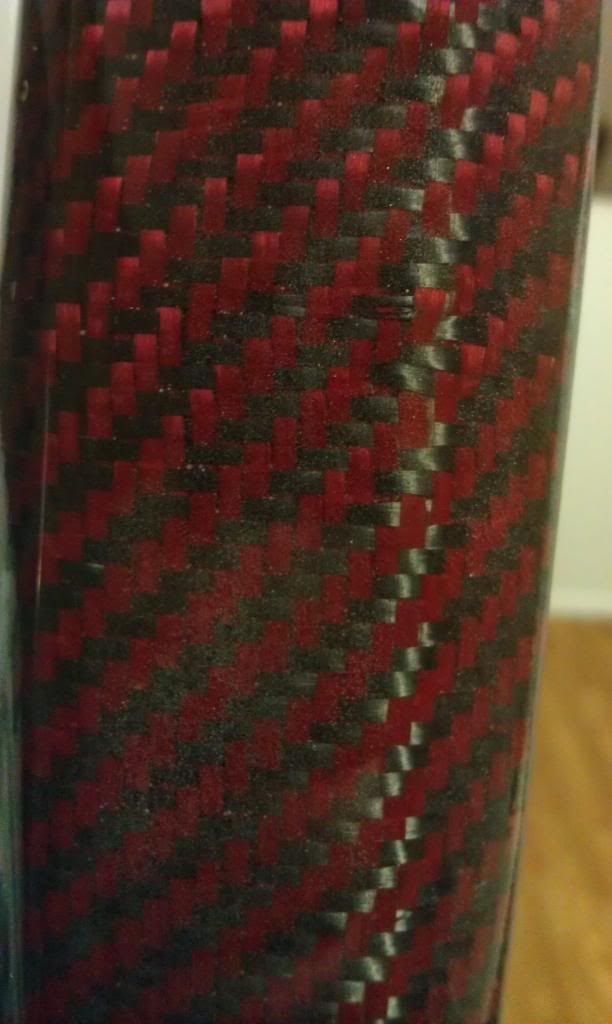
You can see the White Specking that I’m talking about in this photo.

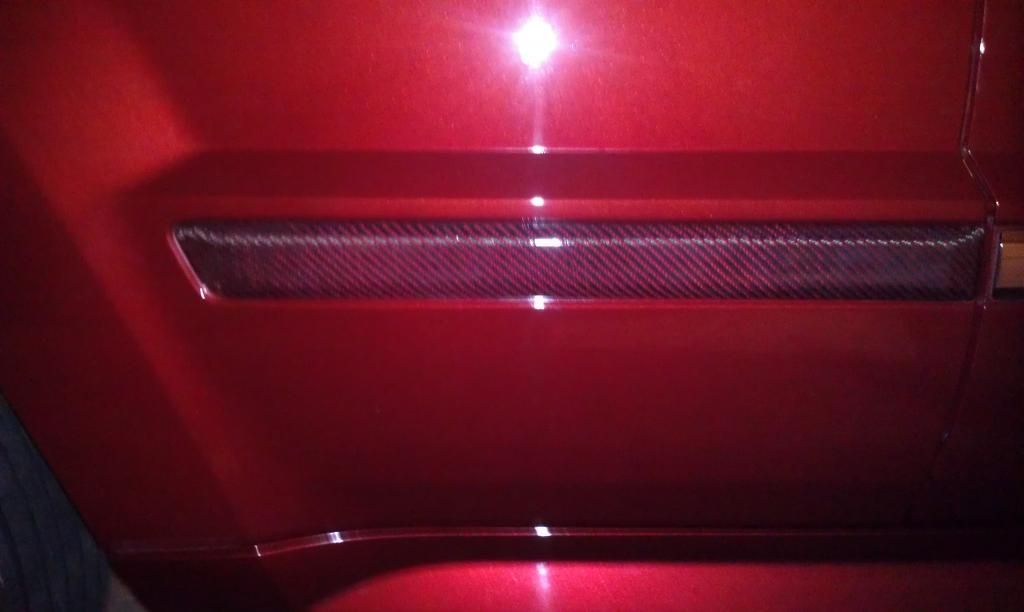
Finished product, looks great from far, but not in the sunlight or up close.

Welcome to the forums SRTCobra. It’s hard to tell with the photo but those look like little gas bubbles in the resin. If that’s the problem you need to degas the resin before you use it to prevent the air from expanding when it’s under a vacuum.

Since you’re doing handlayup what’s your process? Are you putting the resin down and then the cloth on top, or are you putting dry cloth down and pushing the resin in?

-Ravin Kumar

Thanks for the info! What’s the best way to degas a resin? Also, do you think that the cloudiness, which like I said is way worse than the pictures show, is caused by not letting it dry long enough after wet sanding before laying more epoxy?
My process is simple and I used all of the instructional videos on line. I was making covers for the panels, so I just waxed down some extra panels I had, put down a layer of epoxy, and waited for it to get tacky just like instructed. I then laid the fabric on it and pressed it tight against the part. I waited overnight for the epoxy to dry and then trimmed the excess material. Then I started applying coats of epoxy until there was enough to sand it down without hitting the fabric. I then sanded it with 120 grit, washed it, and let it dry. Then applied some more coats, wet sanded it with 180 grit and then 1500 grit and then let it dry. Lastly I applied two coats of gelcoat and let that dry. Wet sanded it back and then clear coated it. That’s my entire process minus some minor steps in between.
Thanks again in advance,
Cody

I also think those are air bubbles you didn’t get rid of during the process. If you don’t have vacuum pump I think you can use the blow torch instead.

https://www.youtube.com/watch?v=Uqqj9C-5fQg

SRT Cobra,
So you’re putting down dry fabric on top of a B stage epoxy. Next time put the liquid epoxy down first and let it seep UP through the fabric. Pushing resin into the fibers can create trapped pockets of air.

Like N1ck said you can use heat to degas your resin, just be careful that you don’t speed up the reaction and solidify it in a cup.

The method that I use, which seems to be the safest, is to use a vacuum chamber. Put your resin in an airtight container, pull a vacuum and let the bubbles froth up to the top. After that there should be no more dissolved air.