My project: Diary and a whole lot of noob questions rolled into one post

Hi all, essentially first post here. I have done some reading (far from finished, lots to digest here!) and still have a few questions that will likely seem idiotic to you sagely folks =)

My project: I am working on creating a CF/Kevlar gas tank for my motorcycle. I am going to quickly detail the process that I went throug so far so if I have made any critical errors I can correct them before I begin working with my final materials.

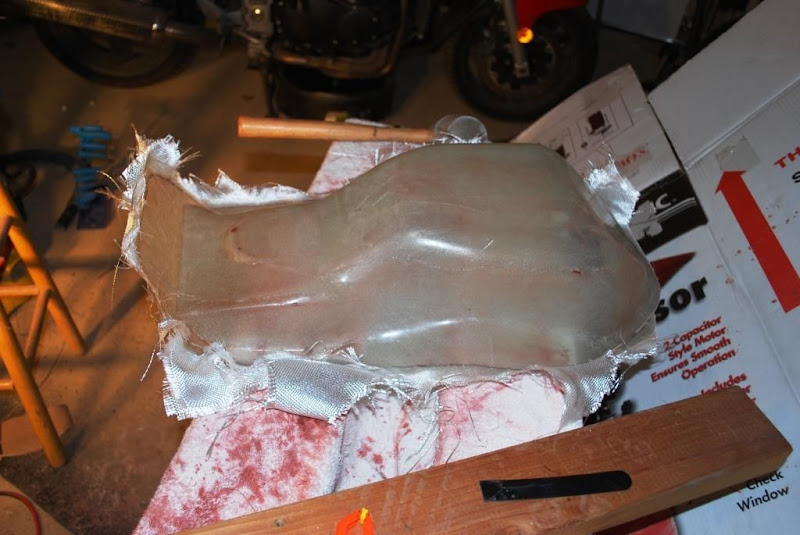
I took the original steel tank and made a splash mold from it and subesquently made a fiberglass plug from the splash mold.
The plug:

I have made a production mold for the bottom from the plug and am still working on making the top mold which is where I currently sit. I am at the point where I am ready to begin making the production bottom while I make the top produciton mold. Here are some of my questions.

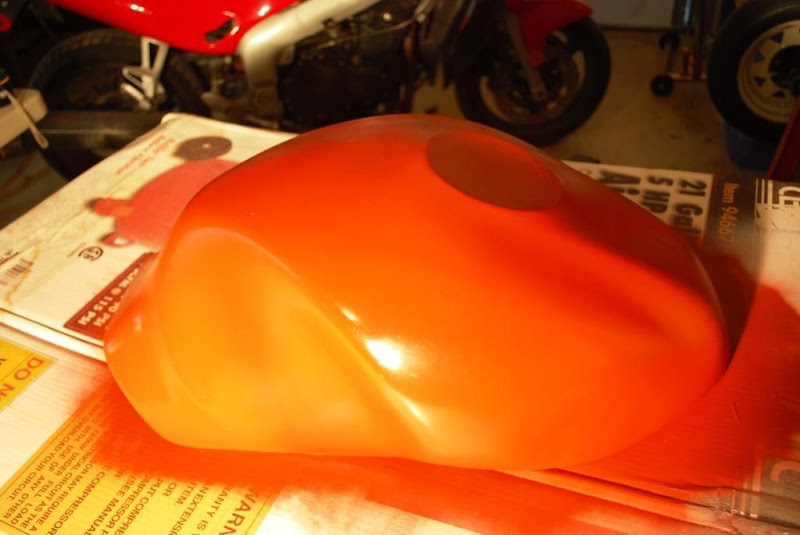
First, this is what the bottom of the tank looks like. This is still in the stage of cleaning up the plug so please be gentle with your comments =). I am only posting it so you can get an idea of the kind of shape that I am dealing with.

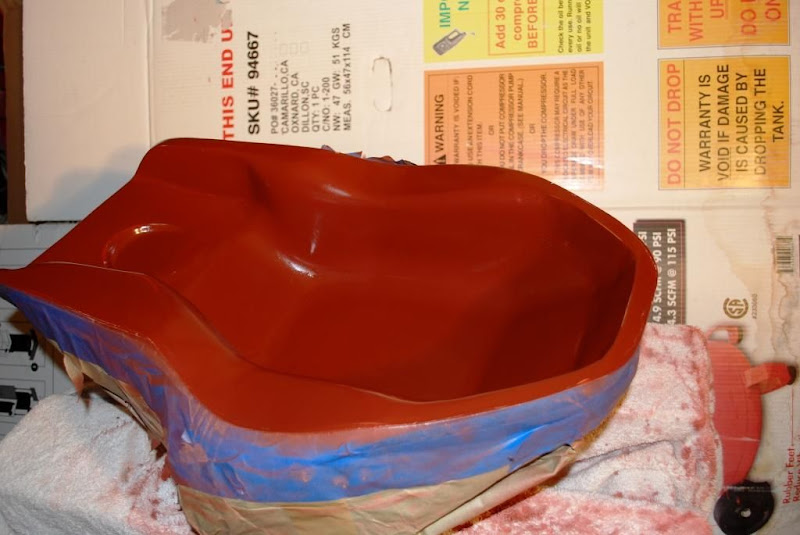
this is the produciton bottom mold, I am sorry its the best pic that I have and it was before trimming or any finish work.

Ok, so that is where I am at. You can see that there are several areas of compound curves on the part and this is where I am having some difficulty. I am using 3k plain weave CF for the top layer. I will have to do wet layup and just to be sure I am doing it right I will detail the process: wax/pva mold, apply epoxy until tacky, apply first layer of CF and wet it out. Repeat until all layers are in place then use peel-ply, polyfil, and vacuum bag the part for curing.

So, here are my questions:

Will a single piece of CF conform to this shape?

If so, how does one hold it in place while applying subesquent layers?

If not I know that I will need to make relief cuts, etc. How do you keep the edges from fraying and looking horrible? I know that you cut the cloth using blue masking tape, but I assume that this tape has to be removed prior to layup. How do you do that without destroying the weave?

I am sure this is just the tip of the iceberg so I will thank you all in advance for your patience and words of advice!

if you are applying a surface coat.your first layer will stick to that.if you need to make cuts in your first ply.you would want to pre preg it on some plastic sheet.then make your cuts.thats how i do it.i have never tried the tape method.looking at your part.it looks like you could do it in one sheet with no cuts.you could also do a trial run with a full sheet before you add any resin to your mould.just lay a dry sheet into your mould to see how much distortion you get.

So, here are my questions:

Will a single piece of CF conform to this shape?

If so, how does one hold it in place while applying subesquent layers?

If not I know that I will need to make relief cuts, etc. How do you keep the edges from fraying and looking horrible? I know that you cut the cloth using blue masking tape, but I assume that this tape has to be removed prior to layup. How do you do that without destroying the weave?

I am sure this is just the tip of the iceberg so I will thank you all in advance for your patience and words of advice!

A single piece of CF will conform to that shape just be sure to push the first layer into the curves.
The tacky epoxy coat will hold the first layer on, the wet resin will hold the rest of the layers. If you’re still having trouble a number of us here use spray glue sparingly.

I leave the blue tape on the flanges and cut it off afterwards. I’ve seen videos where people cut it off before sealing the bag, if you have Wiss fabric shears or something similar you can cut the material easily without disturbing the weave. The first layer is the only layer that matters for cosmetic reasons though. If the part is nonstructurual slight distortion in the innermost layers could be a bit more acceptable.

I am sorry for being harsh anyway, but I really like you to avoid mistakes.

Make sure your plug and mould surface are A+ quality. Sand, polish and buff.

Even pro’s have problems getting good parts out of bad moulds. for this mould I suggest using PVA, to prevent sticking. You will need to paint the product afterwards. (I guess you already planned to do so).

The shape is not that crazy to use a sngle piece of carbon. About all carbon products you see with nice sharp edges, are prepreg, which is a different ballgame. (needs heating to at least 80 degrees in a controlled oven. Something your mould will not survive)

After the initial layer of carbon, you will need to beef things up. As the visual aspect is not important for these layers, I suggest using carbon biaxial, as that is much cheaper (or at least you get more carbon / thickness for the same amount of money…). Another option is to make a sandwich of carbon - glass - carbon. This will be very slightly heavier, but much cheaper.

Make sure you use an epoxy which is chemically resistant against fuel. Definately not all epoxies are.

Thanks all for the advice. I will give it a dry run and see how a single piece of CF lays onto the shape. I wasnt aware that CF could be made to fit something like that in the home shop. I can see that I have some experimenting to do.

Herman: the plug had been sanded through the grains ending at 1500 grit wetsanding followed by polishing with compound, 3 coats of Partall #2 wax and PVA. The mold was near perfect except for some pinholes which have since been filled and the entire mold has been 1500 grit wetsanded, polished with compound, and 3 coats of wax and I will use PVA. I am fairly confident that the mold is in reasonably good shape but if this is insufficient please let me know.

As for sharp edges, well thankfully I have very few on this entire piece, they are mostly gracefully curved edges that I feel a wet layup should be able to handle quite well. Pre-preg does interest me for sure but it is not something I am equipped to deal with at this time which is why all of my pieces thus far have been wet layup. I may give infusion a try at some point depending on the results I get from this tank.

As for layers, the tank is scheduled to be put together in the following fashion: CF/CF/Kevlar/Fiberglass/Kevlar/CF/CF which should give me the necessary rigidity as well as structural integrity required. The epoxy is the West system and once cured the entire tank will be internally coated with POR15 fuel tank coating for extra insurance. This is the same methodology used in race car fuel cell manufacturing so I assumed it would be sufficient for my needs here.

If any of this seems insufficient please let me know.

There’s a lot of different materials in that layup. How did you end up deciding on that layup order? Also if you’re concerned about structural integrity that degree did you consider the ply angles?

It is not too bad of a layup. You could discuss about the glass, but see it as a carbon skinned sandwich, with kevlar as a core material, which nicely adds some impact strength.

I would definately not bother with infusion for this mould, as you will need generous flanges. If you ever decide on infusion, feed resin around the part, and apply a vacuum in the centre only. This should work. Getting all fibers in place without bridging can be a challenge, but nothing a bit of spray glue cannot solve. Ba patient however doing a dry layup.

I picked that order simply because someone else who had done something like this previously used it. I have no reason other than that. If you feel that it should be done differently please let me know. My main concern is impact and abrasion resistance. There will not be much in the way of stress placed on the tank other than normal riding (partial weight of the rider on the tank at times) which should be well within any limits of the materials.

Thanks for the tips! I think that infusion is a ways off in the future for me, definitely not for use on this project. I would be interested to hear how people are using that spray glue? Is there a post somewhere on this forum detailing exactly how it is used in production?

Just mist coat the area that you want to stick fabric to, then place the fabric. Nothing more.

Definately do not overdo on spray glue, it is something you do not want in your laminate.

In your case, you have resin sticking down the fabric. (wet layup, perhaps bagging it)

Supposing he was going to paint the part, it might make more sense to put the kevlar on the outside of the laminate, no?

sv650?

Yes, SV650, good eyes =)

I am planning on having the tank painted however I wanted to leave a visible carbon “rally stripe” down the center of the tank. I am not going through all of this work to not show it off a bit :D. With that in mind it may be better off to do just the top stripe in carbon followed by a full layer of kevlar. The top of the tank isnt likely to come into contact with anything (unless I do something REALLY wrong, and that will be the least of my worries at that point) but the sides might so outer kevlar would be a good idea. Thanks for the idea!

I think your material layup is fine. It’s not the reinforcement that cracks initially but the matrix. Also I seriously doubt your tank is gonna take heavy impacts as well.

About your material layup, the cool part about composites is that you can mix and match however you want! I was just curious as to why you picked that specific order and combination but it’s been answered. Thanks for the information.

Great stuff here, and thank you all for your input. I am just awaiting the last of my vacuum bagging supplies and I will have the bottom ready for production! Thursday night is the night!

If you ever choose on aramide on the outside, keep in mind that hitting it with sandpaper means trouble. In that case I would opt for either a gelcoat or a light woven glass as a first layer. (80 grams would do)