My First Infusion... Not too pretty... Graphic!! Help

Hey guys I am new into the world of VIP. I have a mold I made of a gauge bezel and had my first go at the infusion part of the game last night… Needless to say it turned out just plan bad. Any input would be great.

I learned a lot right from the get go. Like spreading the inlet and vacuum much further apart. I have watched so many videos but nothing teaches you more than just getting up and trying it for yourself.

Products used

US Composites 635 Thin Epoxy Resin System Medium setup
Stretchlon 200 baggin film.
Enkafusion mesh
poly peel ply
3 layers 1.5 oz matte

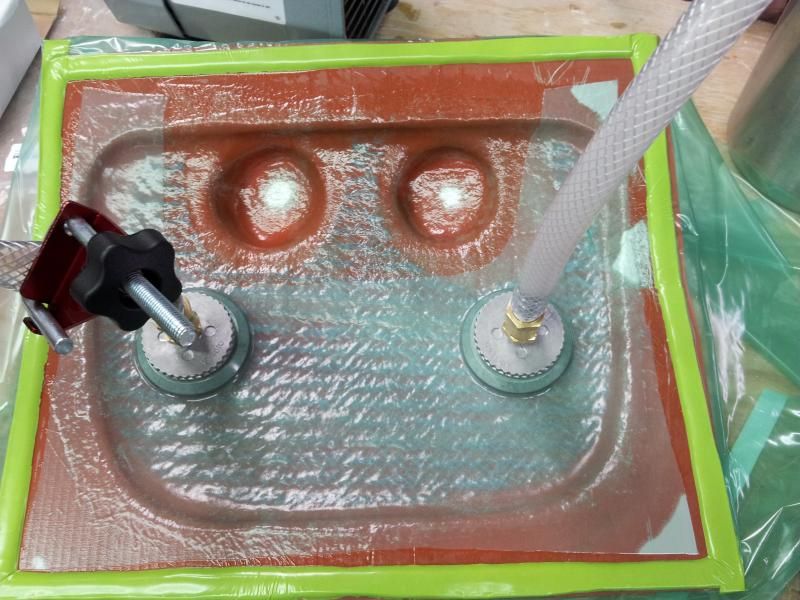
I know I had the slightest vacuum leak losing around 2"hg over 5 minutes so I left my vacuum running until the resin was setup.

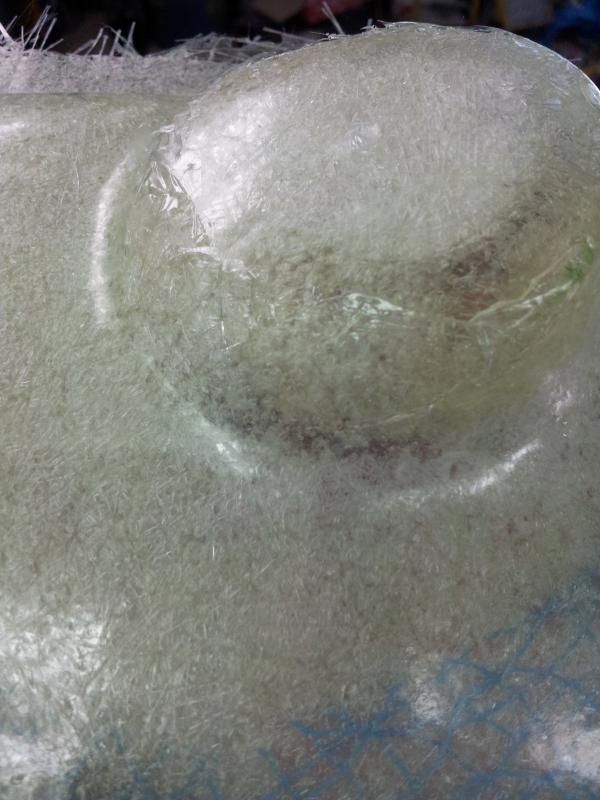
I can only guess that is what caused all my bubbles?

Infusion time was about 17 minutes and pot life is said 25 minutes.

here is pictures of the parts. Sorry they are so so bad…

Initial vacuum pull on the bag
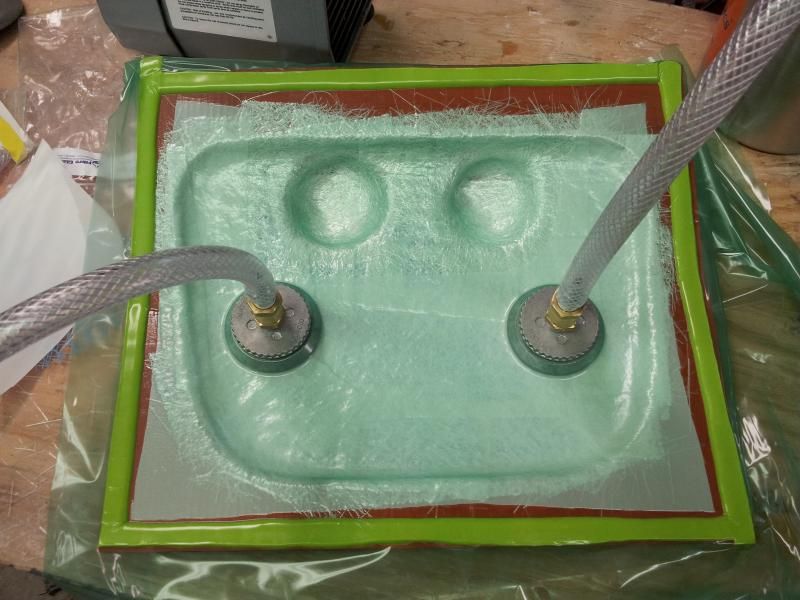
wetted out… well sort of.

The ugly finished part


Could one tiny strand of glass going through the sealant tape cause a vacuum leak? The only spot I couldnt get resin to flow was where there was one little tiny strand going through the seal.

I did not by any means expect my first time to Even full infuse let along make a good part lol. I know there is lots of learning to be done still but wanted opinions from anyone that could make the learning process better!

Thanks Composites!!!

If you have a leak you’ll get bubbles in your layup. When you first draw down your stack (debulking) turn off the vacuum and see if it’ll hold (drop test). If you have a leak you have to close it off.

Make your flange wider on your tooling surface. Arrange your vacuum around the perimeter with spiral wrap (vacuum manifold). Feed in your resin from the middle of the part so it’ll flow outward. At the edge of the part use a bit of peel ply (resin brake) to limit flow to the vacuum manifold.

Use something a little heaver than just mat. Some nice satin weave fabric makes for a nice finished part. Back up the satin weave with the reinforcement layer (mat).

I bought a couple of these cheap lil’ gadgets off of eBay.

Spy Ear

They actually work pretty well for finding leaks.

Any first try is a good first try!

Cheers

Rick

Thanks! also if it matter I have a Gast 1/8th hp pump was able to only pull down to 26"hg

Yes, a small glass tow or thread will definately cause a leak. You need to be extremely particular and achieve the best possible seal, ideally you are chasing 100% seal. In most cases, if you think it can cause a leak, it can!

Never would have thought something that thin could cause a leak like that. And as stated The spot where the one fiber went through was the only spot I couldnt get resin to reach.

It doesn’t take much at all. The dry spot in your laminate was filled by air, hence the resin was no longer being pulled by vacuum into that area. The two dry spots in the middle of the two nodules also suggests you did not have a good seal. I think if you focus a bit more on the seal of the bag, you would achieve a reasonable result. Also, as knottybuoyz said, you would usually arrange your feed and vacuum lines differently, but there just isn’t enough flange area for that - which is not ideal.

Is the back side of the mould smooth or does it have sharp dags on it?

back is pretty smooth for the most part. thanks for the info everyone. I’m doing a new part tomorrow will update Monday with finish pics.hopefully a better part.

No expert, but I clean and prep my mold, put the bagging tape on the flange leaving the protective film on the exposed side, mask it off, and then do the layup. Once I’m happy with the layup I clean up stray fibers, blow off the flange, I remove the masking tape and begin to bag it up. That masking tape will keep your tape seal clean. If your using pva, mask off your sealant tape, then spray the pva, and then do the layup. Remove the masking tape with care so you don’t peel the pva off. Was I able to make that make sense?

If the back side of the mould is smooth enough - with no dags which may puncture bagging film, you may also consider envelope bagging…

Well i tried again on saturday night with no luck again… I am able to pull 26" and tried for 3 hours to get it to stop leaking which never happened. I went over all the seams with extra tack tape. closest I could get was 3/4" loss in 5 minutes which over time would still not work…

I am at a loss is to how I cannot find my leak. I might attempt a envelope bag tonight.

The only thing I am worried about is if the resin will wrap around the back side of the mold and get stuck

You may also try to run two lines of spiral wrap as your resin feed and vacuum line. Place them on the edges of the part and run the epoxy from one side of the part to the next. If you try this method, use 1/2" spiral wrap and place peel ply over the vacuum line to prevent the bag from sucking it.

Also use a roller on your sealant tape. It doesn’t sound like it would make a difference, but it makes a huge difference in sealing a bag. I have noticed that unrolled sealant tape can have very small leaks that can prevent you from getting full vacuum.

Envelop bags are a huge PITA for that reason when you’re doing an infusion.

I’d recommend ditching the aluminum through bag connectors and seeing what happens. You might as well ditch the braided vinyl hoses while you’re at it, those things are so strong that I’ve actually experienced difficulties in clamping them that led to small leaks just because they weren’t fully sealed off. The Watts brand vinyl (non-reinforced) tubes that they sell at home depot are strong enough to withstand a full vacuum if you’re at RT…although some non-reinforced ones aren’t, so just keep that in mind.

edit: also, I’m surprised that this hasn’t been mentioned yet, but it looks like you’re using stretchlon green, which isn’t suitable for infusion. That point has been brought up many times in the forum and if you’d like a more in depth reason as to why doing a quick search will give clue you in.

I’m very new to this stuff too but I thought chopped strand matt wasn’t compatible with epoxy resin? Am I wrong.

Strechlon 200 is notorious for leaking

You are correct Alibro. The Epoxy will not break down the binders in the matte. But still works just fine. done it with several other hand lay ups no problems.

Yea I did some research yesterday on the strechlon 200 and I am pretty dissapointed. Sounds like 90% of people have leaking problems with it.

I am going to get some other tubing and try it without the fittings and see how it does from there.

Make sure you have a well balanced laminate. Unbalanced laminates will warp more than likly, especially a flat panel. Do not use CSM, us a proper reinforcement made for Epoxy. Post cure slowly in your mould until fully cured.

I have to disagree respectfully disagrees with you Hojo, I’ve used strand mat for infusions for cost effective parts at my shop for a while. They infuse well, if the infusion is run correctly.

If you are set on envelope bagging your part/mold , be certain that the back of it won’t puncture your bagging material . Try your next go at it with the same approach as the first “plus” the envelope bag . In a sense you would be double bagging it and the first bag would seal once the second envelope bag compacts . You’d probably be able to get multiple uses out of the envelope bag that way as well . HTH .

To second HCD, sand the back of your mold to make sure that nothing will puncture the bag.

When I envelope bag I place a layer of breather cloth over the back of the mould. Haven’t had a punctured bag yet.

I must be in the 10% of people that doesn’t have too many issues with Strechlon 200. It is tricky, but it just takes some care. Edges of infusion mesh need to be covered with tape etc. I like the stuff, but I only use it on complex moulds with areas that are too tight for me to poke the bag around to prevent bridging.