Motorsport parts, some with pinholes some without

Hi all, firstly i’d like to say this is an excellent site i have read practically every thread and between this and some advice from Deetech i have made the change over to infusion.
I know pinholes comes up from time to time onhere as i’v gone through them all but this is a little different.
I can infuse a 3 foot by 2 foots flat panel on glass with no pin holes at all and some of my moulded parts come out fine too. then one or two more partscome out with the usual pin holes on the weave intersection and i’m trying to find out whats causing them on some parts.
I use greenflow mesh (always ran the same direction) always ran passed the part. Its always one full piece. I always run the peel ply one piece the same direction. I use 200g and 650g carbon 2x2 twill as well as carbon kevlar and kevlar. the fabric i use doesn’t seem to matter this prob shows no consistancy.
I use a scott bader vinylester resin. I use marbocote semi-perm release. The vac pump is left on until resin gels.
The panels that always work out (on the glass) practically jump off the glass when i pull off the peel and mesh. The other parts from the moulds take a little tug to get off. As i can’t come up with any more ideas i’m going to try another marbocote semi perm with more slippage as i’m wondering if parts coming off the glass so easy is related to the way they come are coming out perfect . As in will the stuff having more slippage on the gel coated moulds work better.
Befor anyone mentions priming andpainting the parts, they are made this way as this is what is wanted. I don’t use gel coat to try keep weight down and clear coat afterwards.
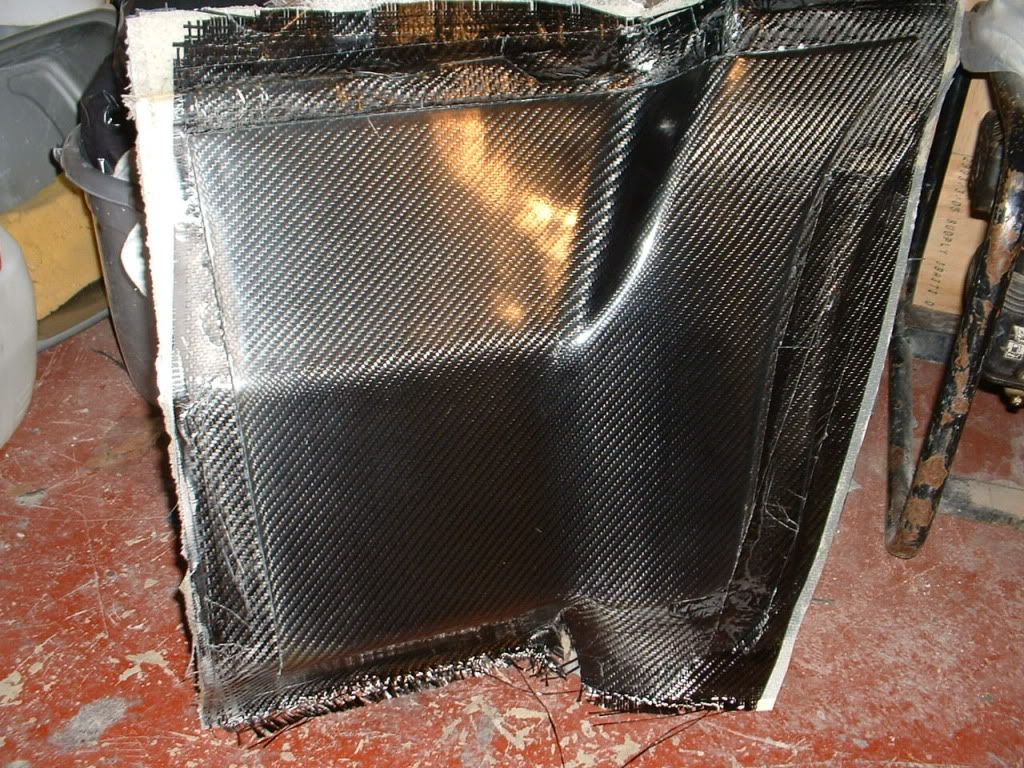
This is one part that works out with 3 or 4 pin holes

This is the part that gives the most pin holes straight out of the mould. you can’t see them here but i’m showing it to give the shape

http://i903.photobucket.com/albums/ac235/grealishbrian/ArchGuardMK2Carbon002.jpg?t=1256806794
And keeping n mind the flat parts are 100%
Any ideas appreciated and do you thing i’m on to something with the release?

Here is that second pic

And again it didn’t come up!

leave the pump on till it cures, not just gels. Also, are you looking at the left over resin in the bucket or the part? Large mass of resin in the bucket can cure before the part, due to heat build up. SO, the part might not be gelled when the bucket is.

The pump is on until its gelled in the part as in a little built up in my resin stop in front of the vac line goes hard. Then i clamp off the vac line before turning off the pump and the bag doesn’t loose any vac until its pulled off.
Also no resin gets into the vac line.

Parts looks good. I’m trying to figure out why the pics don’t come up. Gonna try messing with the control panel…

A few things:

  1. Flow media shouldn’t be larger than the laminate. It will be a false indicator of how far the resin has flowed. Keep it 1" away from the edges of the reinforcements (layup), and don’t clamp the feed line until the resin wets out completely.
  2. What is your “resin stop”?
  3. Leave the pump running until the resin has cured. Maybe not a full cure, but well past the gel stage.

ok i thought runing the flow media an inch beyond the laminate helped get air out. when i say air out i mean the bubbles that flow with the resin front as it travels across the mesh as i see these stop moving as fast when the mesh is fully saturated.
I will try that.
The resin stop i mentioned is just some rolled up breather wrapped in peel ply at the vac line.
I don’t clamp the feed line off until the part is well wetted out but as you say the mesh beyond the part could be a problem there.

Missed that part, and second it.

it’s the reverse. you stop the flow media a bit before the vacuum line (or even leave 30% of the area before the vacuum line with no flow media) so that the air bubbles you see travelling towards the vacuum line have the time to leave before the part is all infused. also you clamp the resin feed a bit before the part is all infused. how much and how soon you will see eventually based on experience and each part. better have a notebook and keep notes.

Testing has shown this is not a desirable practice.
If the part is not fully infused, why would one stop the flow of resin? The laminate then needs to finish wetting out using just what resin is already in the bag, which was only enough for what had been infused. This leaves pinholes or dry spots if bad enough.
Allow the part to infuse fully so that there is enough resin to achieve a proper fiber/resin ratio. Any excess that’s squeezed out as vacuum equalizes after clamping the feed line will be pulled through the vacuum lines.

Thanks for all the replies.
Keeping the flow media back makes sense in my head as i have seen bubbles just stop moving when the mesh went passed the part.
It prob is the likes of this that is causing the problem.
I still don’t understands how the glass produces flat sheets always pin hole free and i wonder if the more slippage semi perm will aid in any way (kepping in mind i’m not putting in a gel coat) or is that ever connected with this problem.

Since you are infusing now consider buying a HarborFreight 2 1/2 gallon paint pressure pot. Remove the gage it comes with, buy some brass npt pipe fittings and a good vacuum gage, plumb the vac gage onto the the fittings with a gas ball valve in between the gage and the pressure pot. Also cut the tube length down inside the pot lid to 4" length so everything works properly.

Wax release the inside of your vacuum pot or get a one gallon open container and set it inside the pot to catch the resin so it does not permanently stick inside the pot.

This will create a vacuum resevior and provide a resin catch so your good vacuum pump doesn’t suck in resin.

Leave the pump running at least 9 hours if you are using epoxy… 4 to 5 hours if using ester resin. Check the oil level on your pump after every infusion. You may be able to let it run less time if your shop is at least 90 degrees F inside.

Since you are infusing now consider buying a HarborFreight 2 1/2 gallon paint pressure pot. Remove the gage it comes with, buy some brass npt pipe fittings and a good vacuum gage, plumb the vac gage onto the the fittings with a gas ball valve in between the gage and the pressure pot. Also cut the tube length down inside the pot lid to 4" length so everything works properly.

Wax release the inside of your vacuum pot or get a one gallon open container and set it inside the pot to catch the resin so it does not permanently stick inside the pot.

This will create a vacuum resevior and provide a resin catch so your good vacuum pump doesn’t suck in resin.

I have been using a pressure pot since i started infusing. i just use the breather and peel ply in front of the vac line as an extra precaution and allows me to re-use the vac line over and over.
I’m making 5 or 6 parts a day and am happy with them but just want to try get those last few pinholes rid of. Since i don’t get them on parts made on glass it has to be something very small.