I have searched on here and have seen a lot of sport bike tanks that have been made. All of these tanks have a folded over pinch weld on the bottom where the carbon fiber tank halves can be bonded together when finished. Being the chopper type of guy I have thought about making a tank for my bike but have a possibly silly question. Where the side and bottom of my tank meet there is no pinch weld or lip. Its just a 90 degree angle straight to the bottom like an (L). How do you join the top and bottom of the tank together when there is no lip to bond?
It sounds like you are asking if you can make a tank which is not molded in two halves, but molded as one piece?
We do quite a bit of closed molding using either infusion or hand layup, all using a silicone interior bladder to avoid fusing two halves. This method is far more difficult than molding two halves and fusing, but the end result is a stronger part. You would most likely need a two or even 3 piece mold, and there would be flashing lines but they could be wet sanded out. You will have visible partition lines where the material is laid up in each section of the mold, but if it is done correctly, it looks very nice.
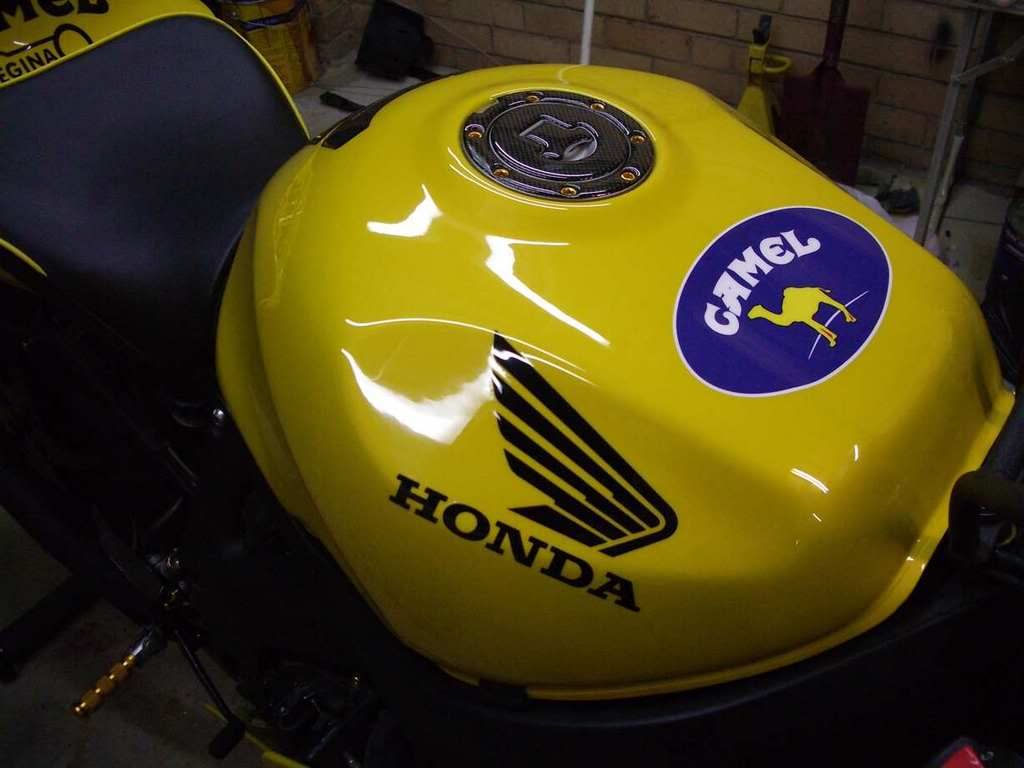
Thanks Composite man. I get what you are saying but Im too new for a process like that lol. But, I worded my first post wrong. I have some example pictures that might help me explain it better. On the right side of this pic which is the front of a cbr 600 tank, you can see there is a 1/4 flange where the top and bottom of the tank is joined together. This make a good place to bond the top and bottom together after the carbon replica halves are made.
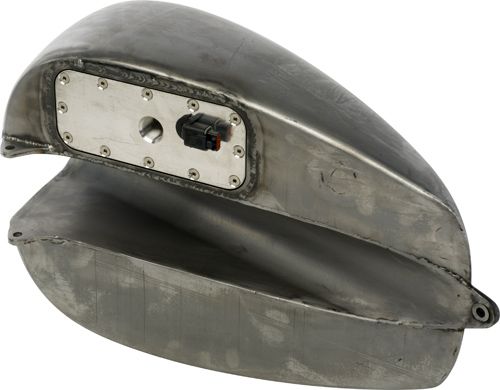
But I have a tank that has no built in flange from the factory. Like the picture below. It is a 90 degree straight from the side to the bottom. Making no flange to bond the top and bottom together when the carbon replicas are made. I would make a split mold of my top due to draft angles and then a bottom mold. But is bonding without a flange doing to be strong enough on a chopper that vibrates a lot? Or how would you bond it together?
I would do that with a toggle joint if I needed to do it in 2 halves that get bonded.
Quite simple really, you make your split mould in the exact way that you described, except before you make the bottom piece you set up barriers to make a small flange using the bottom of the tank. Only needs to be an inch or so wide around the whole perimeter. Once that has cured, remove that ‘flange mould’ from the plug without removing the top half of the mould. Then continue with producing the bottom mould section.
What you end up with is a top section and a bottom section that fit perfectly together, but you make these pieces separately. Instead of using the full bottom piece, you bolt your small flange mould to the top section mould, giving your top section mould a small return around the inside. Before you lay this mould up, run 5 or 6 layers of flashbreaker tape around that return flange. This will give you a bond gap of around 1mm on your return flange, so when you come to bond your 2 halves together you have your bottom piece that fits tightly against the return flange of your top piece, giving you a completely hidden bonding area around the inside of the entire tank.
Hope that makes sense, it’s a bit difficult to explain in words. If you don’t understand what I mean then I’ll draw some lines on your picture there to assist.
Thanks Hanaldo.
I think I understand what you are saying. Basically when making the top wrap around the bottom and inch and this will later become part of the bonding flange. But before removing the top section of the mold, wax the bottom and lay up the bottom going over the inch made previously with the top section. Then you now have a bonding area?
One question, why leave the top on and not remove that when making the bottom?
I think you’ve got it. You are sort of making the bottom mould twice, but one of them you just make an inch of it around the perimeter. Then you don’t make the entire bottom section OVER that flange, but remove the flange first.
The reason for not removing the top mould is so that you keep the dimensions of the tank. Once you remove that top section, you will never get the bottom section to fit well against the top. You also can use the barrier of that mould to produce the barrier of the bottom mould.
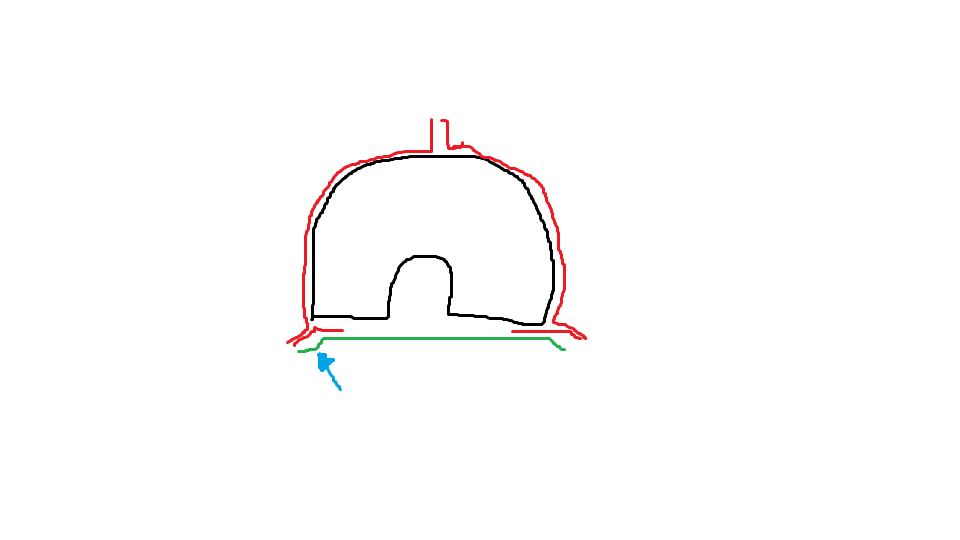
So here is a terrible sketch of that I think you mean just to verify. The black represents the tank cross section. The red the top mold and the green the bottom mold. When making the top I would have a one inch split mold on the bottom. (where the blue arrow is) Then I make the bottom I unbolt that flange and make the bottom so that it over laps. that correct. Im sorry im a pain, im not much of a learner when Written and pics help a lot.
Would an MMA adhesive be suitable for bonding the parts? What about a phenol novolac
coating for the inside of the tank after bonding?..Thanks
i cant answer the question about the bonding, but Im going to use a product called kreem on the inside of the tank. Its the same stuff i use on the inside of my metal tanks. Works great. Hopefully it bonds with carbon.
Sorry mate, I thought I had replied to this.
I’m fairly sure you understand what I mean. It’s a difficult concept to explain in words, but your picture and description essentially shows what I was thinking.
All you’re doing is adding an internal flange to the top section of the part. The important thing to remember is to put the layers of flash tape on the flange section before you lay up, otherwise you won’t have any clearance to bond on the bottom section.


