Infusion challenge - dry spots/pinholes - Scooby Eyelid Replacement

As a newbie to infusion I just this morning demolded my first infused part. What felt like a total disaster with the setup and the infusion last night actually provided some really good results.

The last mile to me would be to get rid of the small pin holes that I assume is trapped air. The gelcoat (vinylester) performed well and the cloth took the form very well. I think Id need to reposition and split the infusion point to infuse in both directions along the side of the part utilising a t-piece from the middle to the outer edges.
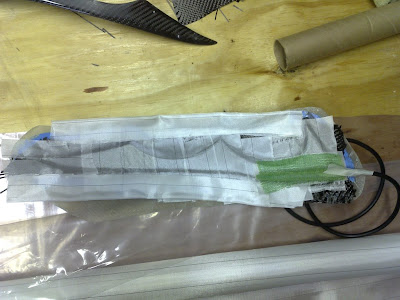
INITIAL SETUP

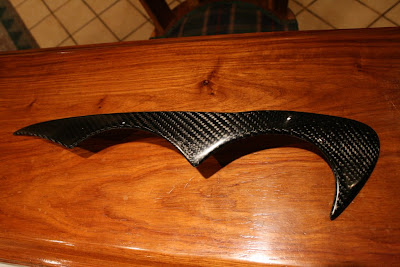
COMPLETED PRODUCT - LOOKS OK BUT AS SOON AS ITS LOOKED AT CLOSELY

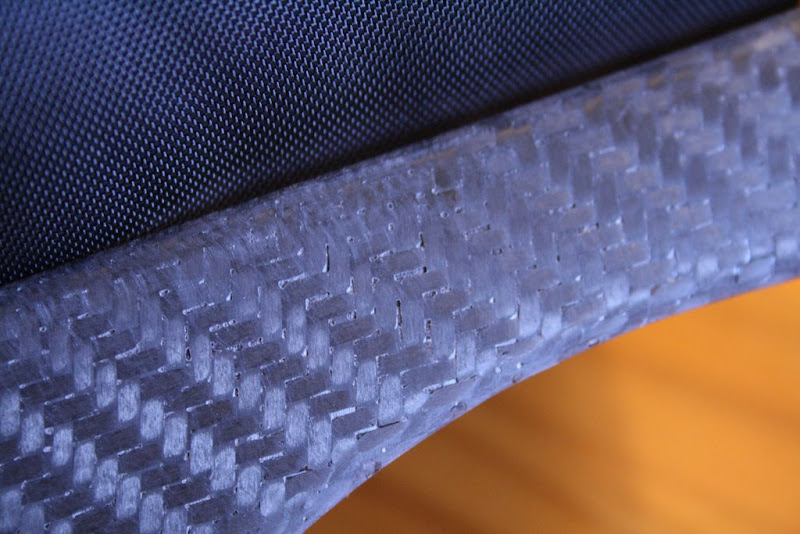
INFUSION EDGE - SEEM TO HAVE LESS PINHOLES

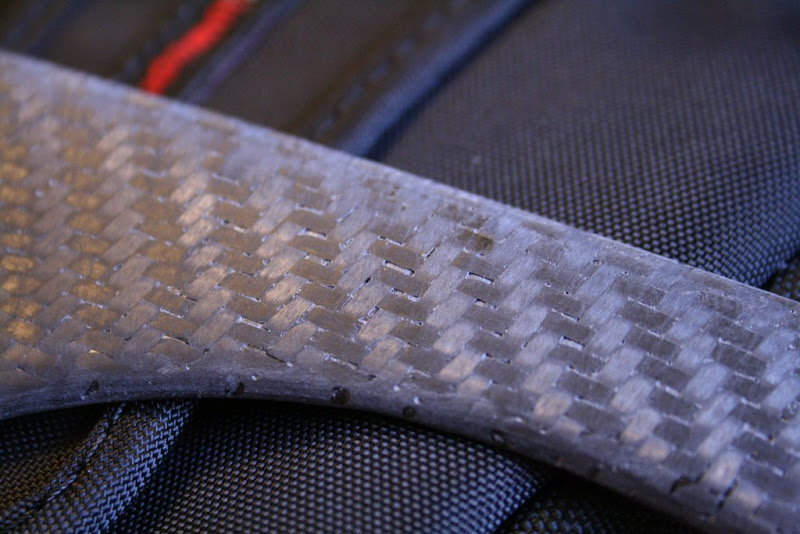
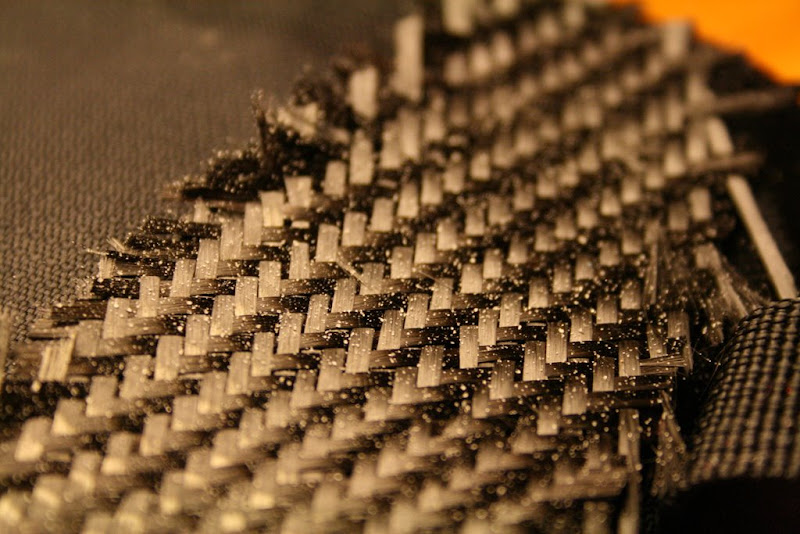
PINHOLES - ANOTHER ANGLE

The epoxy flowed through the remainder of the system very very slow to the point that I got really concerned about the 30min pot life of the epoxy that was going to catch up. It ended up flowing through though.

Im now thinking of setting up the part to infuse with a strip of flow media all along the side of the part so that the epoxy could at least start infusing from the one long edge moving slowly across the width of the part.

Any ideas of how to get rid of these tiny pinholes would be of great help.

Those type pin holes are caused by low pressure. Either from a leak, or, a weak pump.

instead of infusing the length of the part try infusing the width with spiral wrap going the length of the part since it is the shortest distance. all so I have never been able to get good finish with the green flow medium, try the Red flow medium instead, I think youll be much happier with the results.

don’t turn your pump off until it’s well very close to cured.

Thank you for the comments/ideas.

I may have sprung a leak - Im not sure though because I left the pump running throughout the night. Couldnt hear or see anything specific that would have indicated a leak.

This brings me to my next question.

I need to understand the measurement readings on the guage and how I can relate it to the general speak about how vacuum is measured here on this forum. have not seen anyone refering to measuring vacuum in mBar. How is this converted?

Im inland and the guage has been preset to 873mBar which I assume is atmospheric pressure (never was good with science). While in vacuum the guage read 45mBar which means it wasnt under 100% full vacuum. Is this the problem youre refering to?

Another idea was that the gelcoat didnt reach the touch dry stage and could have prevented the epoxy from flowing through properly given that the fabric was stuck onto the gelcoat?

I dont know…Ill attempt another infusion with the flow media across the length of the part placed in the middle with the “breather” all around the part this time so that vacuum is pulled equally (well almost) in all directions.

Any other ideas before I attempt this again wouldbe great.

Thanks again.

45mBar is really low vacuum. Also, if you spring a leak after the part is fully infused, and the leak is in an area touching the layup, you will lose full vacuum indefinitly. Even if the pump runs the full time. The guage on your vacuum pump may read 29hg, but the actual pressure pushing on the lay up is way less.

Chances are that you will never reach full vacuum unless you start infusing when you are in orbit:D don’t sweat it, as long as the vacuum is really low your good.

http://www.digitaldutch.com/unitconverter/ is a good coversion site.

good luck

RC, you got me on this one. If you live AT sea level you can reach full vacuum. Some islanders can actually go over 29.4". Im not following you on the orbit thing?

Also, really low vacuum allows resin to recess up into the contours of the cloth causing “pits” as seen above. This is because there is insufficient vacuum to hold the resin/cloth flat on the mold surface while its curing/shrinking. If my math is right he is getting less than a pound of pressre on the bag.

Hi,

Im realllllly running out of options here. I established from the local vacuum pump supplier that the unit is indeed pulling max possible vacuum. I also tested that the vacuum holds before infusion is started. The vacuum is then kept for approx 6-8 hours.

The following was changed/tested in the process:

  1. Epoxy resin changed to proper infusion poxy
  2. Flow media added to the length of the part
  3. A more flexible bag was utilised
  4. Proper seal and vacuum obtained every time
  5. Gelcoat cured properly once
  6. Gelcoat cured to B stage another attempt
  7. Sprayed several layers of clear coat (not rattle can) into mold instead of gelcoat

The results are consistently bad though. The little bubbles/pit marks seem to be underneath the peel ply if I look at it from the back of the part before I remove the peel ply. Could it be that the peel ply isnt releasing the air? Ive seen some mention made about the green flow media. In SA I cant find anyone who supplies anything different.

I also read something about slowing down the resin flow at first. Not sure how this will improve the process.

Any other ideas would really be appreciated.

If the resin in the flow media moves TOO fast, it is possible to trap air. In other words it is possible to have resin race through the flow media withough fully penetrating the cloth and what your left with is an infusion full of micro bubbles. Slowing the resin face can prevent that situation from happening.

How thick is your layup?
What weight cloth?

Resin flow 60:

http://www.jamestowndistributors.com/userportal/show_product.do?pid=4921&familyName=AirTech+Resinflow+60+Infusion+Medium

if your not degassing your resin first you will need to do so, this is probally the reason for the bubbles

How thick is your layup?
2 layers

What weight cloth?
200gramm

Is there any rule for how long resin should be degassed? Im using a total weight of about 45-50 gramms of resin and I degass until all major bubbles dissappear.

Cheers

degass until the resin si totally see through, as in no more bubbles are in it. The time will depend on how thick the resin is…

Great. Ill degass until the epoxy is 100% clear and infuse from the same cup to not introduce any further air.

Ive also just finished an attempt to spray only clear coat into the mold without any gel coat. I cant call this a total disaster because it may provide some insight as to what the actual issue could be.

Youll notice from the pics that there is no top coat/gel coat on the part. What is interesting is the gaps at the fiber intersections. This is probably what is viewed as the bubbles on the previous parts. So for some reason the epoxy is not finding its way in between these CF intersections or there is something that is preventing the epoxy from filling these voids.

did this part have the clear coat sprayed in the mold? did you let the clear coat cure before you placed the carbon down?

what flow medium are you using? green will leave a poor finish like that, if you use the red it will not

Yip…the clear coat was sprayed into the mold and it pretty much cured past the B stage. Thats why Im not too preturbed about the clear coat staying behind (and in the process ruining the mold). The result below the clear coat is what is driving me up the wall at the moment.

Ive run out of gel coat so Im going to attempt the clear coat approach in the morning. This time Ill make sure to lay down the fabric before the clear coat completely cures.

And yes…Im using green flow medium. Thats all that I could find locally. Im in the process of ordering the red flow medium from Jamestown distributors to test. If the flow medium could be a problem could I then assume that the peel ply may also cause an issue? I have another type of peel ply that Ill try with the next attempt.

Ive checked and the 3M 77 I use to tack the 2nd layer to the first has a fairly rough spray to it. Almost as if the glue isnt atomised enough.

Anyways…thank you very much for your patience. Ive invested too much to turn back now.

So whos up for a visit to South Africa? :smiley: Sort of a working holiday … :smiley:

it is definetly from the green flow medium. the green leaves about a 30% RC and the red leaves about 40% RC in the laminate, being the difference between gettin a good surtface finish

Sorry but what does RC stand for (Resin content maybe).

Thanks for the info. Ill definitley need to give the red flow medium a test.