So I finally have gotten to making some molds for my projects, heck it only took me a year.  My plugs use a quality 2K primer and after my PVA tests I decided to go with just PVA for the release. 95% of the mold came out great but in a few areas the gelcoat wrinkled and looks like it reacted. Could too thin of gelcoat in these areas have caused this? Not enough PVA? Something else? The bad portions are either at the edge of my flanges or on some of the vertical faces but not all of them. I didn’t have time to get pictures this morning but I just wanted to get a thread started as I would like to start my next mold this weekend and don’t want to run into the same issues. I’m pretty sure I can repair the areas but doing it right the first time is always better.
  Thx.
Thx.
Your gel coat is too thin in the wrinkled areas.
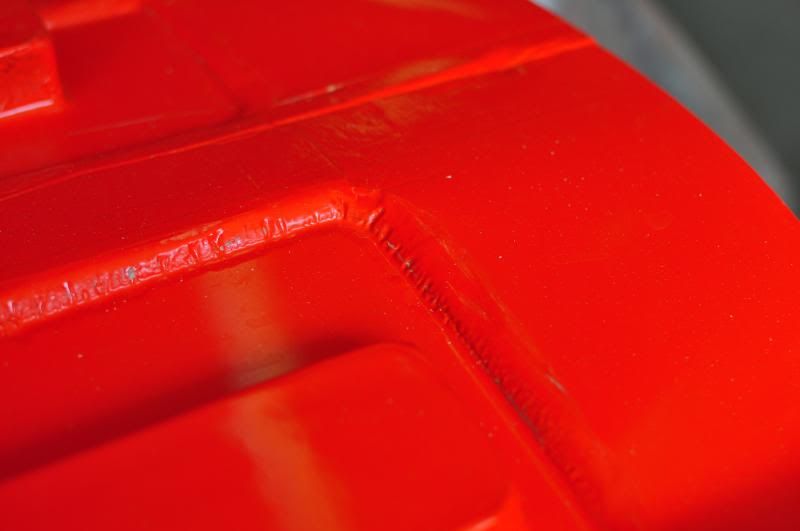
This is called “elephant skin”.
Cause is a gelcoat that is not cured enough.
-too thin
-undercatalysed
-too cold
-draft
-styrene blanket (styrene sinks, so place bucket-shaped moulds on their side)
hehe… “elephant” we call it “gator” over on this side of the pond. Same thing though.
ps. AVT it’s good to see you joined the worlds leading/largest composite forum. I assume this is “Applied Vehicle Technology”
Yep, all the same. There is a nice document on gelcoat problems, I will see if I can dig it up.
Another factor can be bad mixing.
I usually get gatoring when I either apply the second layer of gel coat too soon, or the first layer is too thin and the second layer eats the first layer.
Try applying thicker coats on the first coat, and make sure its fully cured before you go onto the next coat. Don’t wait too long though, you need to get that chemical bond.
You will get a chemical bond anyhow, as gelcoat is not waxed. the surface refuses to cure on air contact, and only cures after another layer is apllied.
So What if you wait a few dys to recoat? Wouldn’t you want to scuff the surface?
Why doesn’t it cure when air is against the surface without any surfacing wax.
It is the nature of the beast. Polyester is “air inhibited”. To have it cure without sticking, you either need to cover it (vacuum film), add a surface wax (paraffin) or any other way of keeping air out.
The advantage of surface wax is that the styrene does not evaporate that much, making for an LSE resin (low styrene emission)
You can way quite a long time before overcoating, but dust pickup of course is an issue.
In this respect polyester really is a different chemical.
Whats the best remedy to wrinkles in gelcoat? Bondo or redo?
Grind out, fill in with polyester, sand smooth and polish.
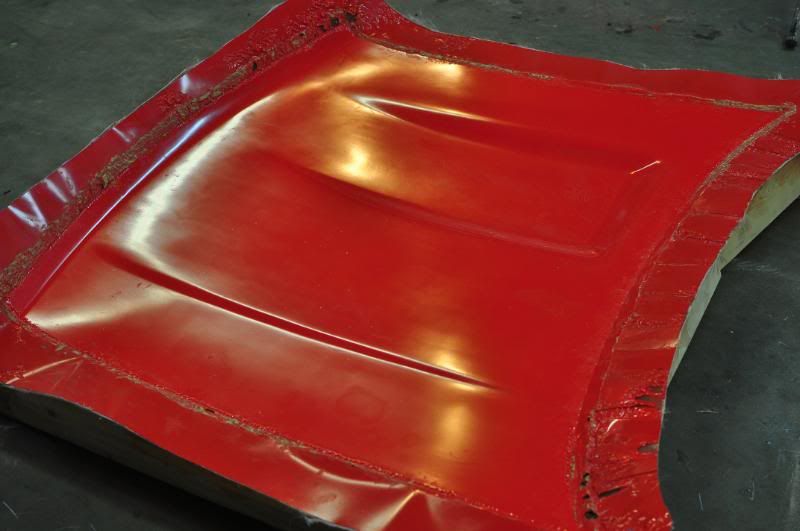
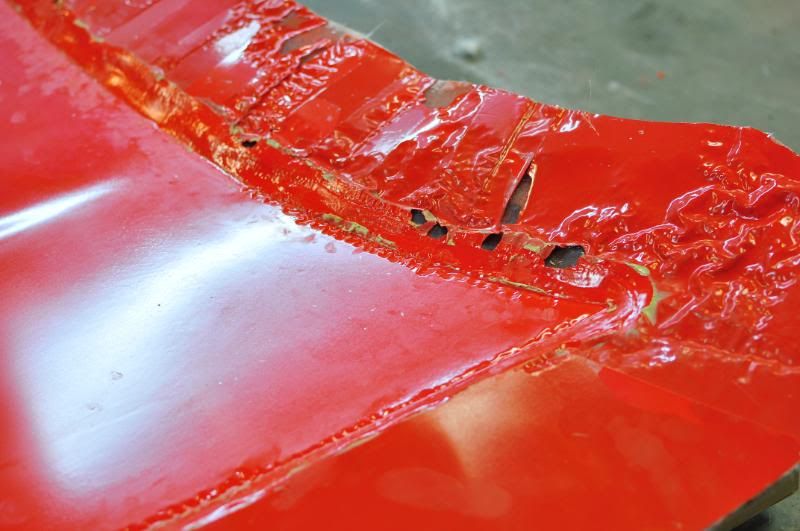
Thanks for all the feedback. I think it was definitely a case of too thin. The main areas turned out fine but the wrinkles were at the edges of the flanges and on corners where the gelcoat would have thinned out.
So do I just use polyseter resin or polyester gelcoat to fill in the wrinlkes? It sucks that it is all at the edges as that is what defines the outline of my part but with 98% of the mold being good it isn’t worth it to do again. O well, I knew I would be making mistakes along the way when it is my first time.
In the future do I just concentrate my spray a bit more at the edges or do I let the first coat B stage and then hit up the edges again after letting those B stage before laying the glass? I used 2oz. per ft^2 with some extra for waste when I was mixing up the gelcoat. Thanks for the help and here are some pictures for reference of what happened.
hi, in aus we call it fry up/ tripe up.
how you can overcome this in the future…
-
make sure your gelcoat is of proper thickness.
-
make sure your gelcoat is cured enough before glassing onto it. (or it wont be chemically resistant to the resin)
-
use a tyre layer on the mould that goes off fairly quickly. once tyre layer is cured lay up the rest of the mould. now without concern that the gelcoat is gunna fry up like this and you can take as much time as you want
also that mean if you do mold - that part paint tryed to come out. when i done ferrari diffuser same thing was with me. so i just brushed those places and layed new gelcoat… and after taking mold of everything went smooth.
Yes what i see same was with me that is from old paint problem that you tryed to do mold.
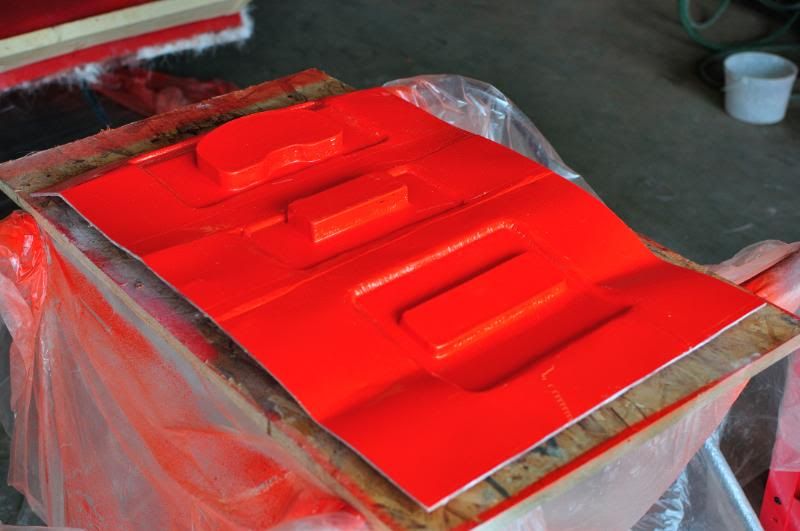
My situation can’t be from old paint since it was new primer that I tested and it didn’t react with the gelcoat and I used PVA so there would have been no physical contact. Also, the worst part shown on the hood mold was on aluminum flashing with PVA so there wasn’t even any paint there.
So my current plan is to try to fix it by filling in the dips on the important mold surfaces with gelcoat and sanding it smooth. It’s going to be a royal PITA but I don’t know how to do it better without using filler and high build to smooth it out in those areas. Please someone chime in if I’m going down the wrong path.
easier to do from 0. as notice those places that you gonna fixed you have to wax more as they not be so good after waxing they gonna like a lot to stick and crack mold once more and etc i tested that.
or maybe im thinking you put to much hardener of mixed not good that how it turn to this? please think
Can be too thin, or undercatalysed. How much catalyst was in the gelcoat?
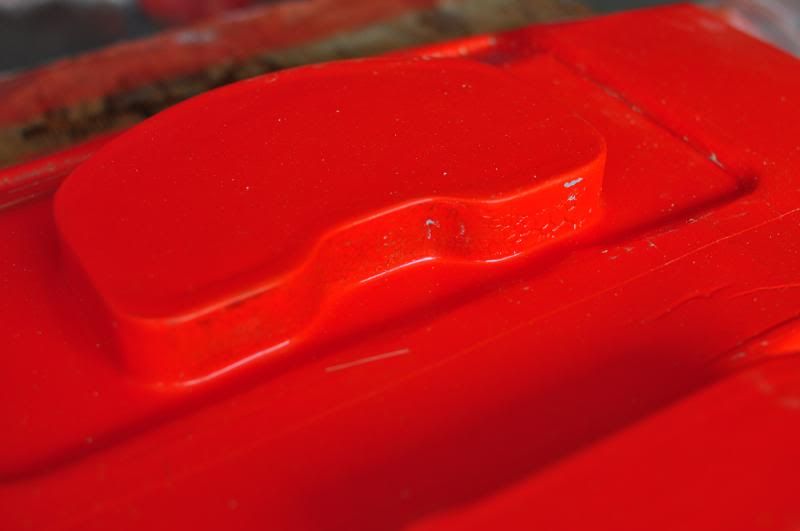
Aluminium draws the heat away from the gelcoat, so make sure your layer is thick enough, and well catalysed. (at least 2%, max 3%)
I used 1-1.5% MEKP. I never thought about the heat dissipation of aluminum and how it would effect the catalytic process. That would explain why it was the worst on the flanges and near the edges as it would have pulled heat away from the part a bit too. Also thinking back I started with a veil and then one layer of CSM which I let set before I did the rest. I noticed a wrinkle and pushed it and the gelcoat hadn’t cured under it like the rest had. Herman, you may be onto something. 