Flange-less Moulds for Auto Panels?! (Also, Hi :P )

Hi Guys

First time posting. My name is Mitchell, I come from New South Wales Australia. I’ve always been interested in composites, but never though to even attempt it. Until I got a job for a fibreglass resin manufacturer! Having access to the materials for decent prices, I’ve been able to play around with projects and learn from trial and error.

I’m trying to make a fibreglass mould of a bonnet. I can’t tell you how many times I’ve watched Easy Composites video on their carbon bonnet. My issue is the flange. Do I need it? Can I do it without a flange and still have it line up correctly with the underside of the bonnet?

There’s not much available local as far as learning composites goes. I have (what I consider to be) a very good understanding of resin. As I need to, so I can do my job. It’s the experience and technique that I fail on. Hoping I can get some solid advice from you gents (and gals?).

Here and there I’ve been able to ask questions to fibreglassers, but they’re self taught mostly or have never made car parts just boats. A guy who has made some tutorials on youtube has told me I don’t need a flange, and that it’s a waste of time. Thoughts? I won’t be using vacuum infusion any time soon, as I want to master hand lay up before I jump into that. So taking that into consideration, is flange-less ok if I’m just hand laying?

I’ve also been following a South Australian company on Facebook. They mostly make cowls, but do doors and bonnets and sometimes full front ends for drag cars. Looking at their moulds, it’s very rare to see a flange on any of their moulds except split moulds.


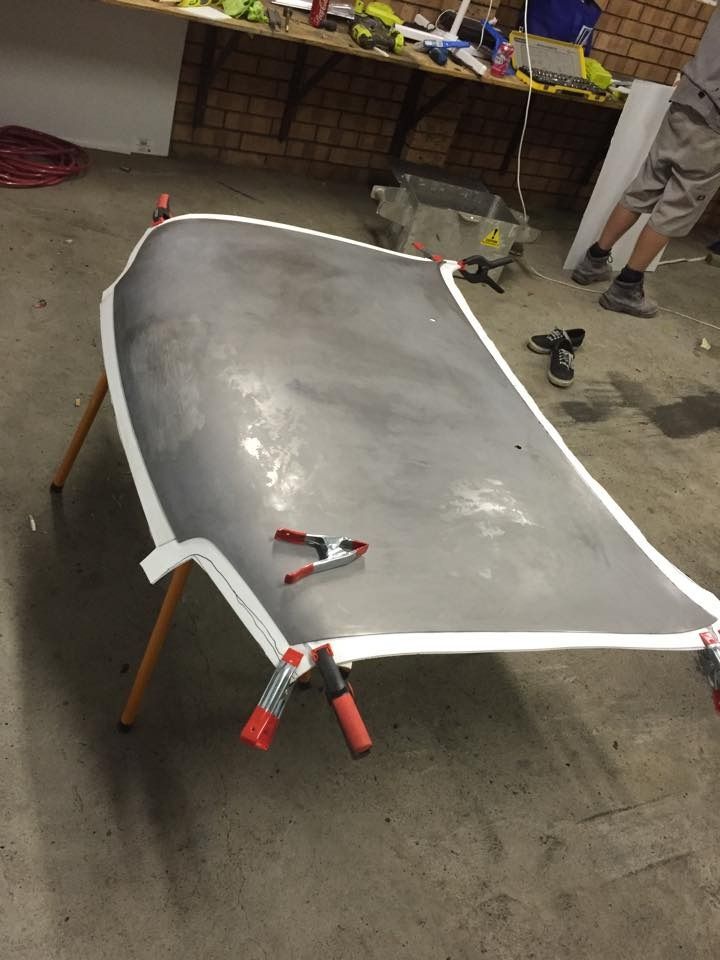
This was a failed attempt. I know what I did wrong, all gelcoat related. Will be using a dumpgun next time, because I find that easier to use than brushing it on. I changed my idea so many times on the flange, that in the end I was only just going to use it as a guide line (after being told the flange is pointless for me) to cut off. I was going to pull it off before I even started tbh, but impulsively left it on. I just had so much trouble getting a good consistent gelcoat with a brush, that I allowed it to pool too long in the recesses of the flange.

Can anyone confirm that I don’t need a flange, maybe even link me to a build of something in the same manner? Or any further advice would be great. As long as it’s constructive, bring it on :smiley:

I’ve got some awesome goodies that I want to use the same technique on (rare flares to remake into carbon, etc) and will be posting a full thread on my progress when I’ve got the technique and skill down. There’s too little information on fibreglassing for an industry as old as ours!

Cheers in advance guys :stuck_out_tongue:
-Mitchell

Flanges will help with the location of the 2 halves but not essential as if the moulds are made correctly and the parts trimmed correctly you can line up the 2 halves with out a drama. In most cases a flange will be required def for infusion and vac bag’s. Having said that I find vac bag resolves several issues when it comes to lay ups and ensuring all the fabrics and cores are compressed together. I just about vac everything that is not very simple as it just makes life easy :slight_smile:

As for the gel coat i have issues using a brush to and want to start learning to use a cup gun. This is where i have most issues with my mould making.

I think in australia you will find most have learned composites them selves via tril and error and trust me you will keep learning every time you make a part!

Flanges aren’t necessary, but to be honest they are so easy to do and provide enough benefits as to be worth having them. For one, they provide extra rigidity to the mould.

For two, they give you a surface that you can apply release agent to and lay up excess fabric on, rather than having to lay up carbon to the edge of your mould and trim it off neatly before it sticks to the back of the mould and locks your part in. Three, even if you aren’t infusing, they give you an area to apply bagging tape for vacuum bagging.

Four, and possibly the best reason to add flanges, your tools are where your costs are. If there is even the smallest chance of wanting to try infusion in the future then it doesn’t make any sense to build a mould that won’t work or will be very difficult to use for infusion. You don’t want to have to modify your existing mould or build a new mould when you do decide to try infusion simply to save having to put flanges on. Build one tool that can be used for lots of pulls using whatever sort of processing method you want.

Totally agree with Hanaldo, flanges are not necessary for hand lay up, but for the reasons that he said and more, tomorrow you will be happy if make your toolings with flanges today.

Having a flange at 90deg to the mould face will help prevent the mould from warping or twisting. I always aimed to have an L shaped flange around the part. The horizontal leg of the L would allow me to make the part oversized to trim back later to get a cleaner line and the vertical leg would stiffen the mould up and if possible act as a stand/support when working on the part.

Hand lay up is so vastly different from infusion that they are esentially different. You can master handlayup while you make your infusion molds lol .

Flanges are a must imo. They keep the mold service life longer and make demolding,finishing etc faster.

Honestly, I get supplies so cheap, and the time putting this together is so little… I’m happy to do it without the flange for a bit until I’ve got the basics down pat.

I’ve sprayed the bonnet with gelcoat, it was perfect and so easy except for a small tennis ball size area that tripped. This wasn’t too thin, it was obviously a contamination from all the crap I’ve put on it. And it tripped almost instantly.

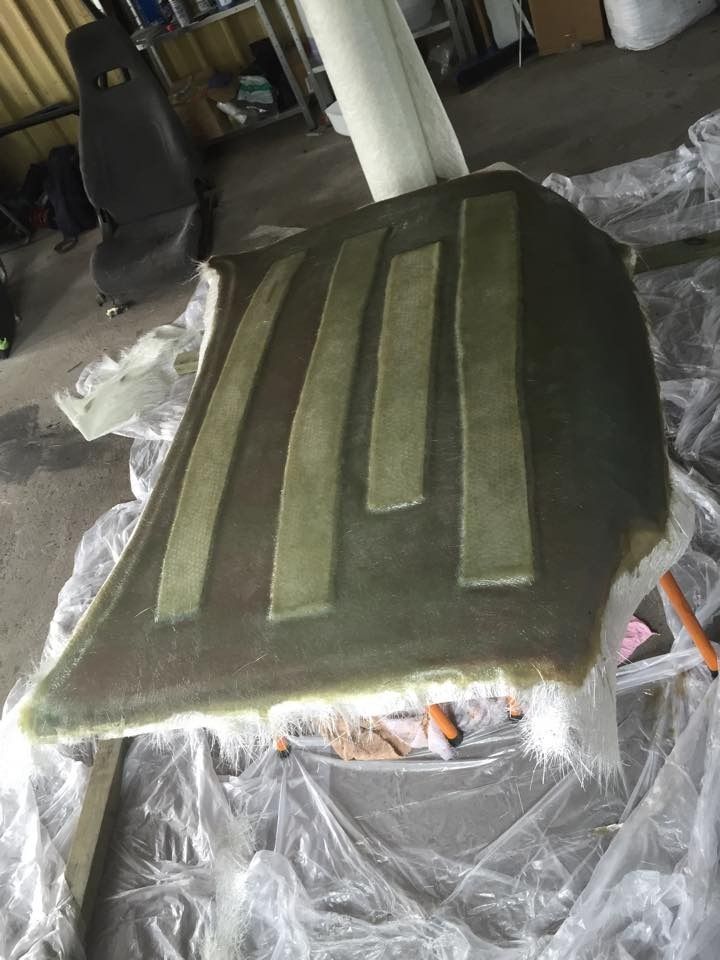
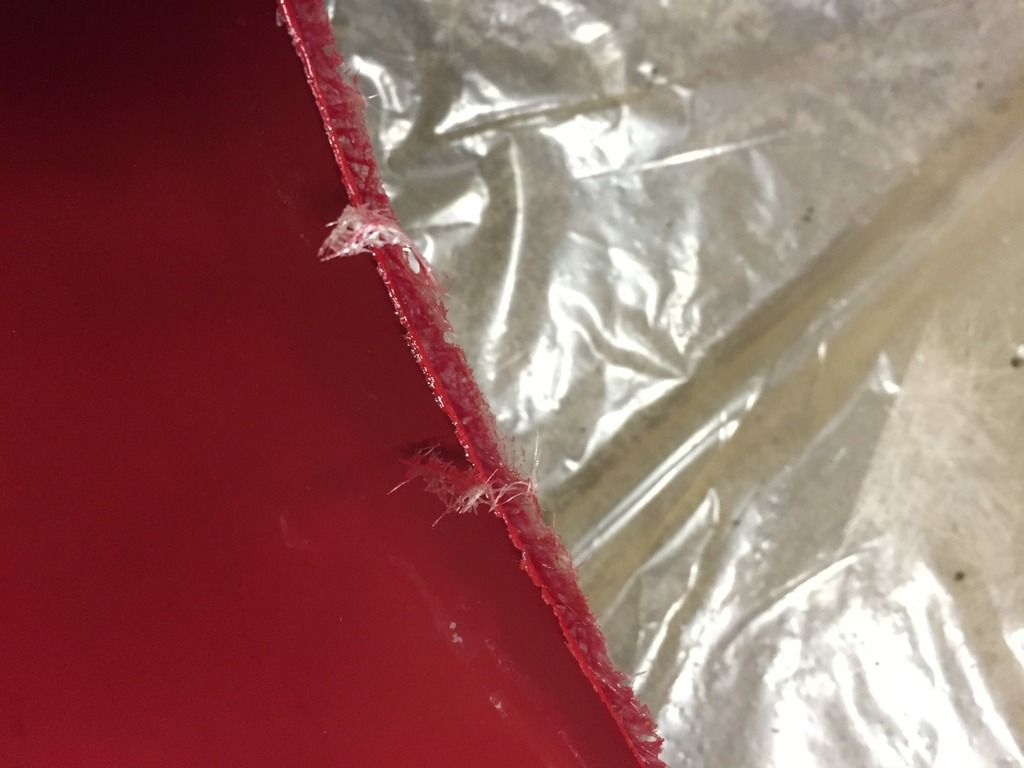
My issue at the moment, and I’ll try and post pics later (on my iPhone atm), is that I can’t get the edges to curl to the bonnet. It’s creates a v-shape channel between the chipped strand and the gelcoat. This will no doubt destroy the edges of the mould. It’s currently in my car, hoping that my boss will be in this week so he can show me how to fix it. And how to get around it in the first place. Open to advice and ideas! I worked it for ages, and used lots of resin.

Really close to making perfect moulds, just need to sort this last issue out!

You’re right about learning from everything you make. I’ve made many mistakes, and im perfecting every aspect as I go. You can see my progress in every project I’ve done. It’s great being able to look at my failed attempts and compare them to my latest and see the difference. They’re getting better each time. I never make the same mistake twice.

I’m very happy with how things are going. Still got lots to learn, and no where near done.

Cheers for your input and advice guys, it’s greatly appreciated!

Not sure if my posts are being restricted. Just writing this status as a test to see if it comes up straight away, please ignore.

How annoying… I wrote a huge reply.

Pretty much, I’ve made a new one without a flange. I get the materials cheap enough to not worry about if my mould has a flange on or not. At the moment I’ll make it as less complicated as possible whilst learning the basic techniques.

I’m having issues curling the glass around the edges. Any advice? Waiting for the boss to come in and show me, but don’t know when that’ll be :frowning:

CSM?

225 conforms quite well to most corners. Best to use loose rovings for really tight corners. In most cases, it is easier to tear your mat where it needs to conform to a corner. Once the styrene breaks down the binder and you use a roller, joins in the fabric don’t really exist any more, it all essentially becomes one layer. But the fabric will mesh together better if you tear it instead of cutting it.

Yeah, CSM sorry.

Yeah, I can blend it quite easily by tearing the edges where they’re not feathered but not sure this will help my edges. The bend slightly, but I want more of 90 degree angle… Atm its only curbing slightly and not enough to connect with the gelcoat edges to create a complete copy of the plugs edges.

I rolled it for ages, and continued to do so for a while with the help of another person after the main area had been done. Didn’t bunch. Drenched it in vinyl, still nothing. It’s emulsion as well not powder, so I don’t think its a binder issue.

Tearing the mat should still help. What weight mat are you using? If you can’t get it to conform just cut the mat along the corner and butt the pieces against each other.

Alternatively, use loose rovings. Either loose 450 gram short strands, or individual 650 gram long rovings.

225csm was used as the first layer. I’ll tear the edges next time and see if it helps, but ill discuss with the boss first to see if there’s anything else I’m doing wrong as well.

I really want to get the chopped strand to work. I feel like it’s not working because I haven’t got the right technique, so avoiding it seems like its only holding me back.

I’ll definitely keep you guys upto date with how I rectified the issue :slight_smile:

Cheers!

you don’t NEED flanges but they are always a bonus. for one off parts I generally don’t bother, but production parts, be it chopper gun hand lay, vac bag, infusion or prepreg I always have a flange. there is nothing wrong with brushing gelcoat, leave it for a couple of days, this should prevent tripe and if its not too thick it wont prerelease.

It’s not that brushing gelcoat is bad, I’ve done it before. It’s just that I find it difficult to keep a consistent thickness without having to constantly touch up areas Ive made worse. Gelcoat gun is so easy to use, and provides such good results of probably never brush again unless I didn’t have the facilities.

I will use flanges later, but I’m just trying to minimise the work for myself atm while I’m learning. Cost me bugger all to make, doesn’t take long for me to do, I can afford to hold off on flanges.

Cheers :slight_smile:

These two statements seem counteractive :stuck_out_tongue:

Just teasing. I really think composites is about using the materials, and finding what techniques work for you, so you can’t do any wrong as long as you are always trying to improve the last thing you did :slight_smile:

Haha

You raise a good point.

I drastically improve with each attempt. I’m never really bummed about any failures, because it’s invaluable experience. I’ve never made the same mistake twice, I always learn from them.

Once I sort this curving issue out, it should be perfect!

I really like the idea of flanges, and when I make a mould successfully that’s when I’ll start to incorporate flanges on my moulds and branch into infusion. So keen to pop out my first part!

you also try mixing up a putty for these tight corners

I’ve thought about this. There’s a “V” channel between the overhanging edge of chopped strand and the gelcoat. I though I could just fill this void with filler and then I’d lessen the sharpness of the edge.

Once again, I feel like I’m shying away from it, and I don’t ever really want to use filler unless I really have to.

Cheers for the advice cartoon!

So waiting for the boss to come into work, and the vibrations of the car has 98% pre-released. So I figured I’d just lift it off.

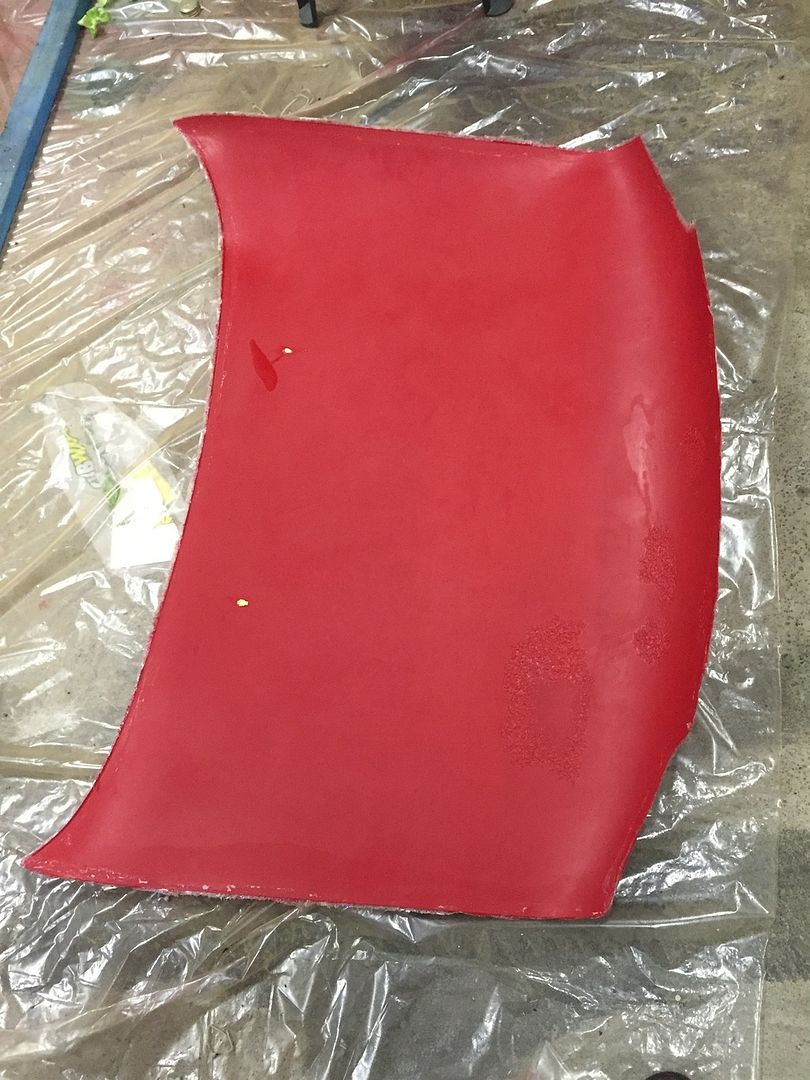
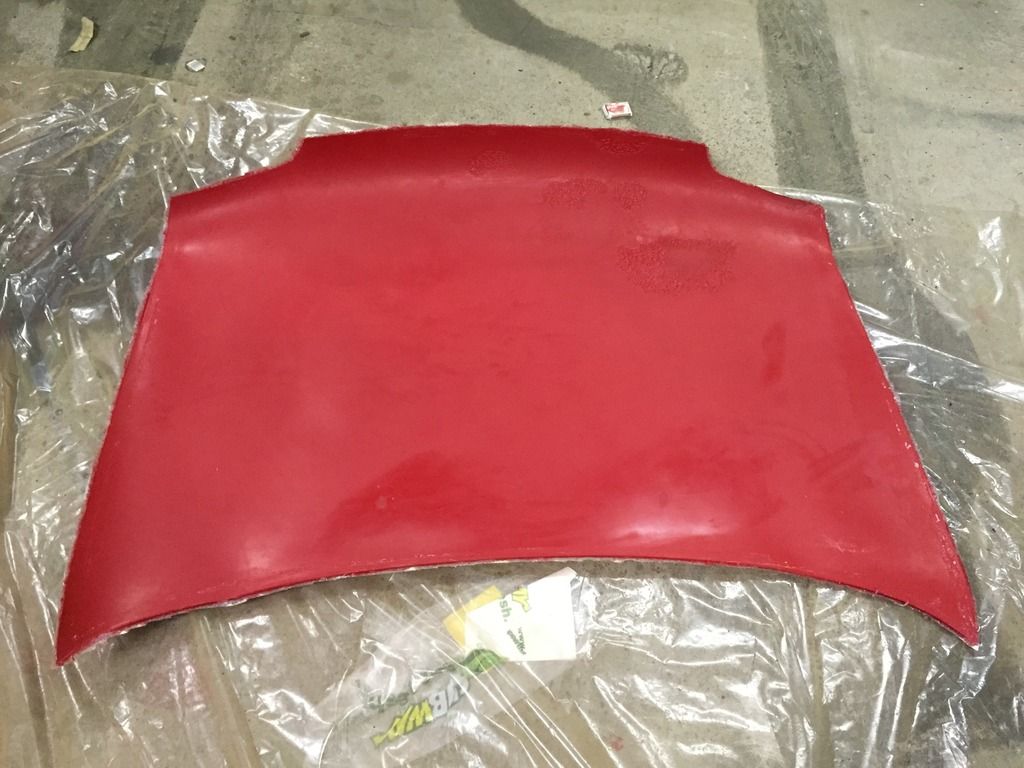
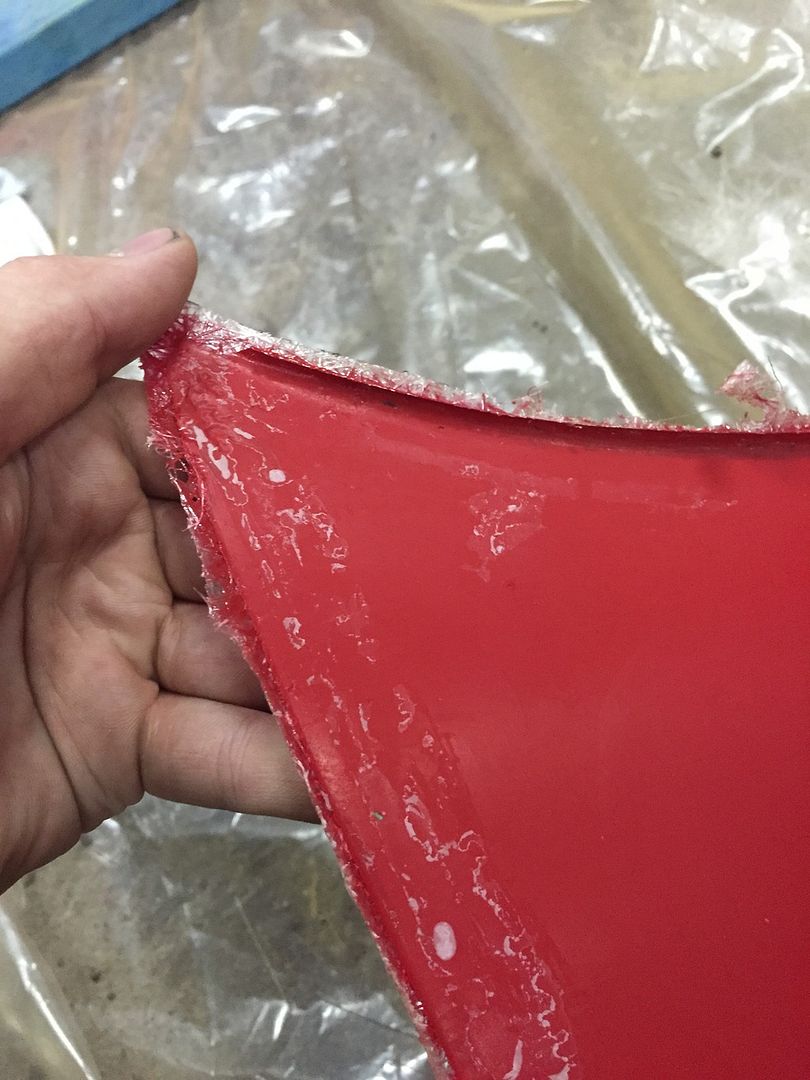
These pics show a bit more about what I’m talking about. I was surprised to find the area i suspected to have triped, not triped at all… and areas that i thought were perfect, large areas of tripe. Though, I’m still more confident using the gun than the brush.


I guess I’ll just have to go thicker and pay more attention to my coats.

As you can see, the gelcoat and the chopped strand doesn’t connect at the edges and creates a channel. Not ideal, or anywhere near close to what I’m trying to achieve.

Before I attack it again, any further advice regarding the corners? I’ll try tearing the edges and see if that helps, but really not sure if that’ll solve my issues completely. Then again, it might be the exact thing I need to change! Won’t know til I try.

Once again, even though it pre-released and triped, I still feel a small amount of accomplishment. One step closer to my goal!