Engineering Basics

This post is the start of a full tutorial on calculating the properties of a composite plate. I’ll start from the very basics of material properties before delving into the properties of composite plates.

Lesson Plan

  1. Overview of material properties and terms
  2. Equations and examples for Isotropic Materials
  3. Pause for questions
  4. Introduction Fiber Reinforced Composite
  5. Calculating Macromechanical Lamina Properties (Single Layer)
  6. Calculating Laminate properties (Multiple layers

Carbon fiber is best known for being the “new” expensive material. I hope this thread shows you why and how it is this special material and how you can use its properties to your advantage.

This thread is closed for posting so it remains uncluttered and easy to navigate. You may post all questions and comments in the engineering forum.
This is a forum after all so it would be ridiculous to say something and then deny comments :stuck_out_tongue:

Material engineering has a set of terms that are commonly used to describe materials. Many properties are needed to describe materials (strength, conductivity, thermal expansion, etc) but we will only focus on three. The three we will discuss are strength, stiffness, toughness.

While the three terms sound similar they are actually quite different. I’ll explain each one individually below.

Before I start one other term to become familiar with is load. Load is defined as the force per unit area. So in English system it’s defined as pounds per square inch. In SI it’s Newtons per square meter or Pascals. You’ll see why this load is defined as such instead as a force in the calculations section.

Strength aka Failure Strength
Strength is how much load a material can take before it breaks/fails.

Material Stiffness aka Young’s modulus aka Modulus aka Elasticity
The stiffness of a material is its resistance to stretching or in technical terms, resistance of deformation when a load is applied.

Toughness aka Brittleness
Toughness describes how resistant the material is to cracking from sudden loads

If you’re still confused try reading the examples below. Each one is a different real word example which will provide physical meaning to these arbitrary definitions.

Now the purpose of engineering is to balance these properties to fit whatever application you need. Let me provide some examples.

Example 1- A Tupperware
Imagine a regular plastic tupperware container, and now imagine what you want from it. You want it to be flexible so you can snap a lid on, you also don’t want it to crack if you accidentally drop it, but you don’t really care how strong is it is since it’s only going to be supporting the weight of the food. This is exactly what plastic is, tough, flexible but weak. Imagine the same container made of glass including the lid. The lid would never snap on, and if you dropped it it would shatter. Not terribly desired for part that is going to be abused.

Example 2 - Surgeons Scalpel
Surgeon’s scalpels are frequently made of materials like obsidian and ceramic. These materials are stiff and strong but brittle and with good reason. Imagine trying to cut open a heart with a rubber knife, Would you want to be the one on the operating table? A rubber knife would just be too floppy to create the precise cuts a surgeon needs. Likewise a scalpel is so thin that it needs to have a high breaking strength or it would just fall apart. Conversely though the toughness of these scalpels is low but it is not an issue. Surgeons treat their instruments carefully so the impact loading is little to none.

Example Three - Car Body
If you’re like me, and you probably are if you’re on this forum, you think composites are cool. And If you’re even more like me you want every body panel on your car to be replaced carbon fiber composite. But is this the best choice? While it may look good in driving situations and while it may be strong, most carbon fiber polymer composites have a low toughness. In other words they shatter easily. A fender bender won’t be a fender bender. The whole bender will just shatter.
So with this in mind what would be a better material for daily drivers? If you guessed plastic you may be right. Plastic is not very strong, nor stiff but it is very tough. In a light accident it won’t shatter and it’s lack of stiffness means the dent can easily be popped out.

Here are some questions to get yourself into a material engineering mindset.
What kind of material do you want for a child’s toy? What about an aircraft wing? Why? Also in what situations would a strong and tough material but a flexible (low modulus) material be desired?

Of course these are very narrow examples and I left out many other considerations, including price, weight etc but my aim is to provide basic examples to help you understand and understand strength, stiffness and toughness.

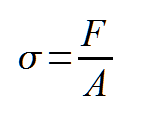
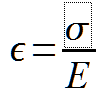
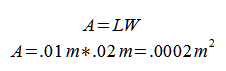
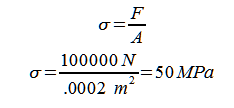
Next up - Equations, hard numbers and more equations

In the last sections we covered some basic definitions and examples. In this section we will take those qualitative definitions and quantify them into hard numbers. For those who enjoy math this will be a fun section.

The variable format will follow these rules
Variable Name; Variable letter (Units)

Let’s get started

Young’s Modulus; E (Pascals/Psi)
This numeric tells you the exact stiffness of a material. The larger E is the stiffer the material. Rubber is between .01-.1 Gigapascals or GPA, Steel is about 200 Gpa and Diamond clocks in at a super stiff 1220 GPA

Normal Stress; σ (Pascals/Psi)
This quantity is force per unit area. For example it’s commonly seen in tires, which are inflated to 40 Psi, or atmospheric pressure which is 14.7 psi. More explanation on this later

Strain; ε (Length/Length)
Strain is the unit length deformation of material. In other words it’s how much the length of a material changed in percent. For example if the strain is .5 that means the material is 50 longer than what it was originally. Something that was 2 inches initially is now 2 inches + .5*2 inches or 3 inches long

You may be a little fuzzy on these variables right now but all three of these come together in one simple equation. If you’re still confused try reading onto the next section to see if it helps.

One thing I need to cover before we move on is why we use force per unit area instead of just force. Think of it this way. Put a brick in the palm of your hand. If you’re not senile or your hand isn’t hurt, nothing will happen, the brick will just sit there on your palm. But now balance that brick on needle and set the point of the needle on your hand. Suddenly you’ll feel intense pain as needle drives itself through your palm. What happened? The flesh in your hand didn’t get any weaker but what we did is change the Area on which the force was applied. Apply the same force over a larger area and the effects of that force are diminished. Decrease the area and the effects of the force are multiplied. This is the principle exploited when people lay on a bed of nails. With hundreds of points of contact you’ll stay intact. Try standing on one nail and you’ll find it inside your foot.

So with that in mind if we used force to describe a material, it would never work. Aluminum foil can be ripped with a few lbs of force, ripping an aluminum aircraft in half requires a couple thousand more pounds. What stays about the same though is the lbs per square inch, or force per area. In an ideal world a larger piece of material will need a larger force to break it. And in material science we like to describe the material, not the shape or size of the material.

So now we know why we use pressure, or in engineering speak applied stress. It describes the loading situation in one easy number. I don’t need to know if you’ve got a tiny 1x1 inch cube or 5 meter circle, give me stress per area and I can tell you whether you picked the right material or not. You’ll be able to do so by the end of this post as well!

I’ve written out the formula many times but here it is in math symbols.
forceovera.png
Easy enough to understand. Take your force, divide by your area and your stress, called stress because it’s what’s stressing the part to deform.

We’ve now defined stress, and we also have defined stiffness and strain. Here’s how they all come together.
hookeslaw.png
This equation is commonly known as Hooke’s law. What it states is that if you a want to deform an object X percent you need Y amount of stress. Since stiffness is on the right side you can easily verify that the stiffer the material, stiffer materials have a larger E or Young’s modulus, the more stress is required to deform it.

It’s more commonly used in this form
hookeslaw2.png
Now when given a stress we can calculate the strain. Let’s do some examples

Assume the following: A rectangular bar with the cross section of 1 centimeter by 2 centimeters and a length of 1000 meters is loaded in tension. The material is steel (E=200 GPA) and the load is 10,000 newtons. What is, the stress applied, the percent deformation.

Stress Applied:
First we need to calculate the area. The trick here is to convert into meters
area.png

Next we need to calculate the stress.
stress.png

Next up strain. Notice how the units nicely cancel out. This gives us a unitless percentage. Perfect for the next step
strain.png

And finally we can calculate the total deformation. After we multiply by length we end up with an answer in meters! How convenient.
deformation.png

Now that you’ve done it the hard way let’s see the simpler way
totaldeformation.png
This formula works but instead of telling you how here’s your assignment. Derive this formula and then use it to find the deformation of an aluminum circular rod 2 cm in diameter and 6 meters in length. The modulus for aluminum is 69 GPa. The load applied is 20,000 newtons or 20 Kn.

So far we have only covered one type of loading known as unaxial tensional loading. Don’t let the name confuse you it’s much more easily described in a picture.
Tension.png
Tension Loading
As you can see the stress is applied perpendicular, or normal, to one face and is pulling the piece apart.

The complementary stress is known as compression loading.
Compression.png
Compression Loading

And the last type of loading is known as shear loading
Shear.png
Shear Loading

As you may notice it’s not exactly like the other two. Instead of loading normal to a face, it’s loading parallel to the face. And this creates an diagonal deformation. The best way to describe shear loading is through an angle, commonly referred to as alpha. Shear deformation is calculated in a similar fashion to linear deformation (deformation along a straight line) but requires a few more terms to learn. However they’re very similar to the ones we’ve learned above so breath a sigh of relief and continue on.

Image Source
http://www.tulane.edu/~sanelson/

As promised here are the important variables used for shear deformation

Shear Modulus/Modulus of Rigidity; G (Pascals/Psi)
Similar to Young’s Modulus this describes the resistance to shear, or angular, deformation.

Shear Stress; τ (Pascals/Psi)
Shear stress is stress applied parallel to the face of an object.

Shear Strain; γ (radians which are also unitless)
Shear strain is defined by the angle of deformation.

Shear is a little bit trickier to understand but I used this example to help me remember it when I first learned it. Imagine a deck of cards, when you push into the cards, the entire deck compresses slightly which is normal strain. However if you take a deck and push across the face it slides out at an angle. The bottom card stays put, the top card moves a lot, and the cards in between form a strain line.

Here is an image showing shear strain. If all the text doesn’t make sense to you don’t worry. Just pay attention to the picture.

http://www.btinternet.com/~martin.chaplin/images/hyvisco2.jpg

Givens: A 2 inch tall plate is loaded in shear. The shear face is 2.5 inches by 16 inches, the shear modulus is 90 ksi and the load is 72,000 lbs. Find the shear strain and linear deformation of the top of the plate.

First we need to find the shear stress.
shear.png
Exactly the same as regular stress. Just force over area.

Next shear strain or angular deformation
strain.png
In this case notice how the final units are radians. Radians are not a unit, they’re unitless however it’s important to specify so anyone reading knows what angular system is being used and that it’s an angle at all. This is very important for the next step.

deformation.png
This is the linear deformation of the top. Some of you might recognize this formula as the arc length. It is important to note that this value is an estimate. When angular deformation is small it is assumed to be linear.

With that you should be able to calculate basic shear deformations. If you’d like clarification or more examples PM or make a thread and I’ll help you out. However if you feel confident move on to the next lesson

The last basic descriptor for linear forces is Poisson’s Ratio. In technical terms Poisson’s ratio is the ratio of the strain in one direction and the strain in the normal direction. In layman’s terms it’s this. If you stretch a material in one direction, the other direction will shrink. You can easily verify this with a thick rubber band. Pull on it lengthwise and the width decreases. Divide the unit deformation, or strain, of the width by the strain of the length and you have Poisson’s ratio.

Poisson’s Ratio; ν (Unitless)
The ratio of strain in applied direction to the strain in the normal direction.

Here is Poisson’s ratio in equation form
poissons ratio.png
You can easily see that if we divide by strain in the one direction (e1) Nu is the ratio between the two. The negative sign shows that the strain in the two direction is the opposite type of the strain in the one direction. If we pull on the material the sides thin, if we compress it the sides thicken.

Throughout our lesson we have made some assumptions. Let’s get one things straight, even though it seems like engineers know what’s going on the reality is in many situations they don’t. They make a lot of guesses and take a lot of chances but by no means is it random. One of the most crucial aspects of professional engineering is knowing your assumptions and how to account for them. This seemingly simple task is the downfall of many students and professionals who simply take theory as fact and are subsequently befuddled when their system fails. So to help you avoid these mistakes let me take you through what we assumed.

Firstly, we have assumed that all materials were stressed in the elastic zone. Look at the equation for strain, from what it says strain varies linearly with force. Assume we have a 1 inch rubber band, and say if we apply 10 lbs of force it stretches to 2 inches. Now the above example says that if we apply another 10 lbs of force it’ll stretch to 3 inches. Now if we apply another 10 lbs, for a grand total of 30 lbs, it’ll stretch to 4 inches. And so on and so forth until infinity, But in real life we know at some point the rubber band breaks.

The same idea goes for a spring, you can stretch it some but after point it starts to unwind and feel loose. This relationship is graphed on what’s called a stress strain graph and it’s very important to pay close attention to it when selecting a material.
stressstrain.svg.jpg
Stress Strain Graph
You can see at the very start the relationship between stress and strain is linear. The slope of that line is actually Young’s Modulus and this graph is actually how it’s determined for new materials.
However let’s look past the strain line, you see that around point 2, the line changes, the relationship between stress and strain is no longer linear. As the strain increases the stress does different things. For some material’s it decreases, for others it increases. Once you get into this zone the material is permanently deformed and this region is known as the plastic region. After that curve continues until the material breaks.

You can experience this stress strain graph with a simple metal paperclip. Bend it a small distance and you can feel the paperclip resist deformation increasingly. When you let go it snaps back to its original position. However keep bending it you’ll notice that it goes “loose.” When you let go it’ll snap back some but not back to where it was originally. Continue bending it and it’ll eventually break.

Another thing we assumed is that the material is isotropic. That means the material is the same in every direction. This is true of metals, plastic and ceramics. No matter which way I slice it, it’s the same material. This also means that I can pull on it from any direction and it will have the same properties. This is NOT true of composites, If all the fibers are running north and south, the properties in the east and west direction will be TOTALLY different.

If you read carefully and understood all this material you now have a basic idea of variables and concepts frequently used in materials sciences. I’ve skipped over many important points, such as Mohr’s circle, torsion that all engineering students are required to learn. The main reason I’ve done this is because for the ensuing composites lessons they will not be needed.

The next thread will be dedicated to analyzing of composite materials. I am the first to admit that my knowledge in this field rudimentary. I have not taken many advanced classes, such as finite element analysis or continuum mechanics so my knowledge is limited in this regards. However I will do my best to explain the knowledge I do know.

I have only learned to analyze flat plates of material but this is the basis of further understanding. All the skills needed to analyze simple plates of composite materials are needed to analyze complex structures.