Check out my chin spoiler....criticism of technique encouraged

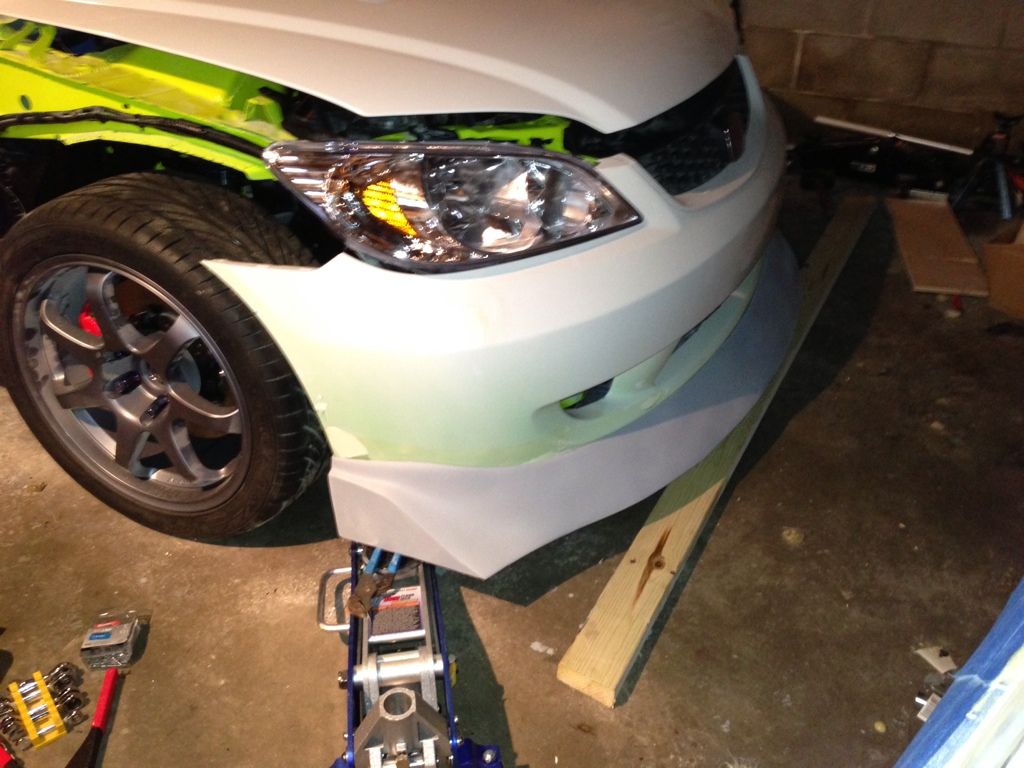
I am building a 7th generation civic and there is very little aftermarket support for this body style. I built a simple fiberglass splitter last year and it turned out nice, but I never really liked the gap between the splitter and the eBay chin spoiler right in the middle.

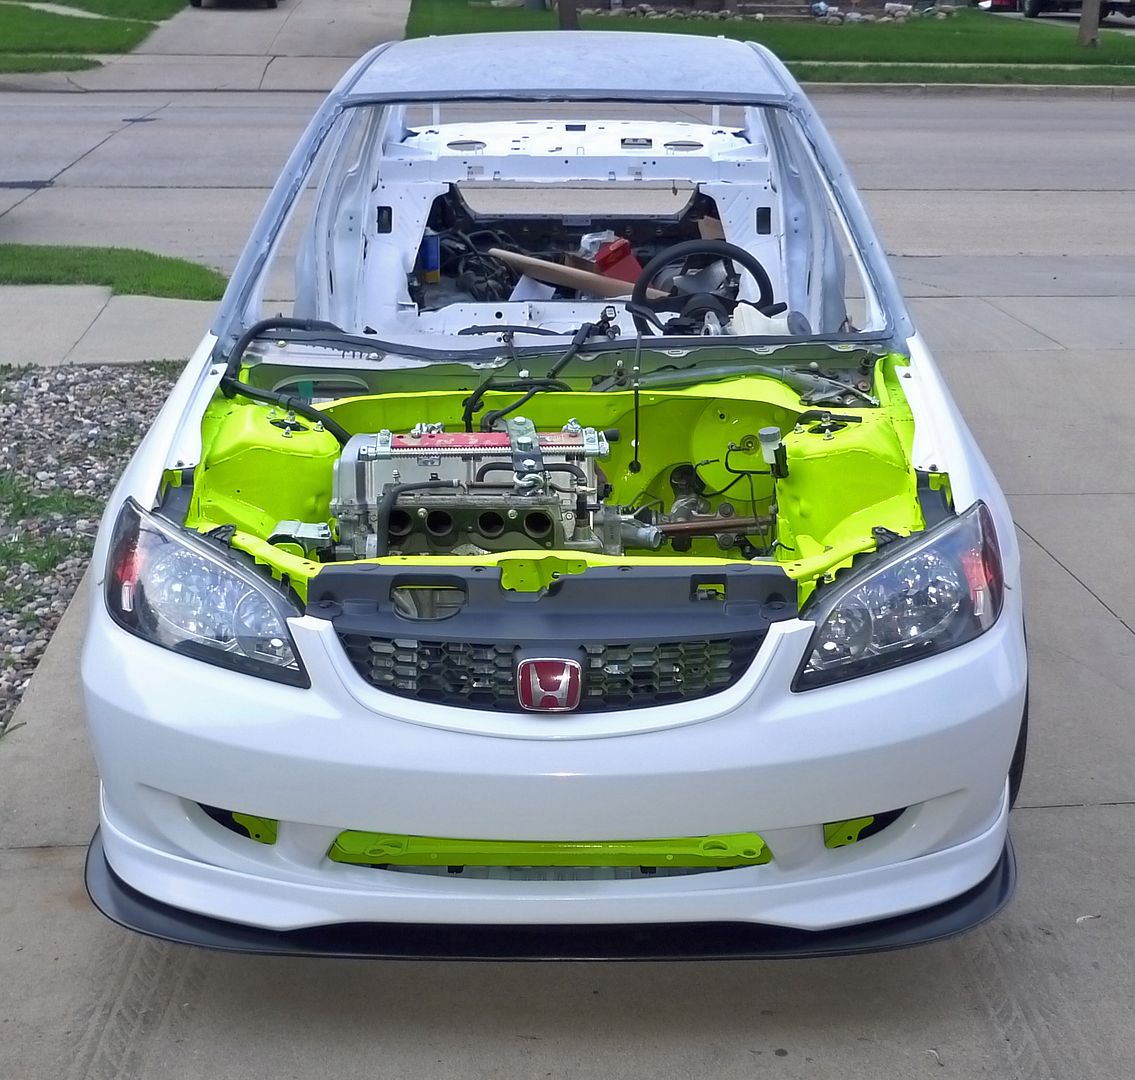
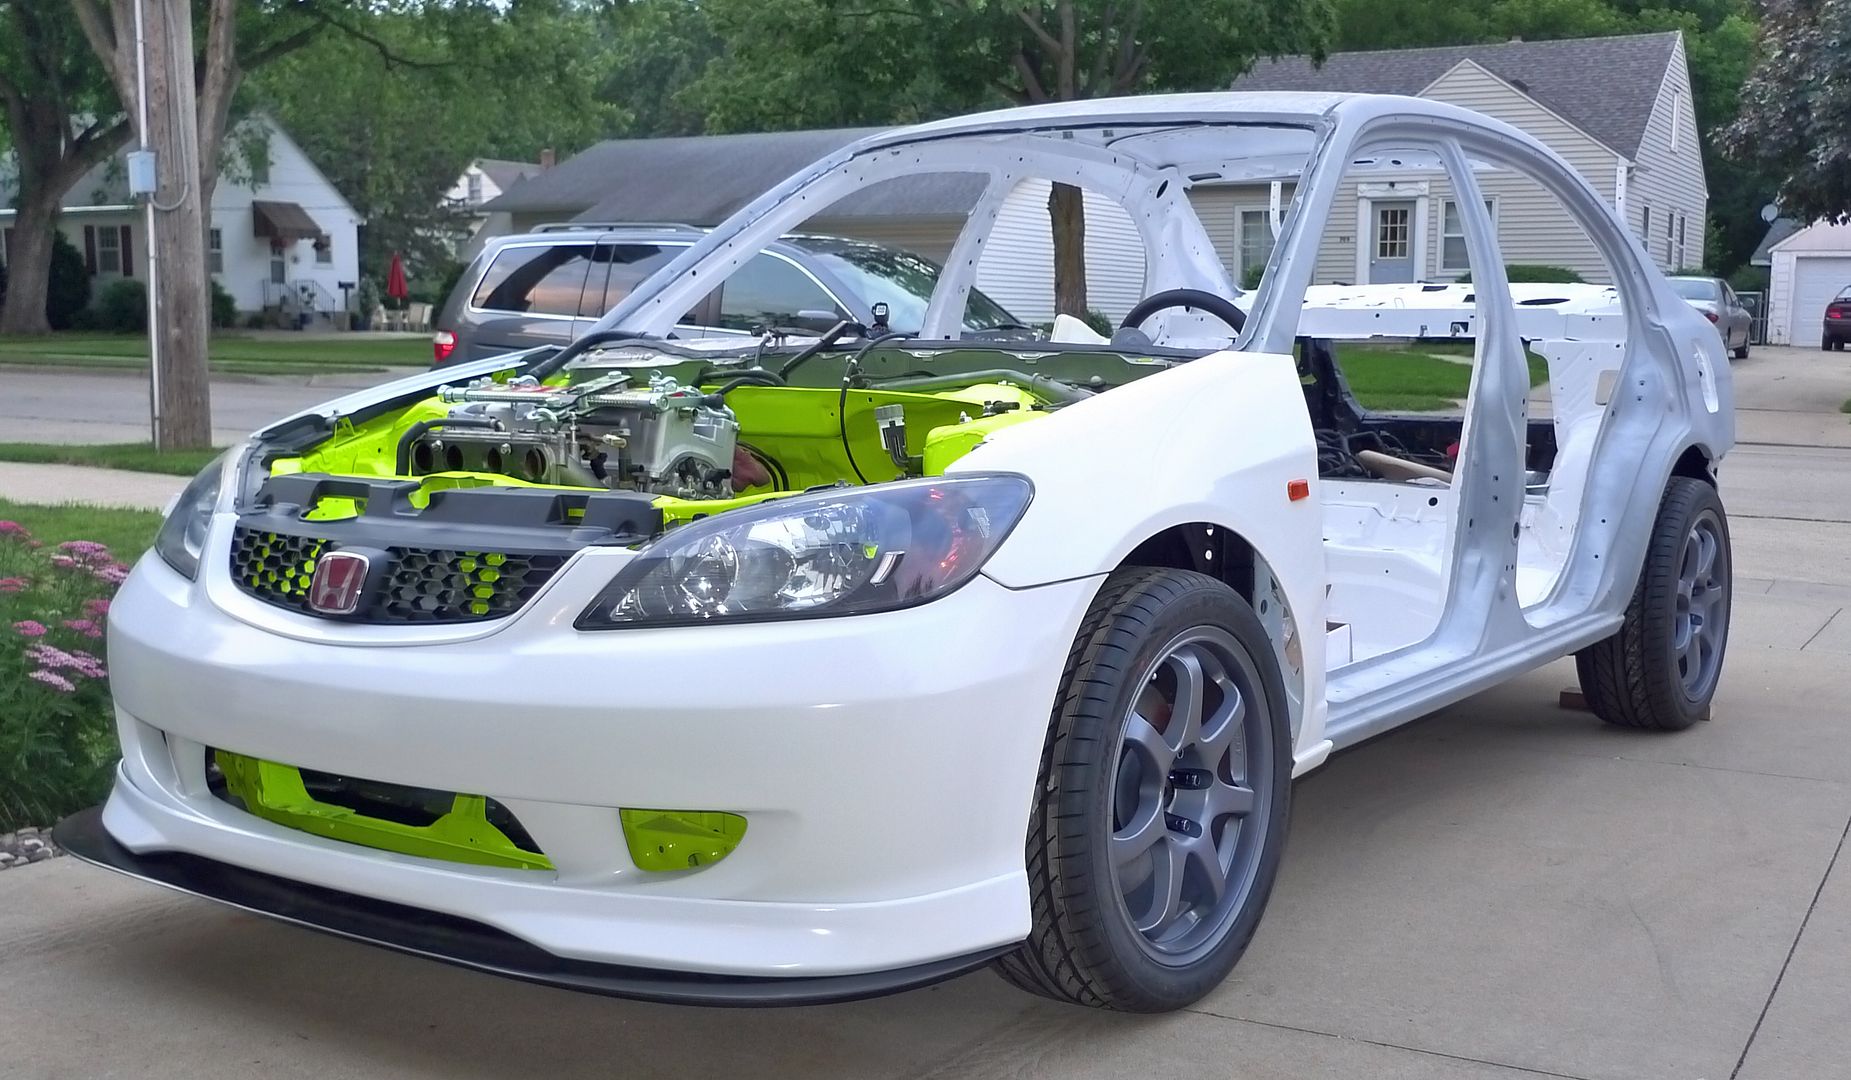
I wanted something unique, aggressive, and with a flat bottom to mount a splitter without a gap. What to do?

Build it:cool:

At first I wanted to go with something fairly simple and flat along the bottom. Like the lower edge of this Scion frs bumper…not a lot of angles and would be fairly easy to make:

But I also like the style of the Js Racing chin spoiler for the 8th gen civic…

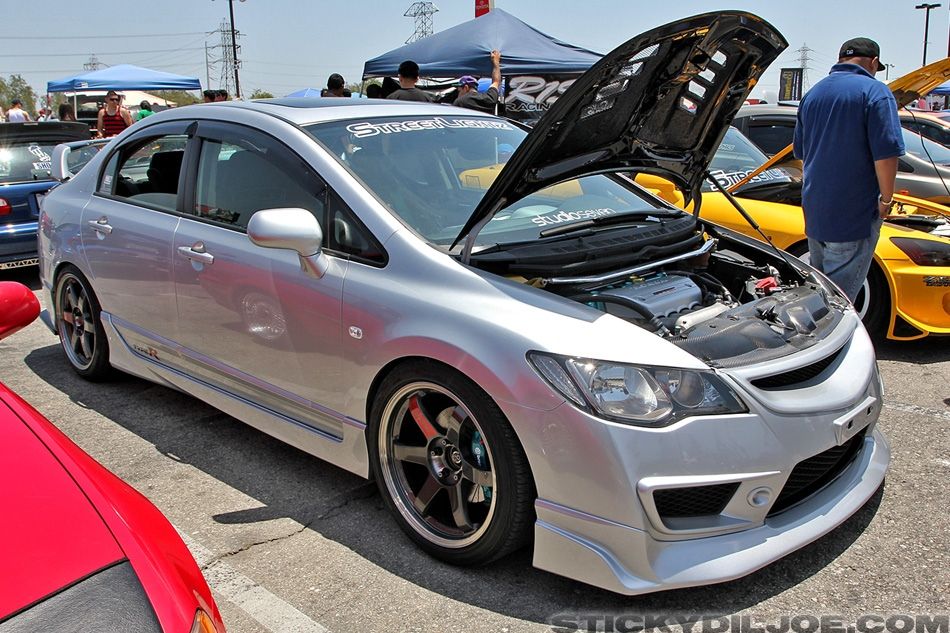
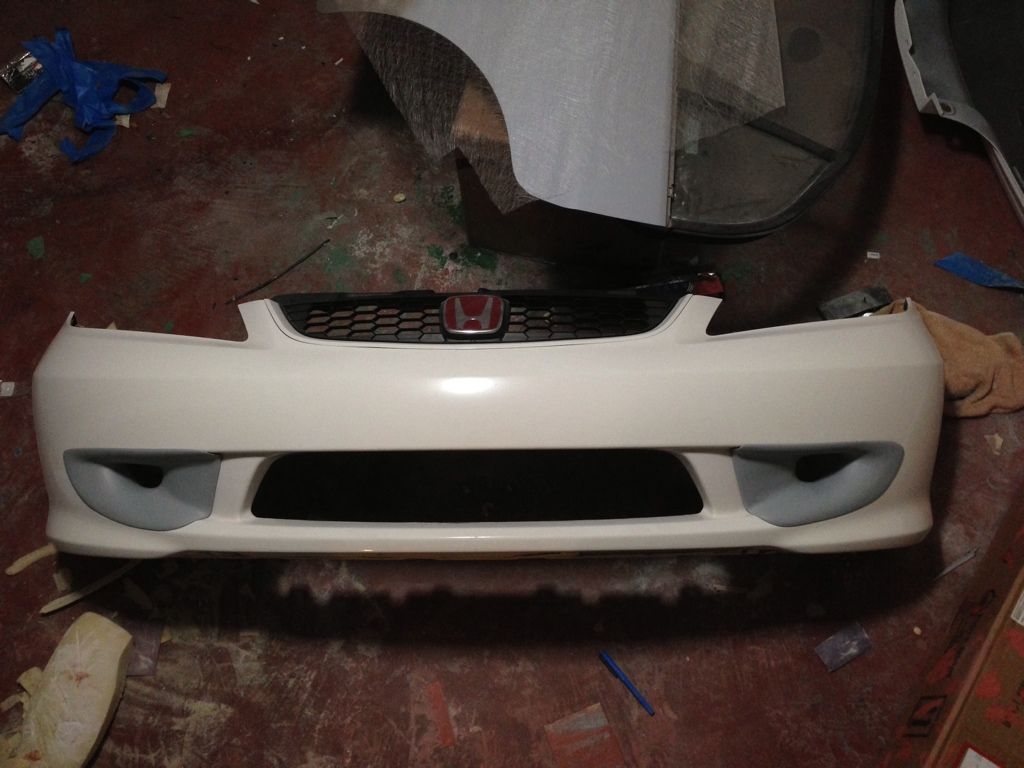
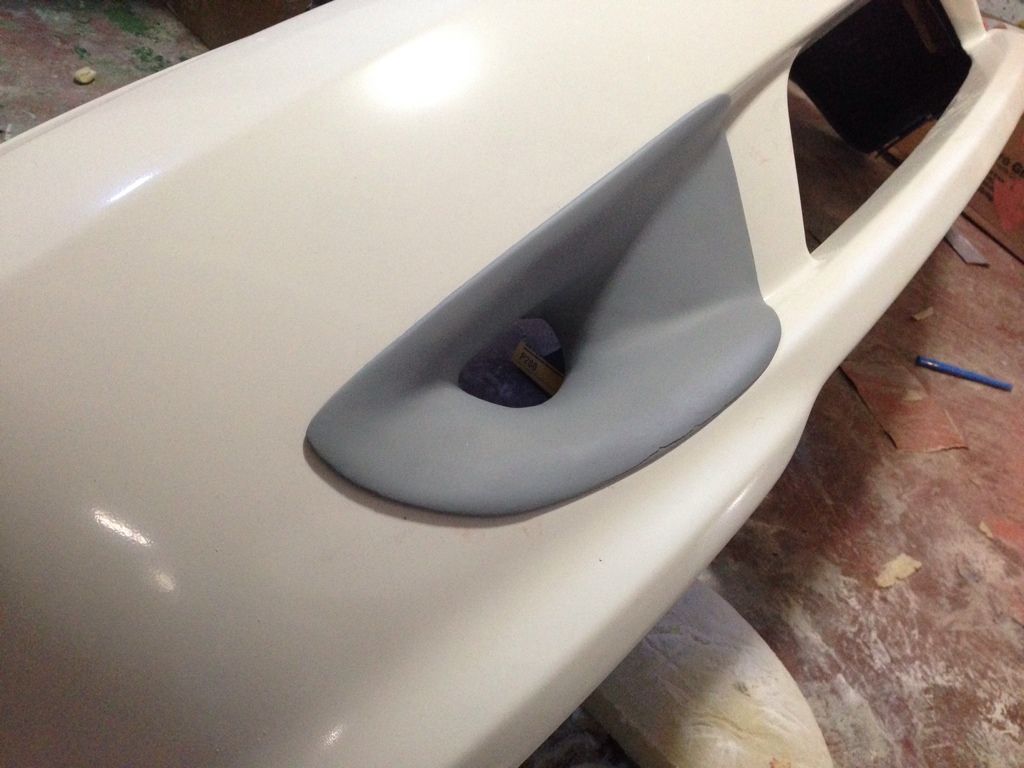
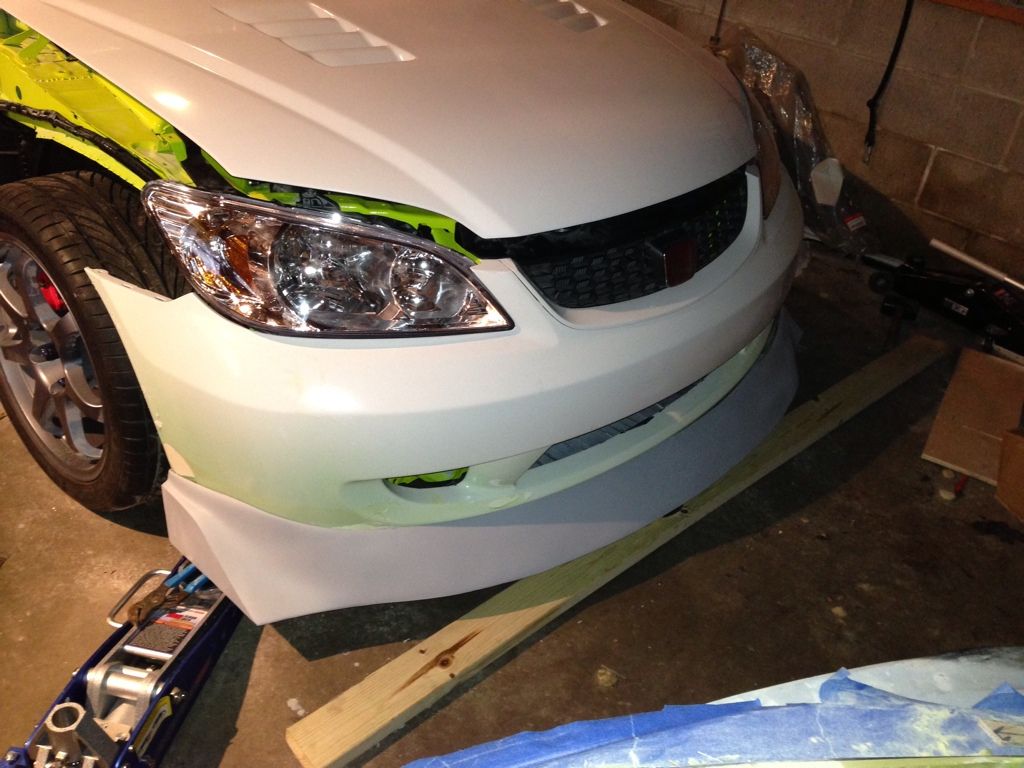
So I decided to build a “hybrid” version of both.

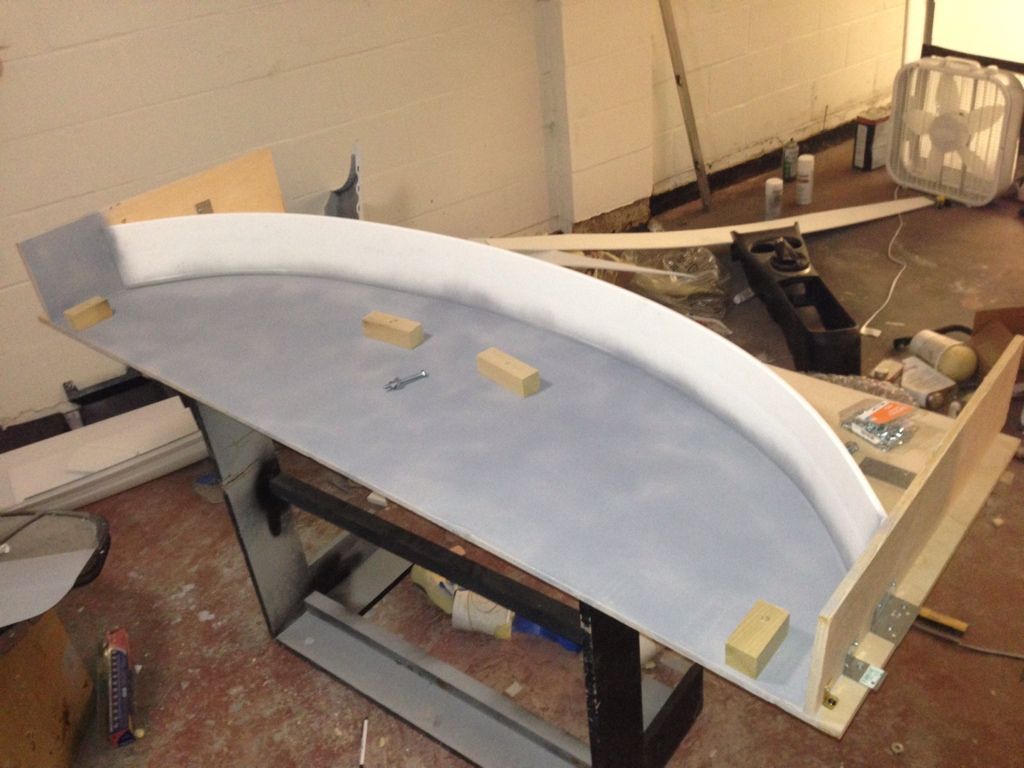
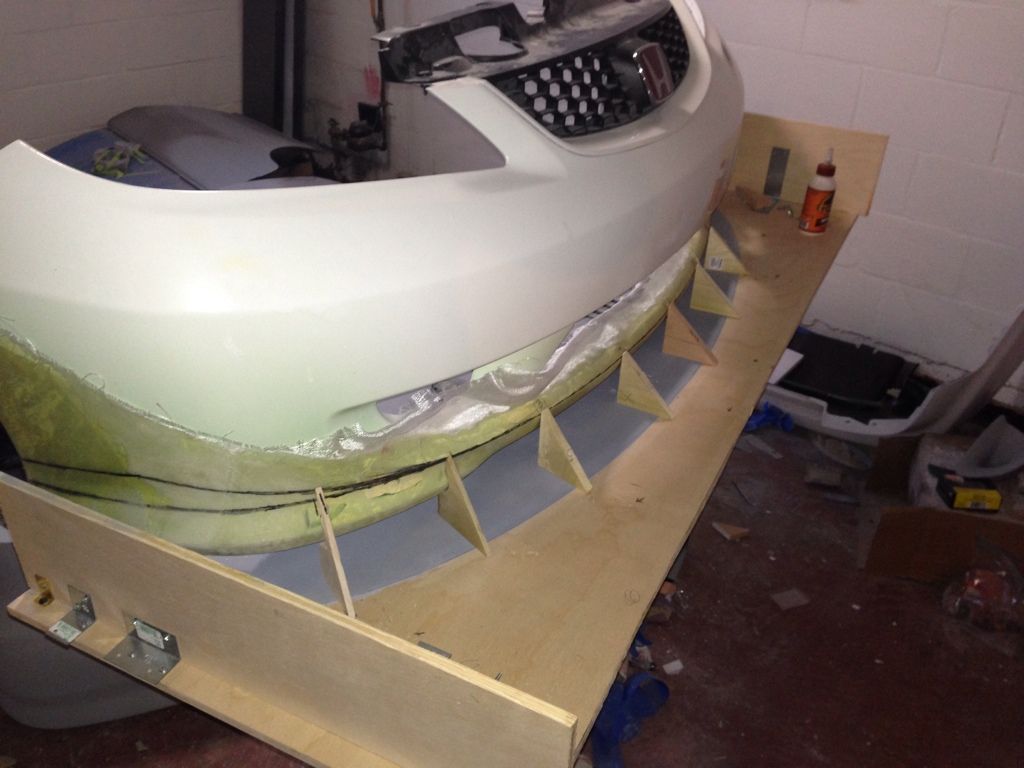
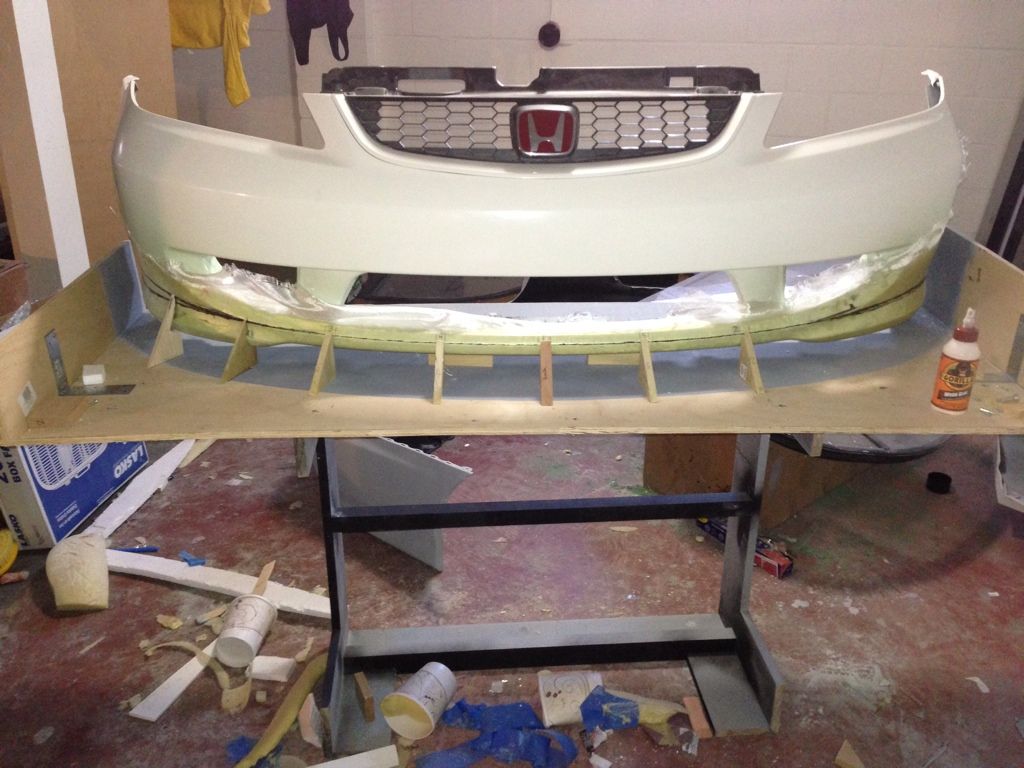
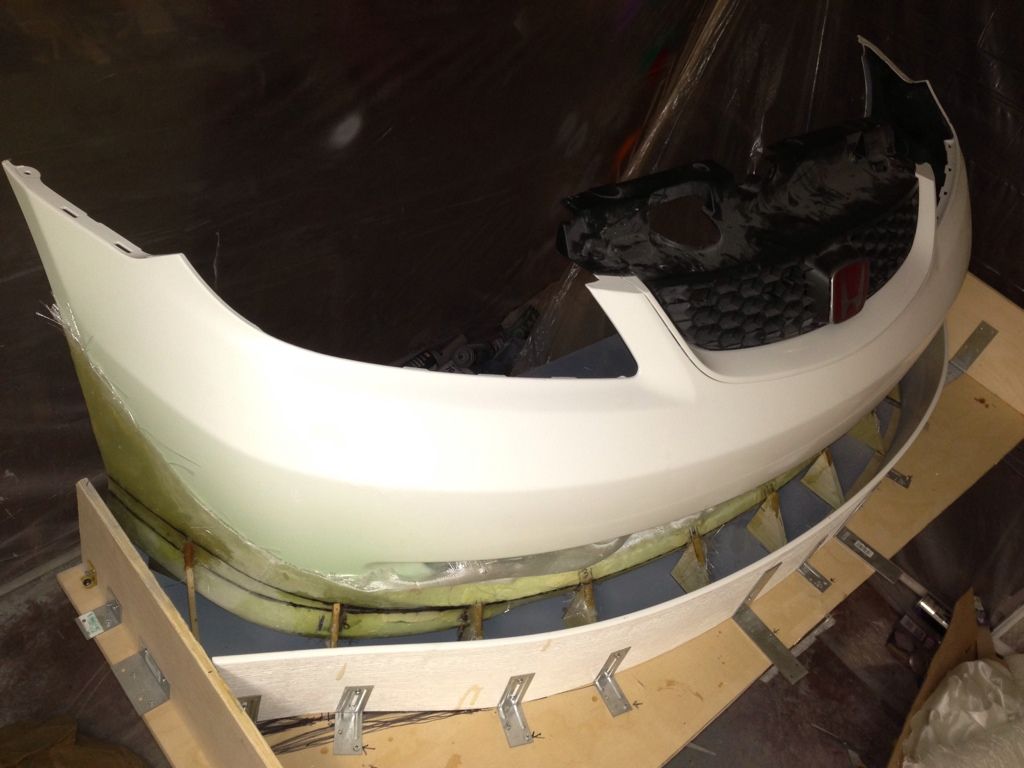
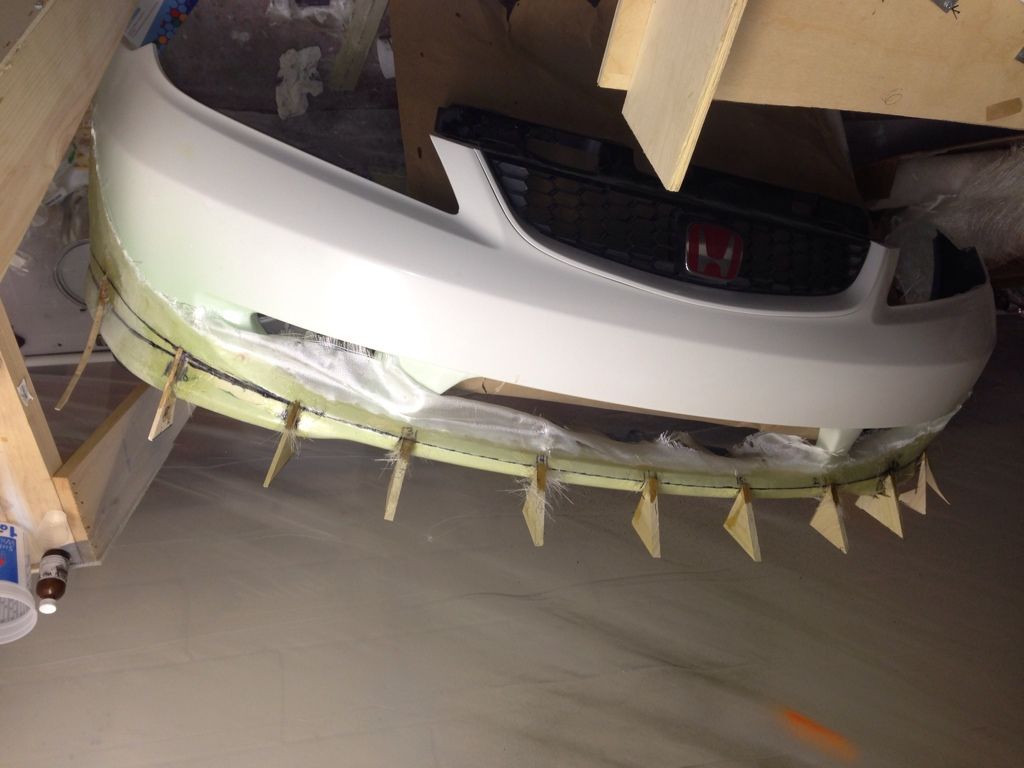
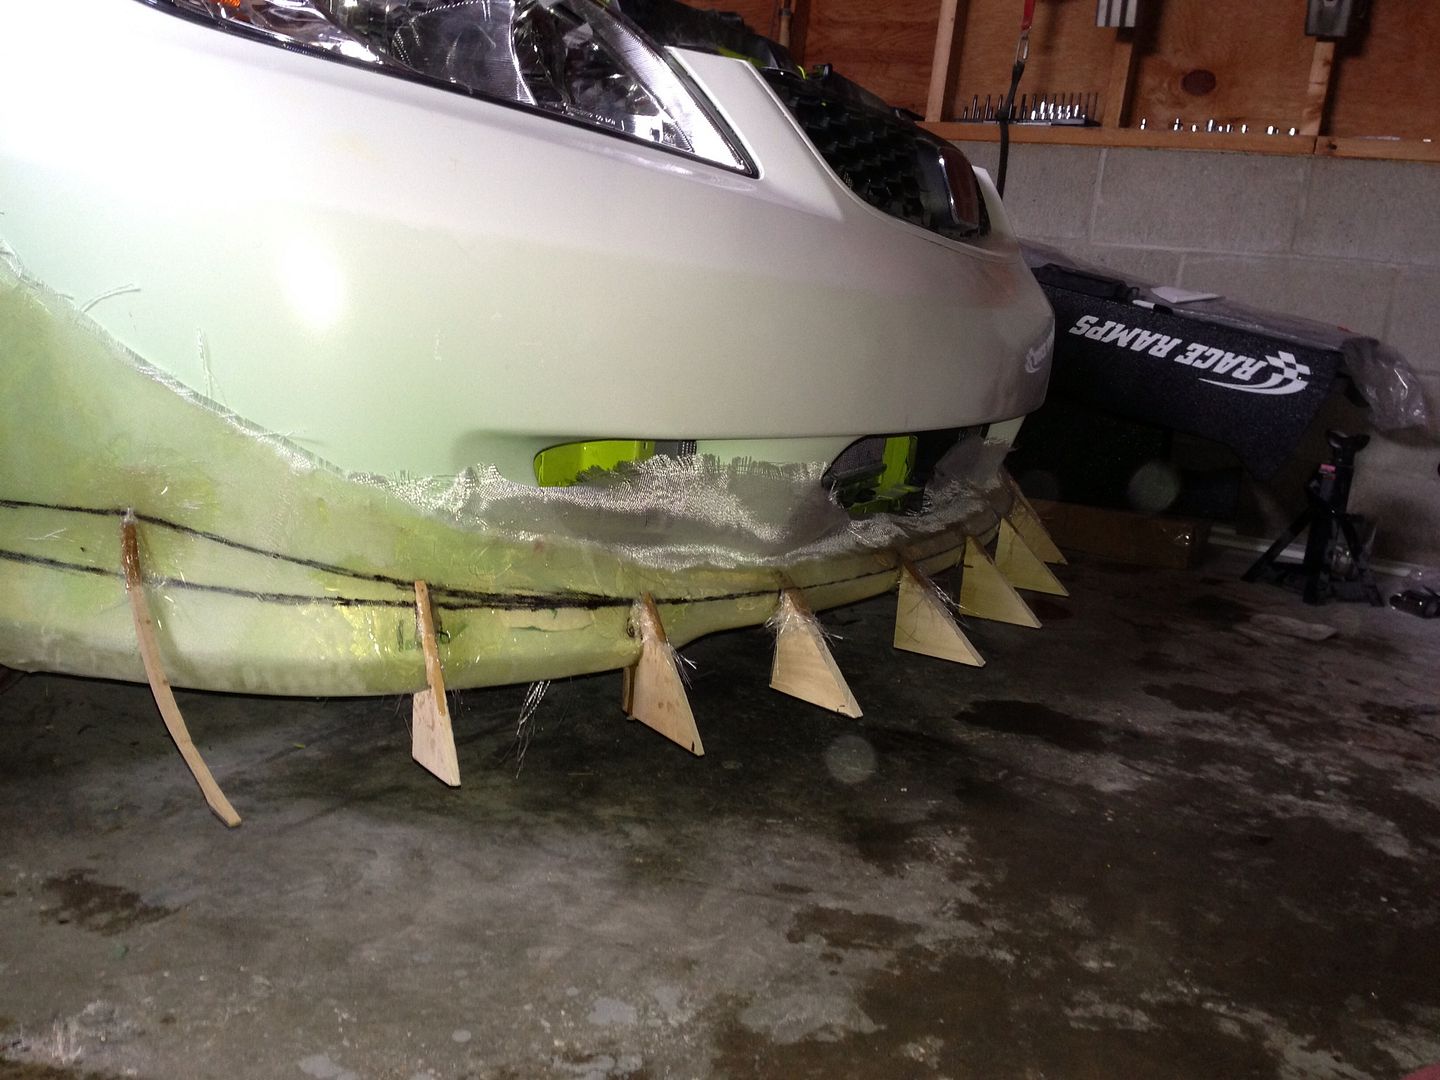
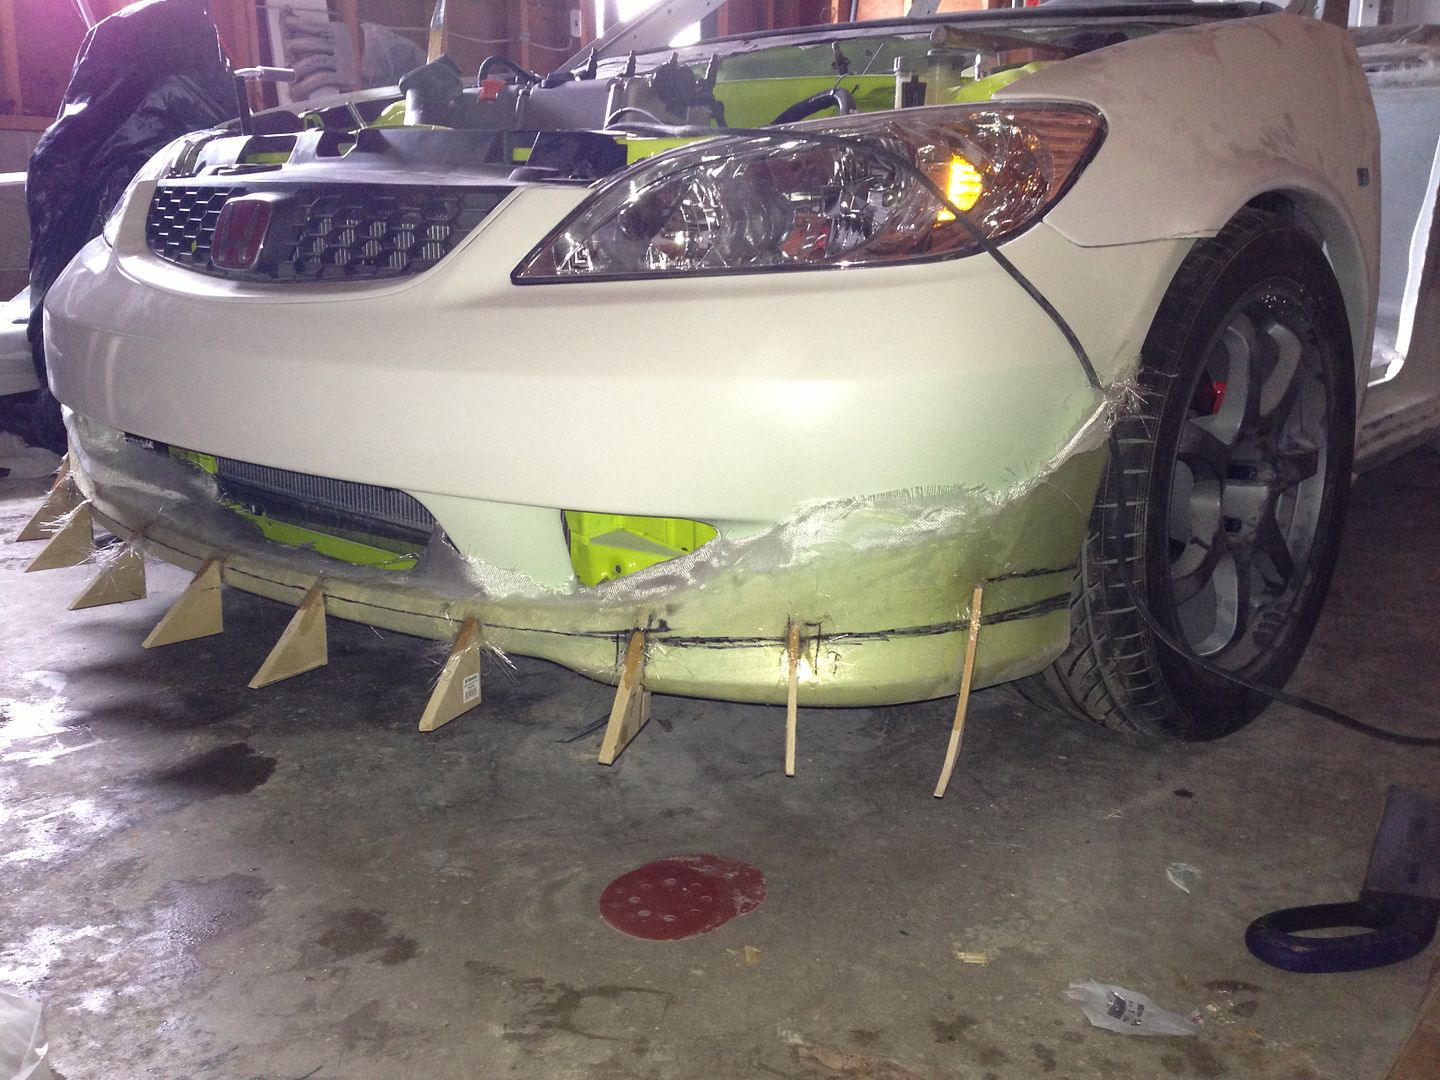
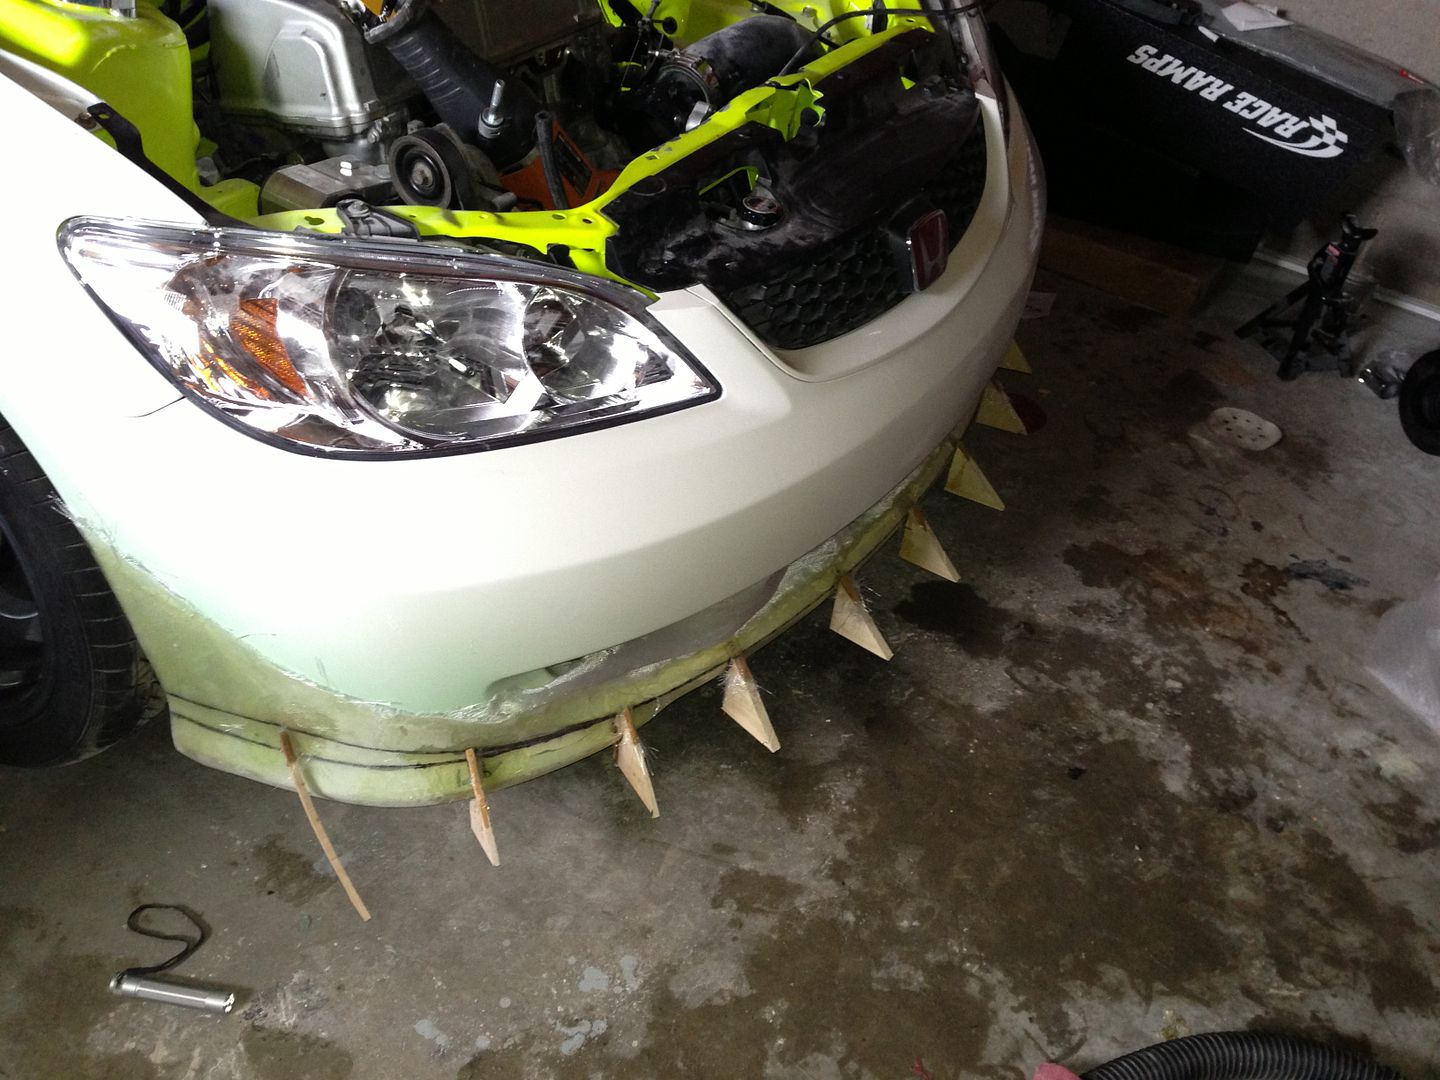
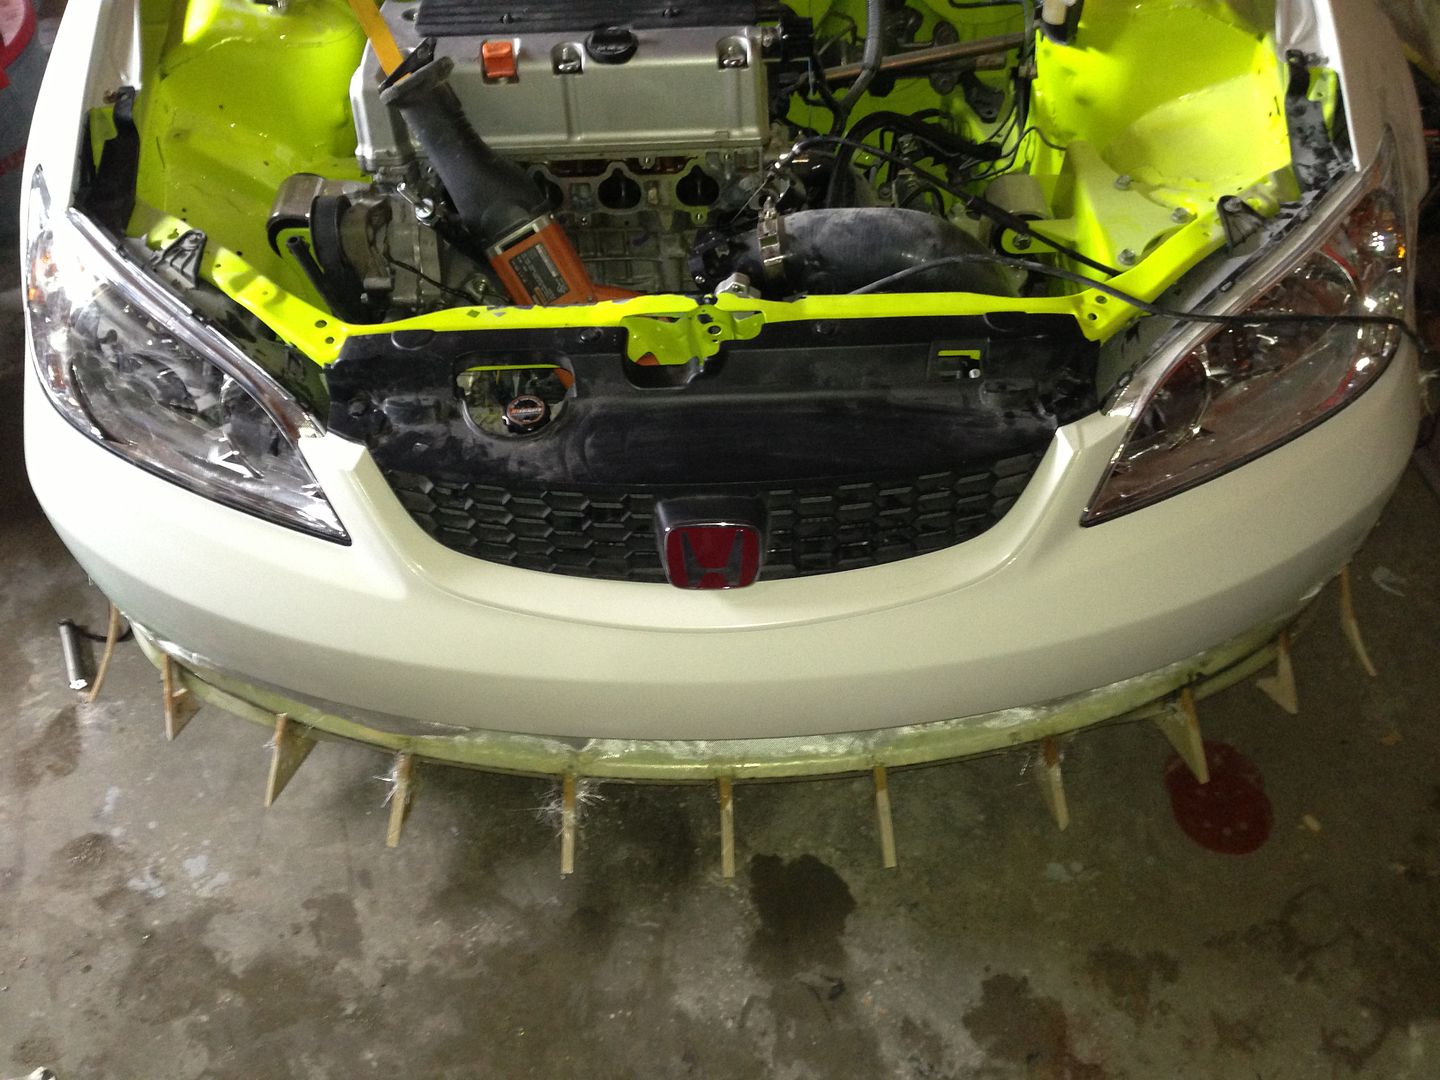
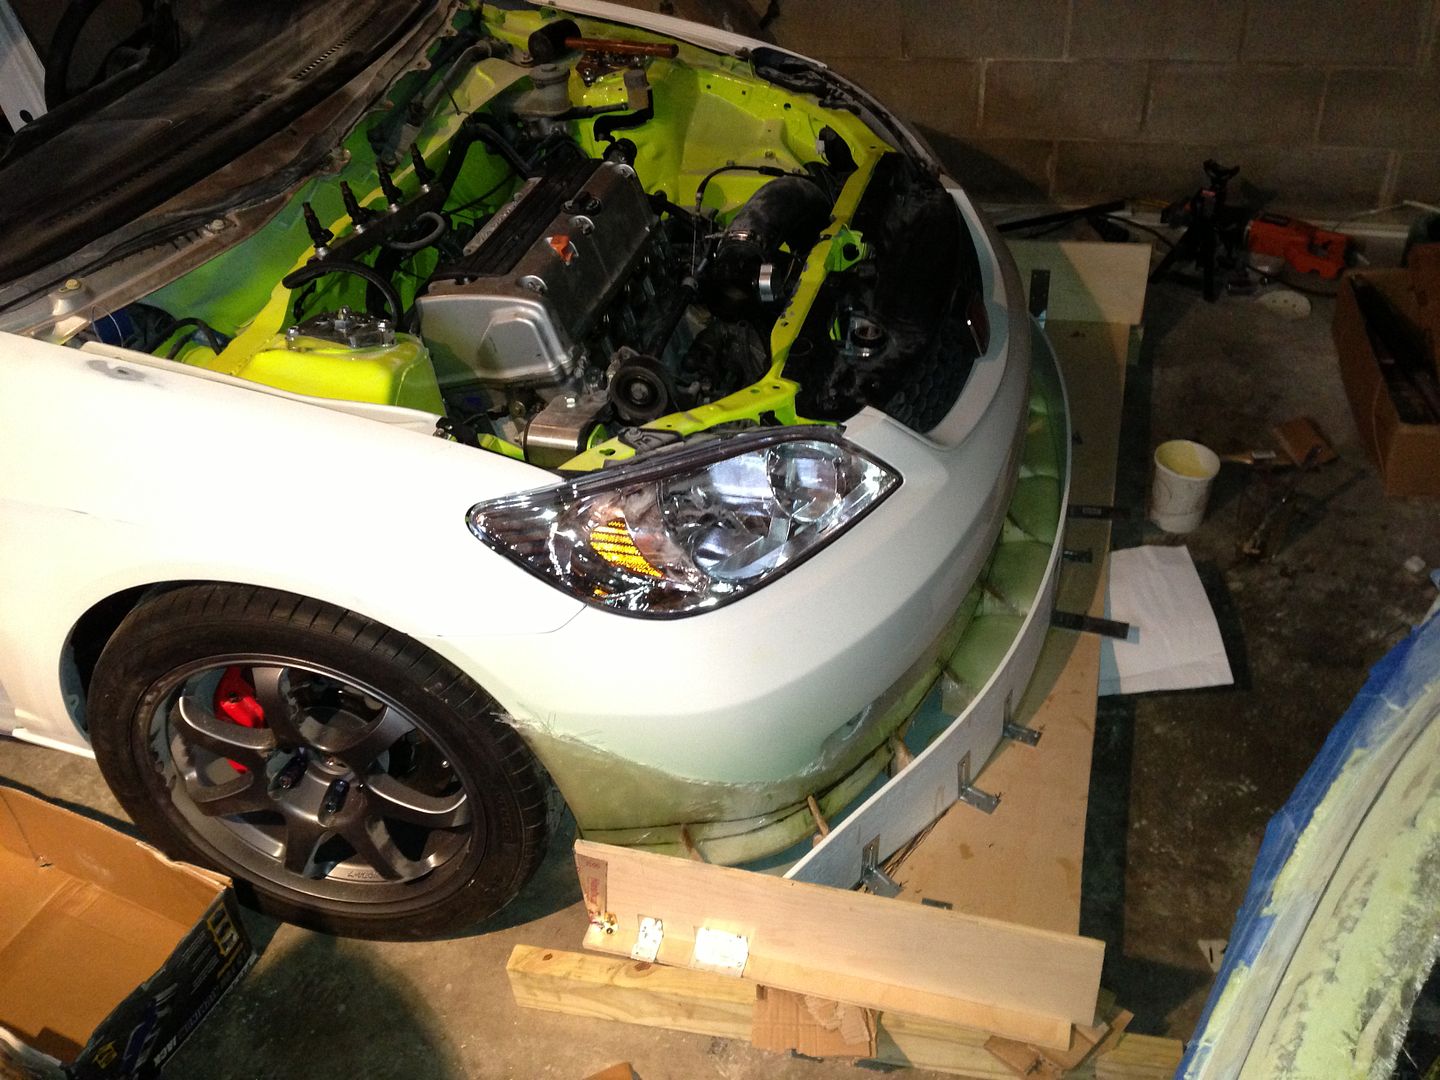
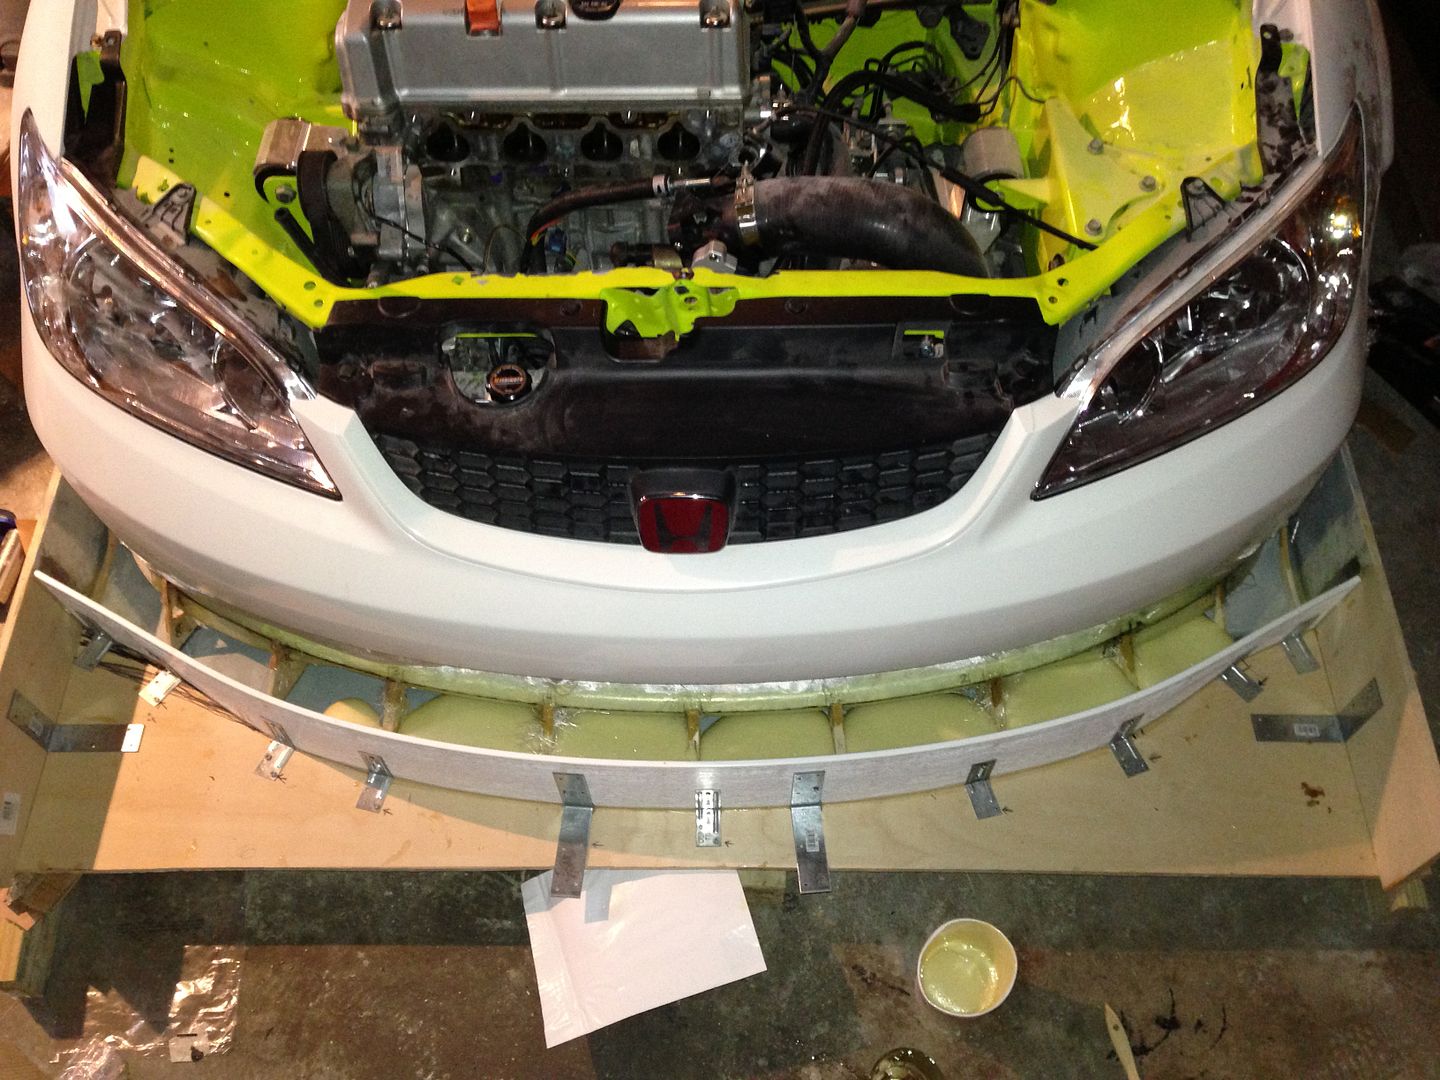
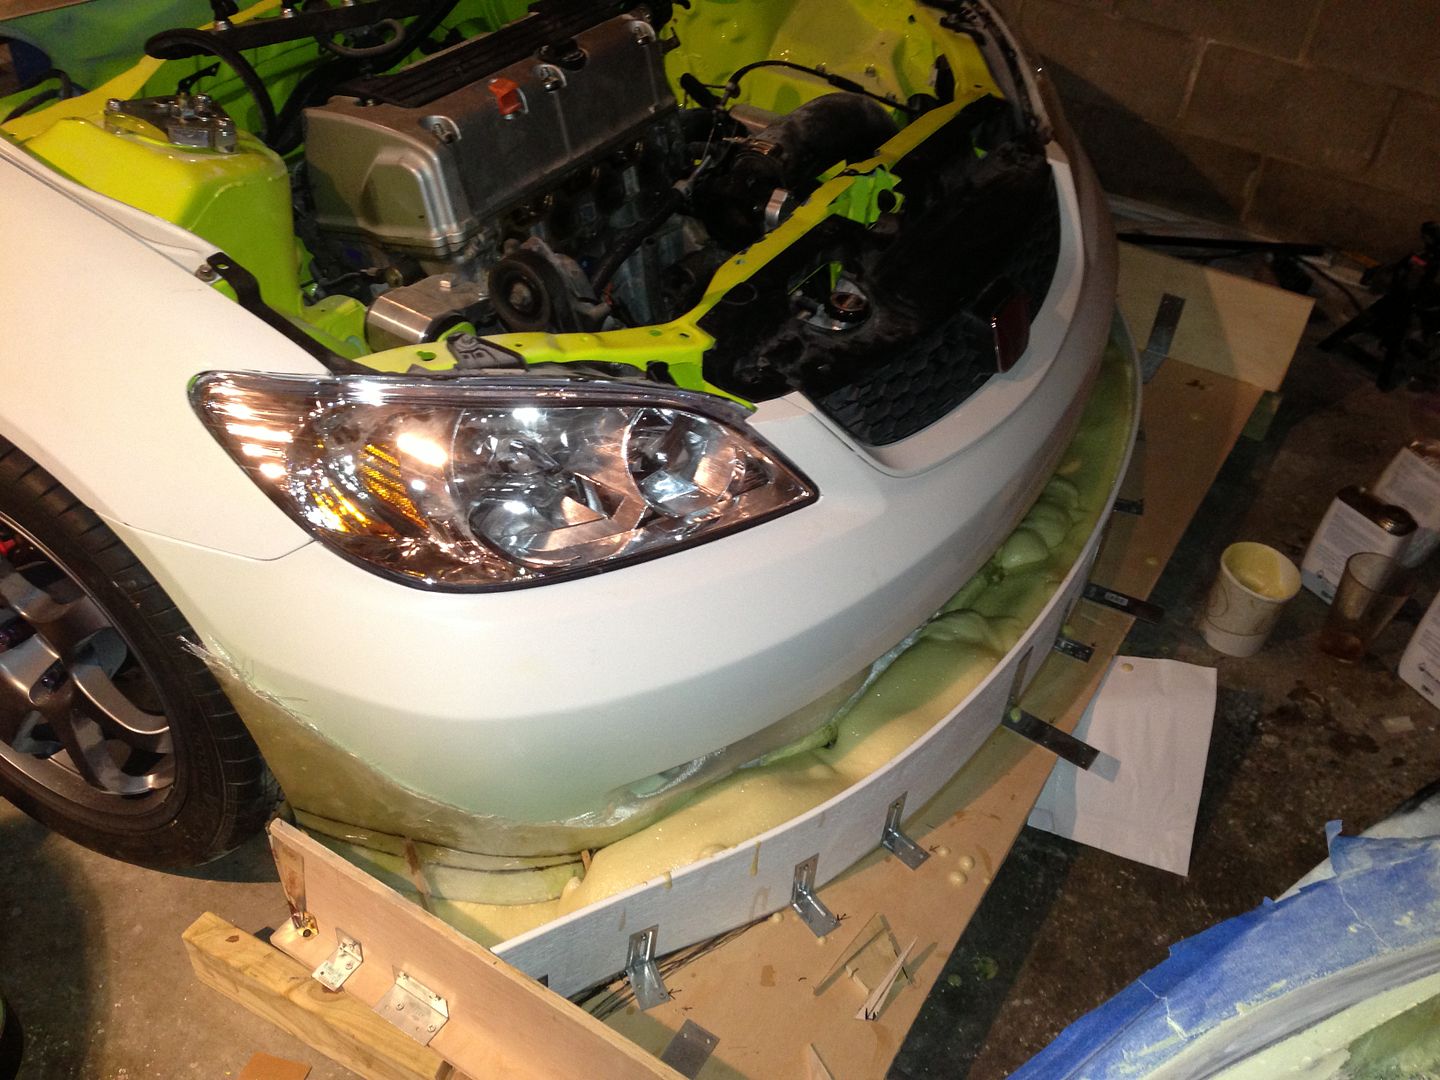
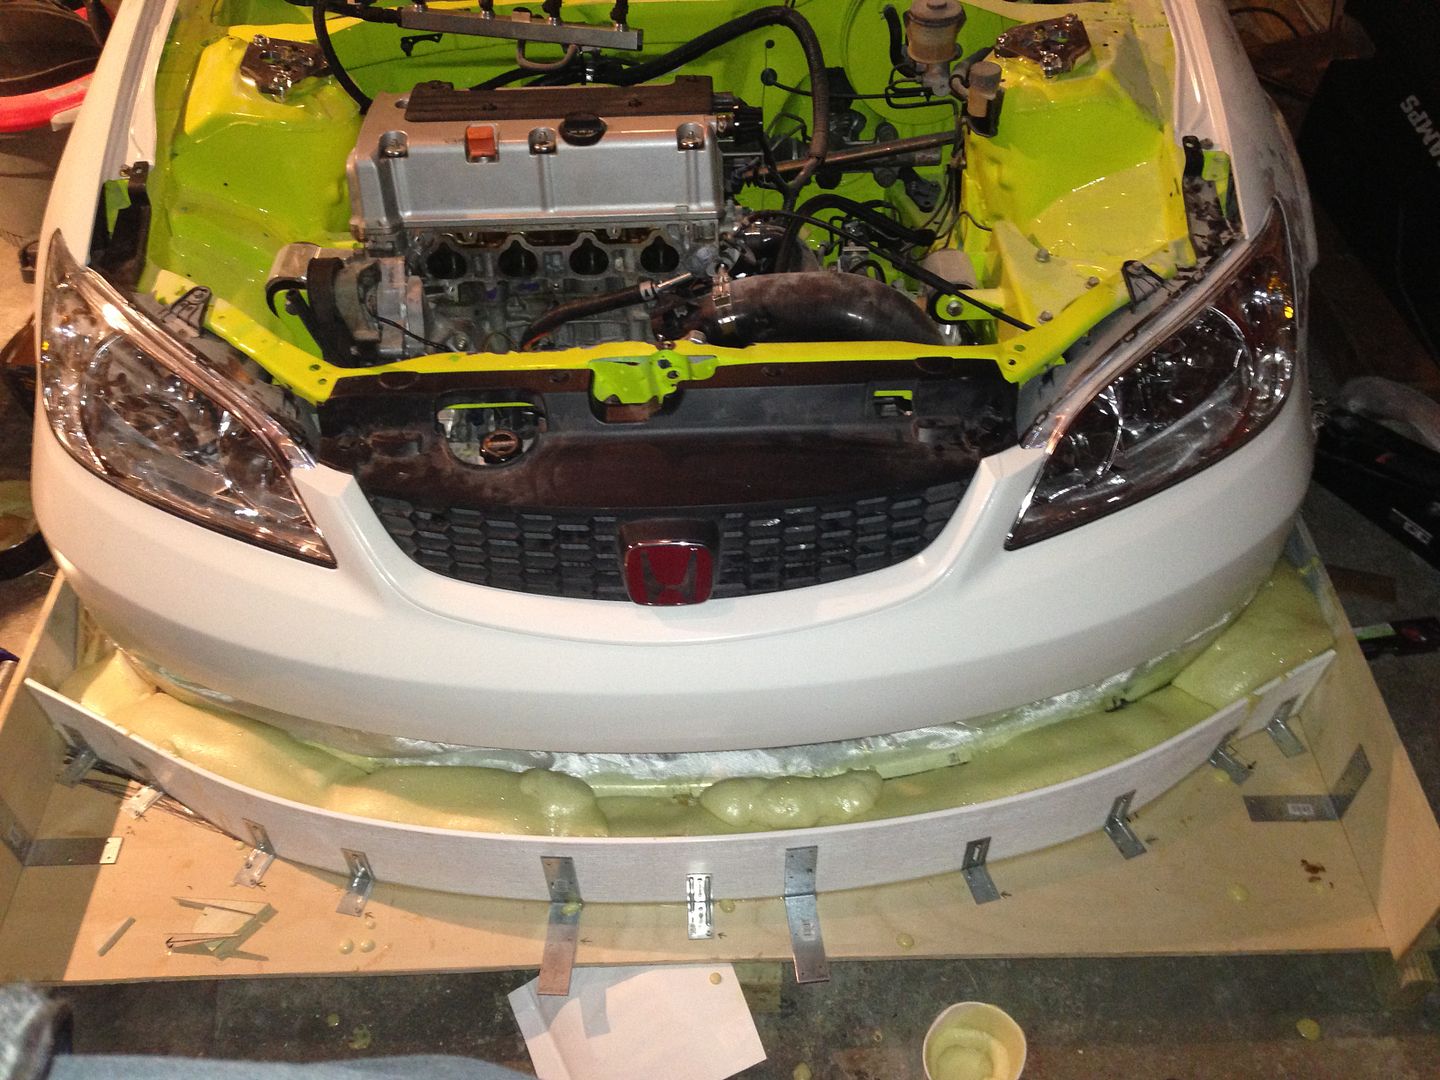
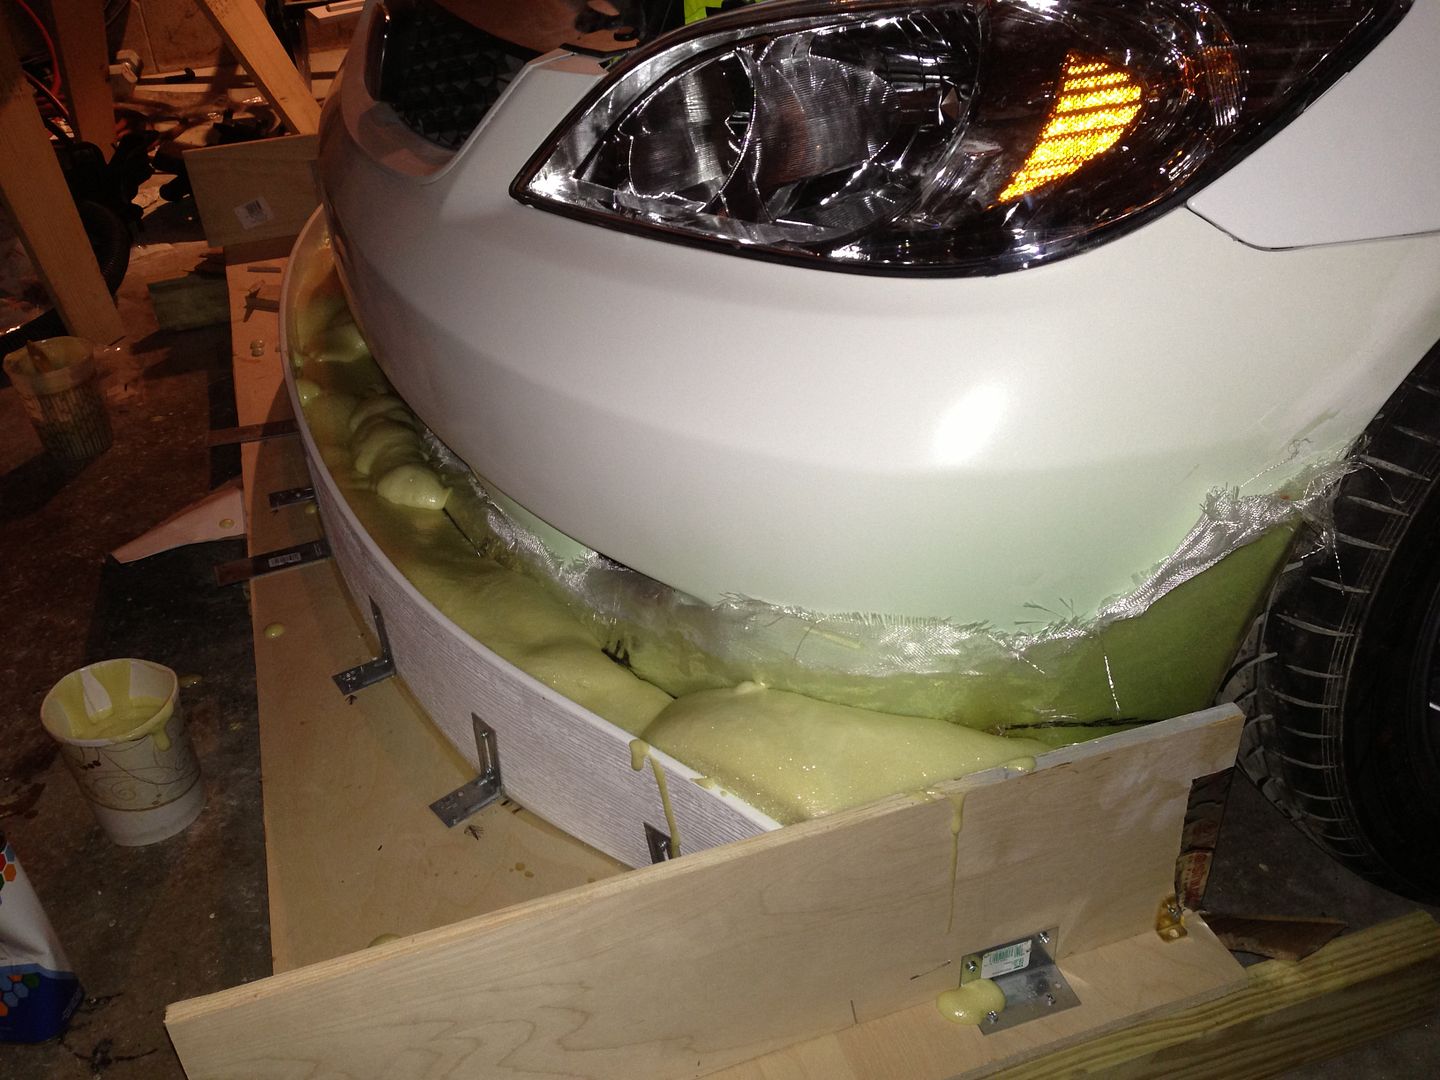
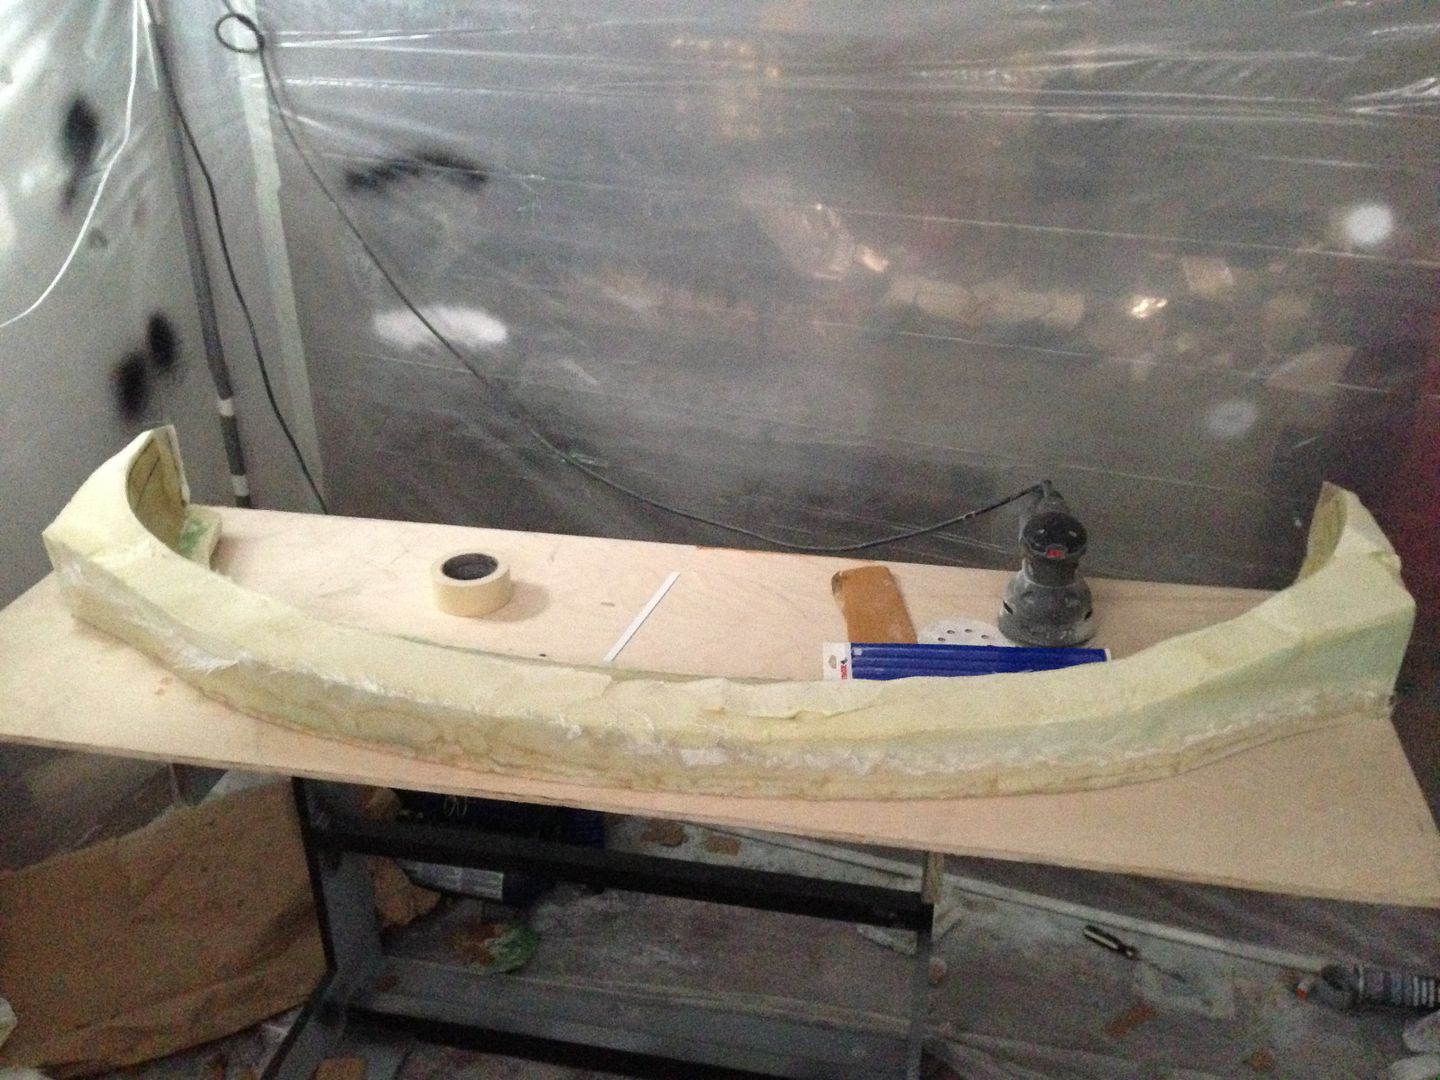
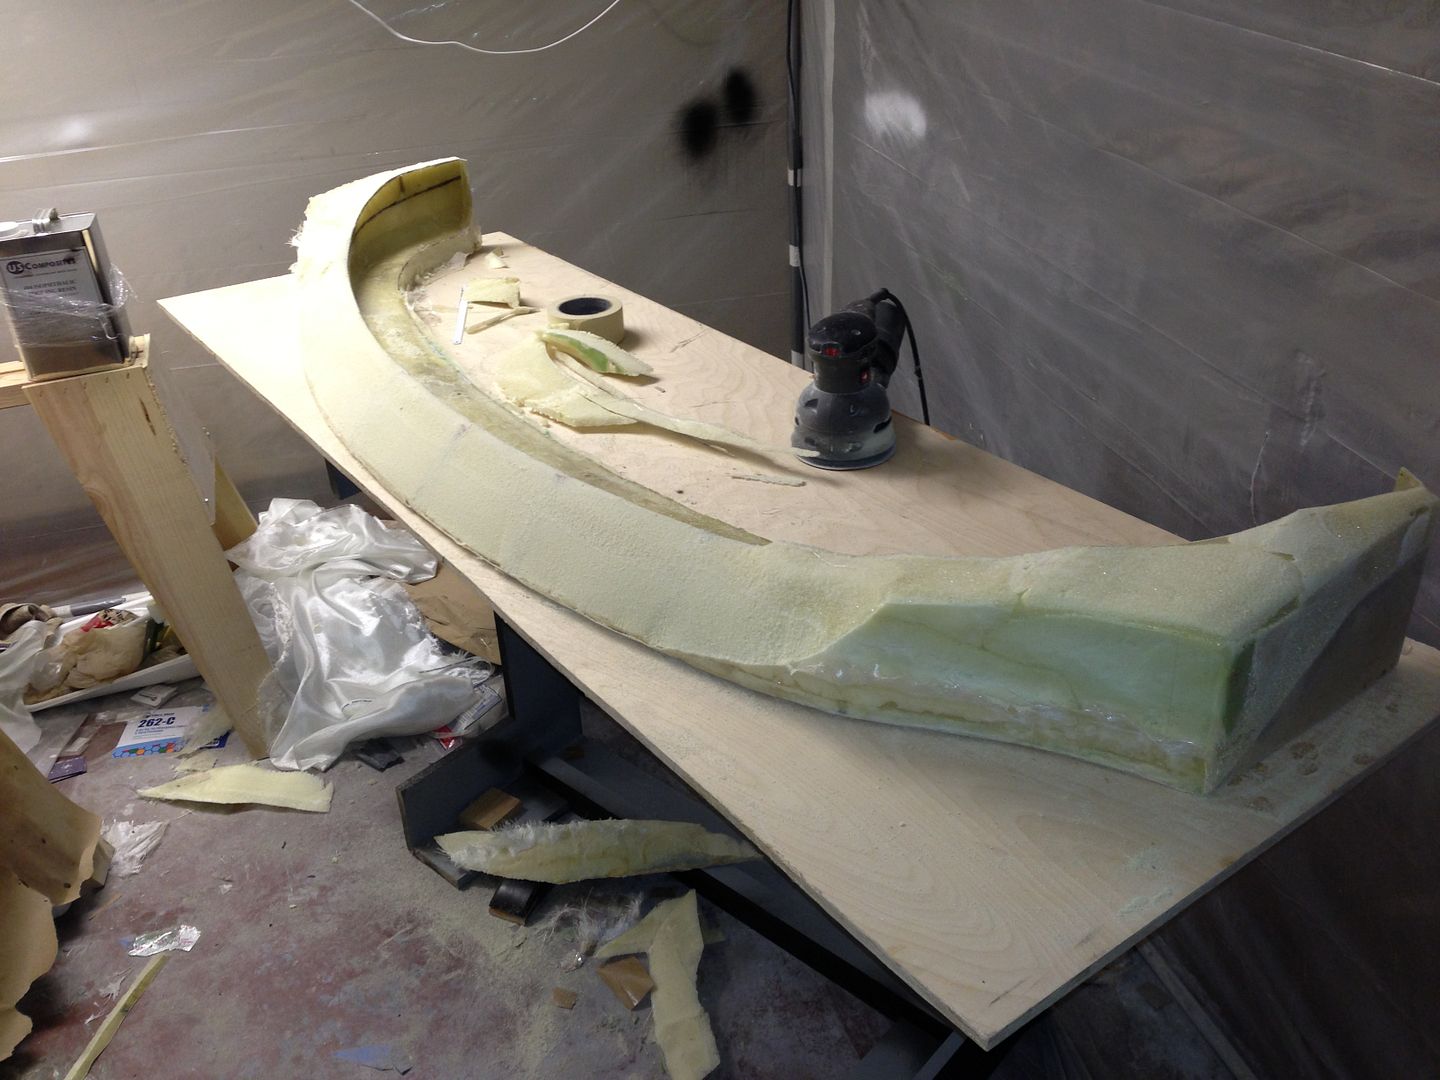
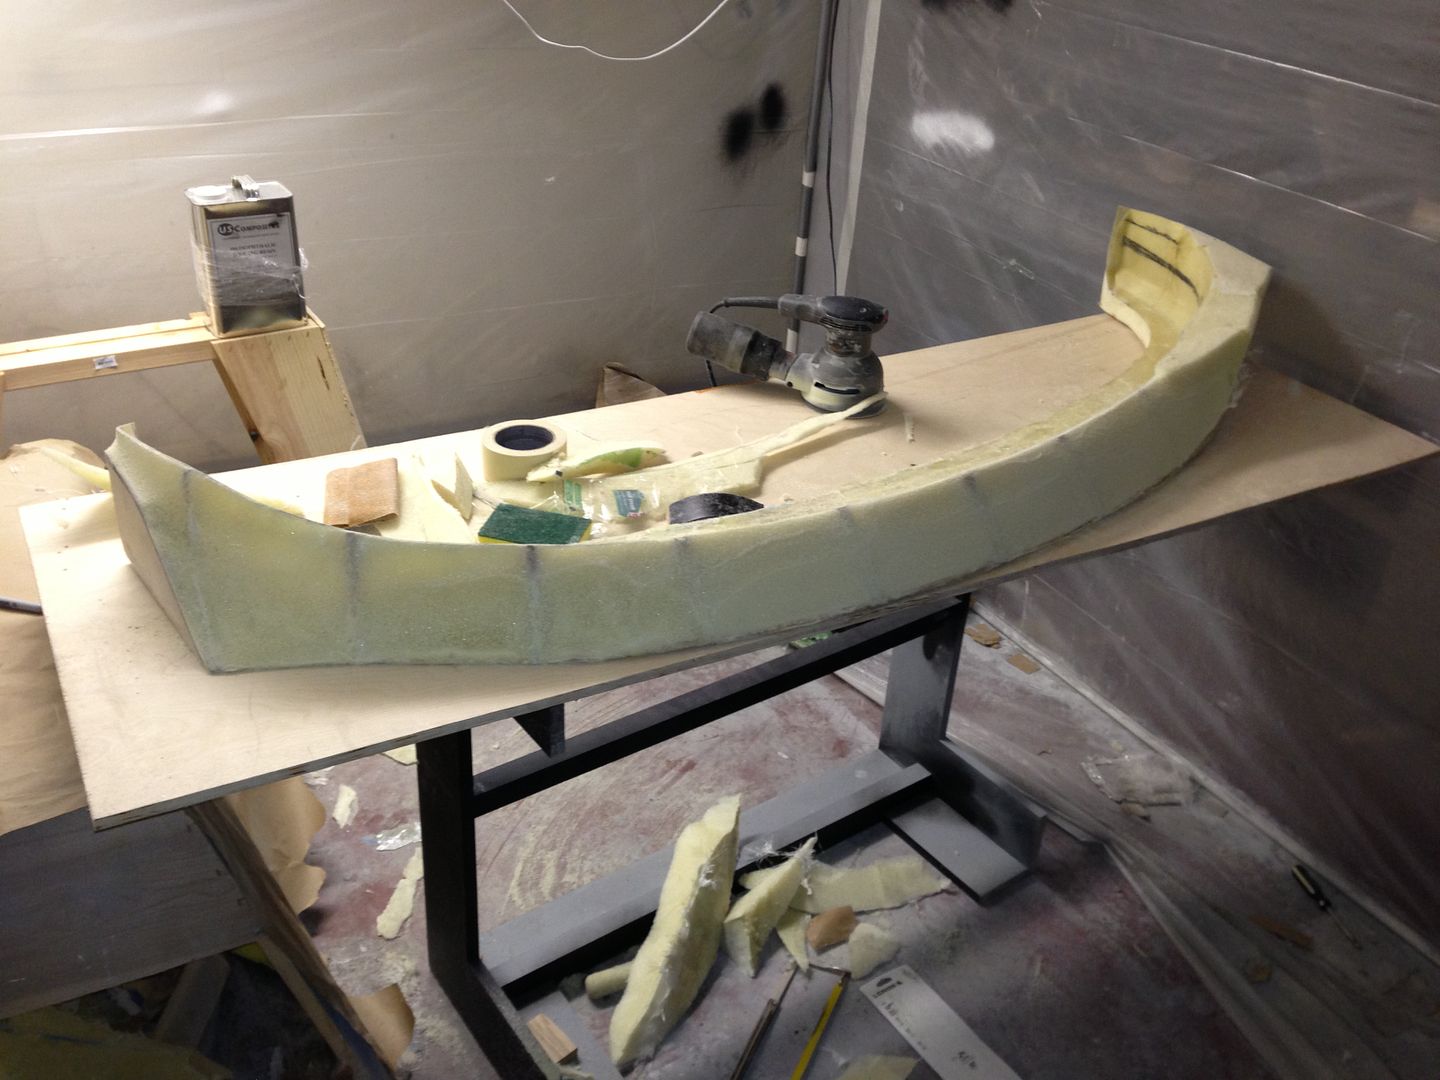
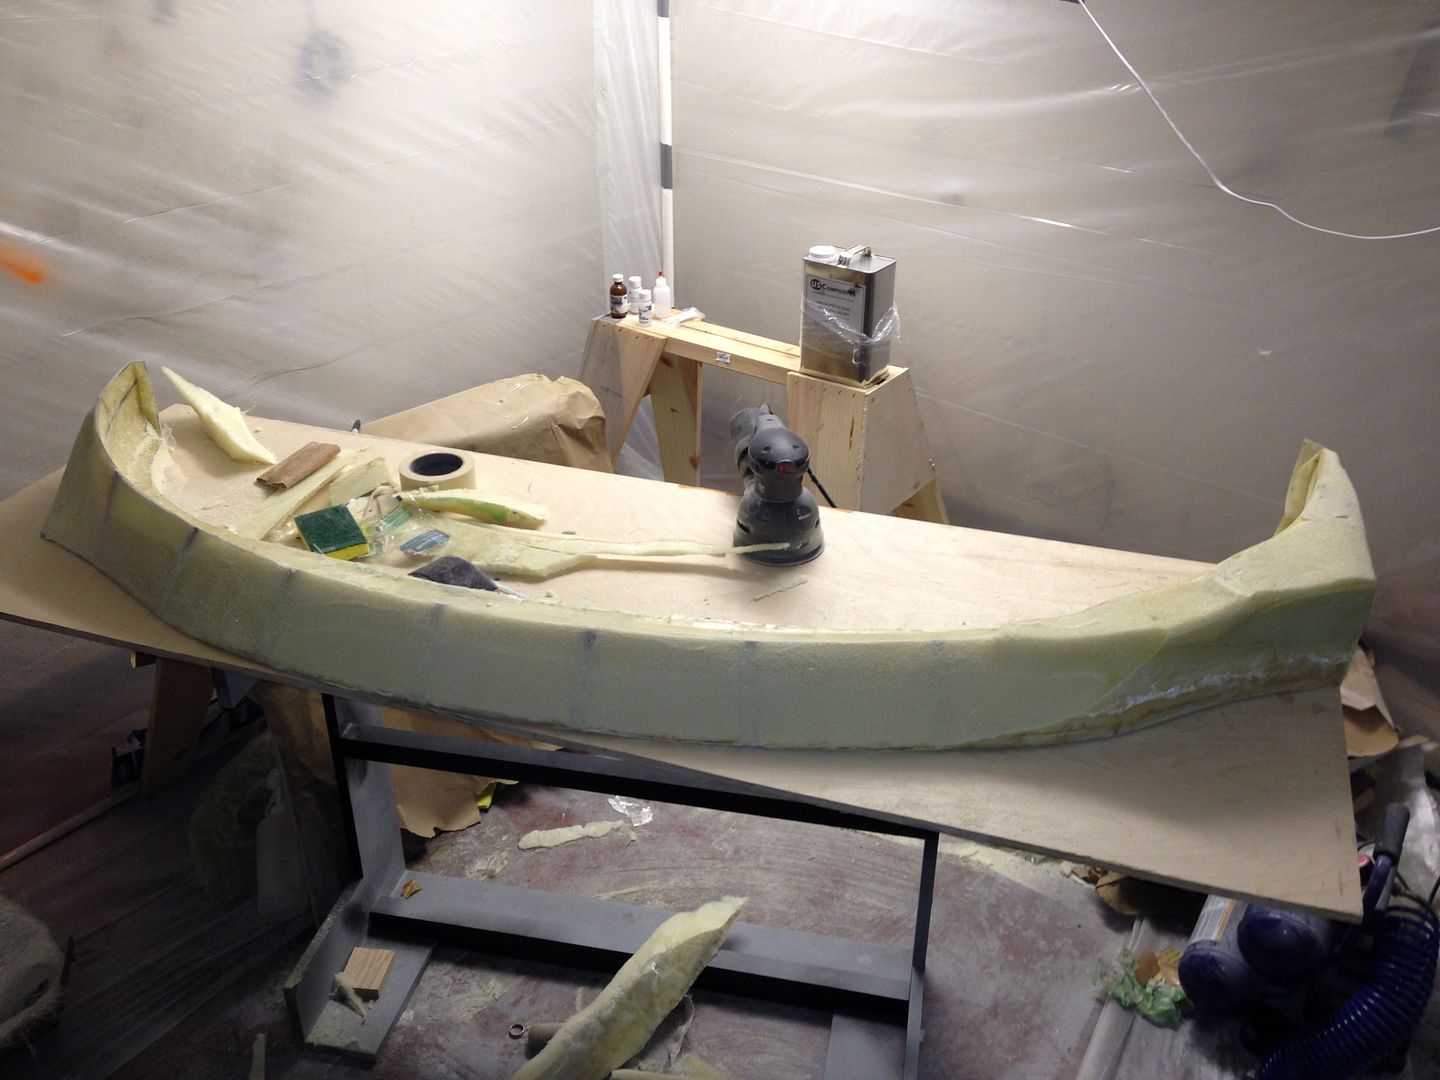
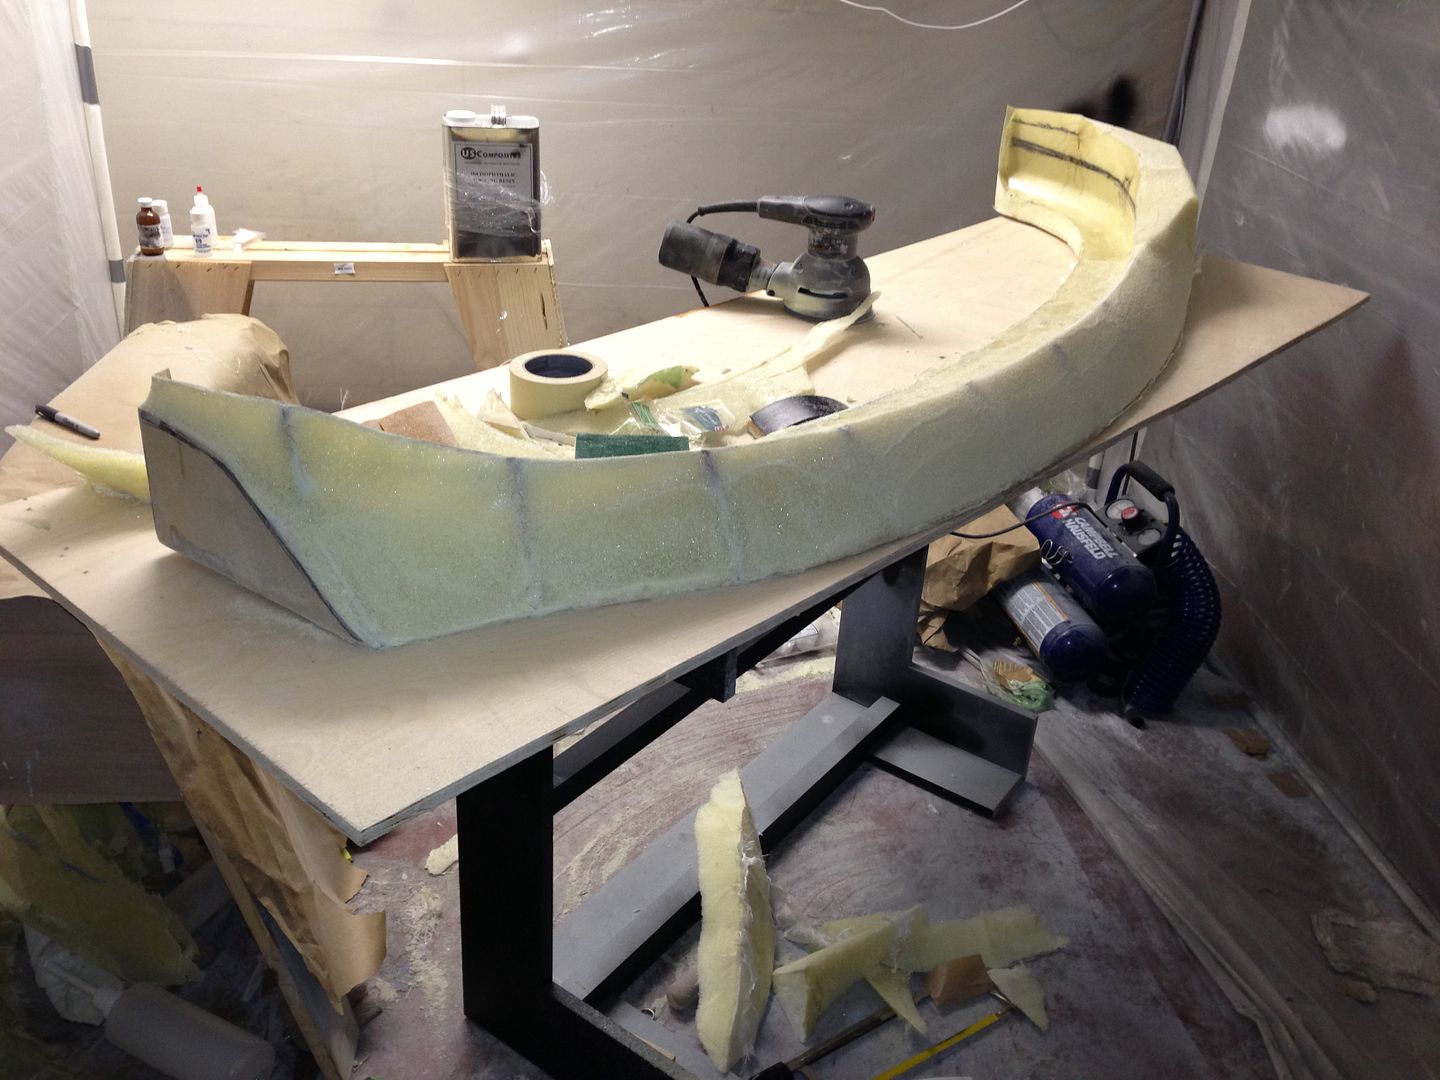
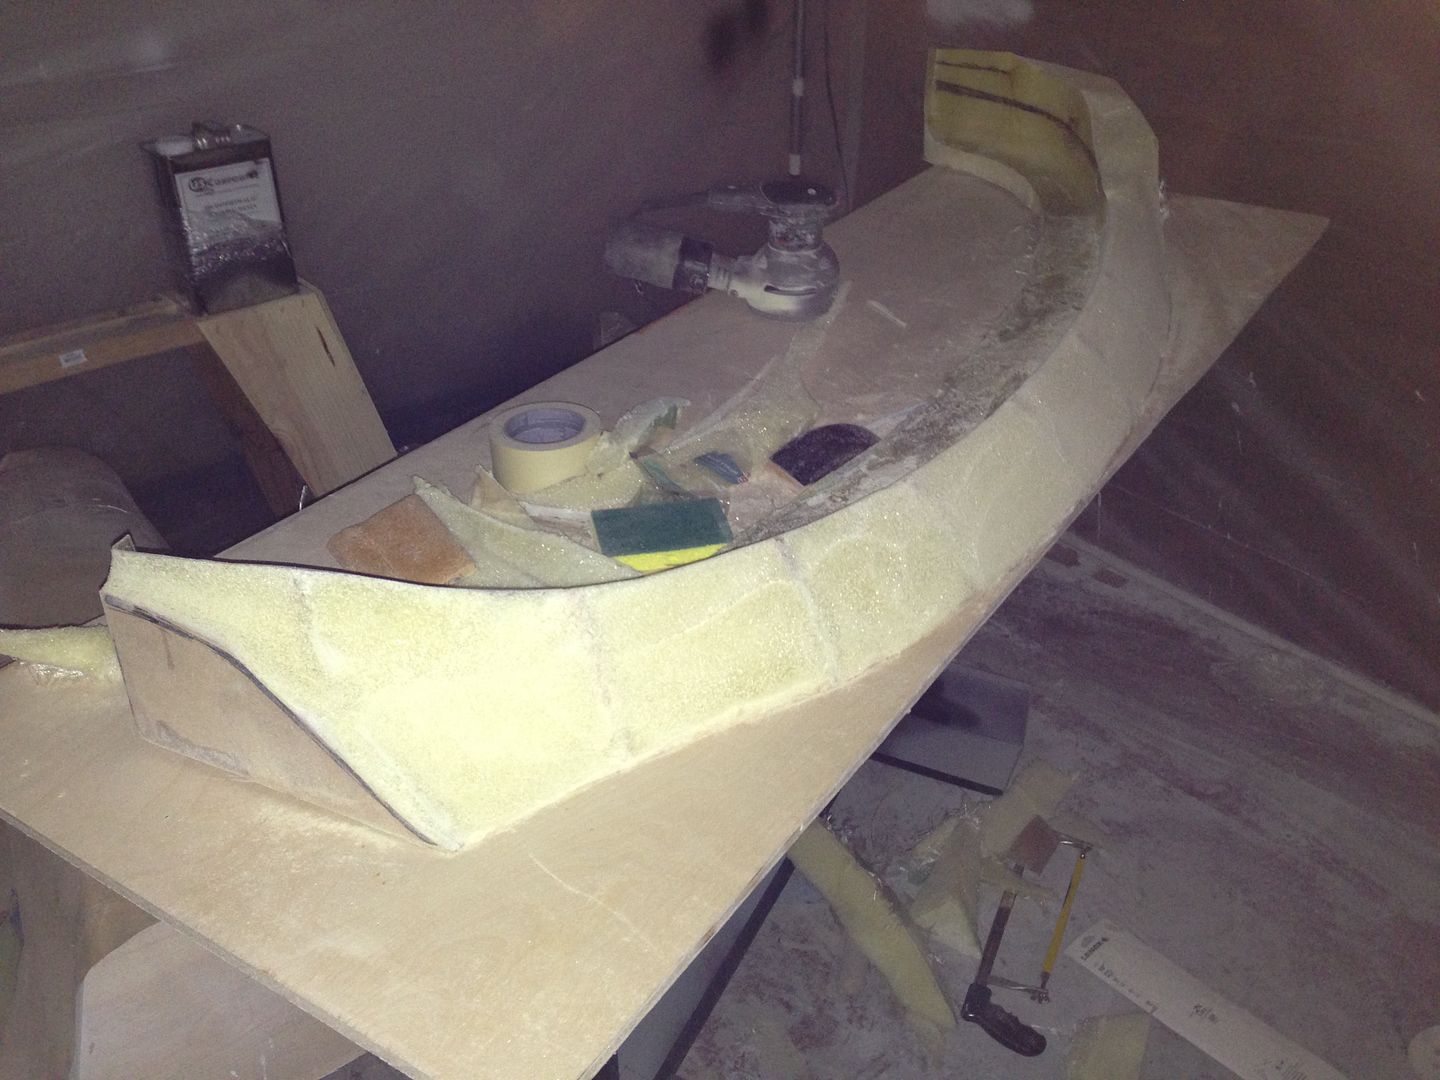
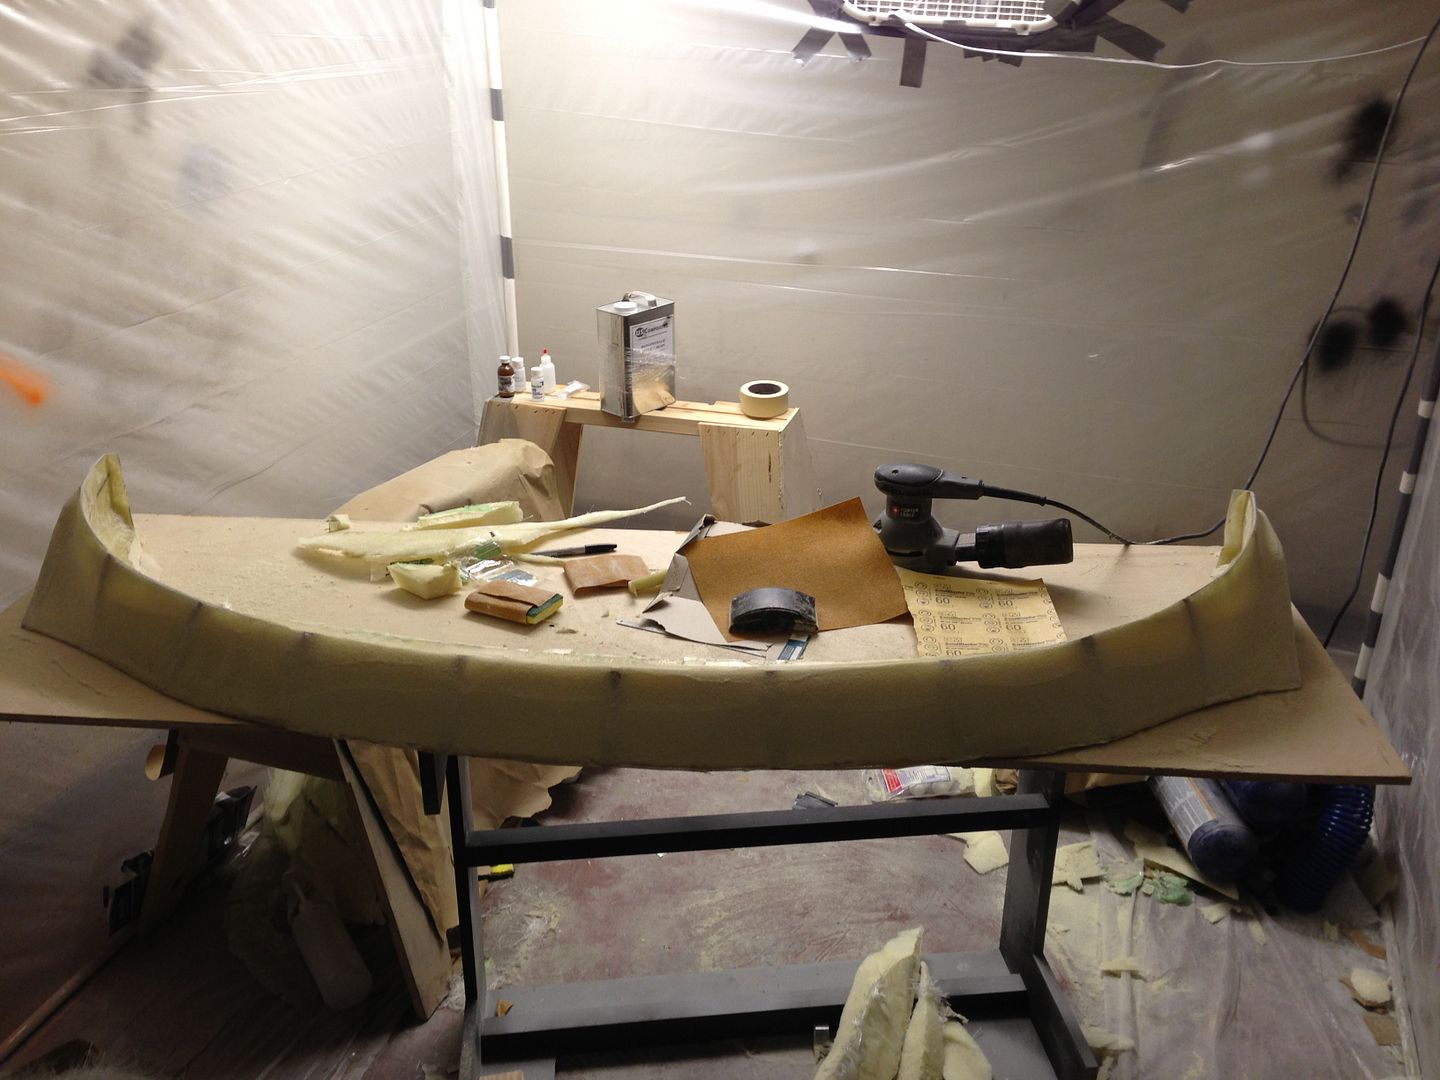
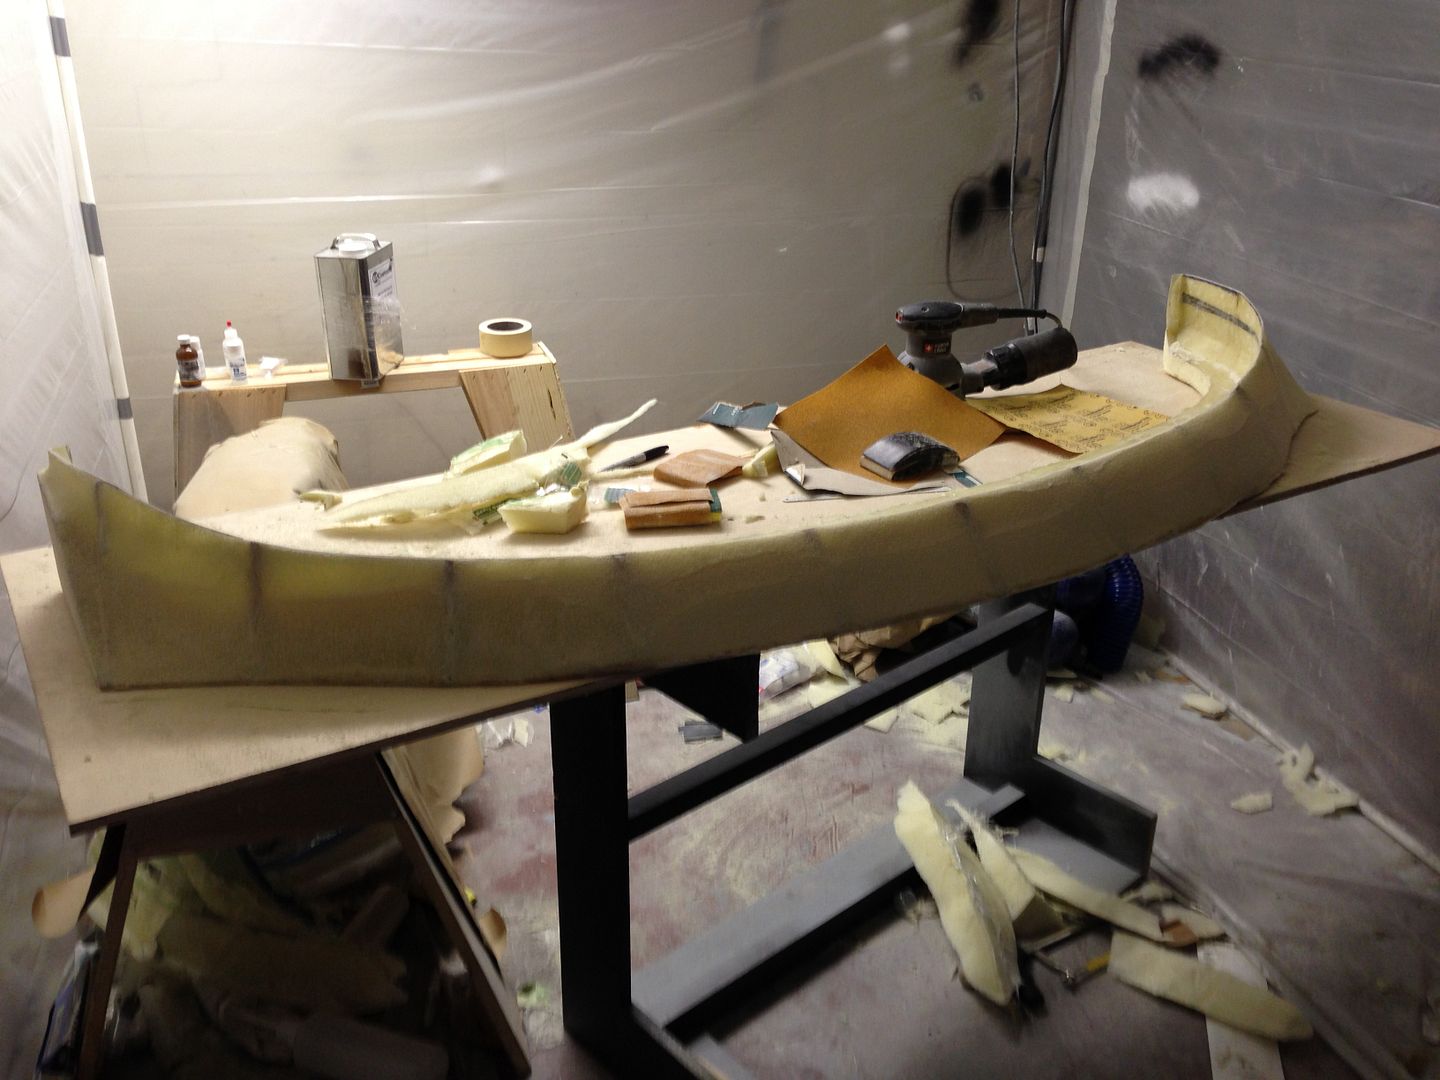
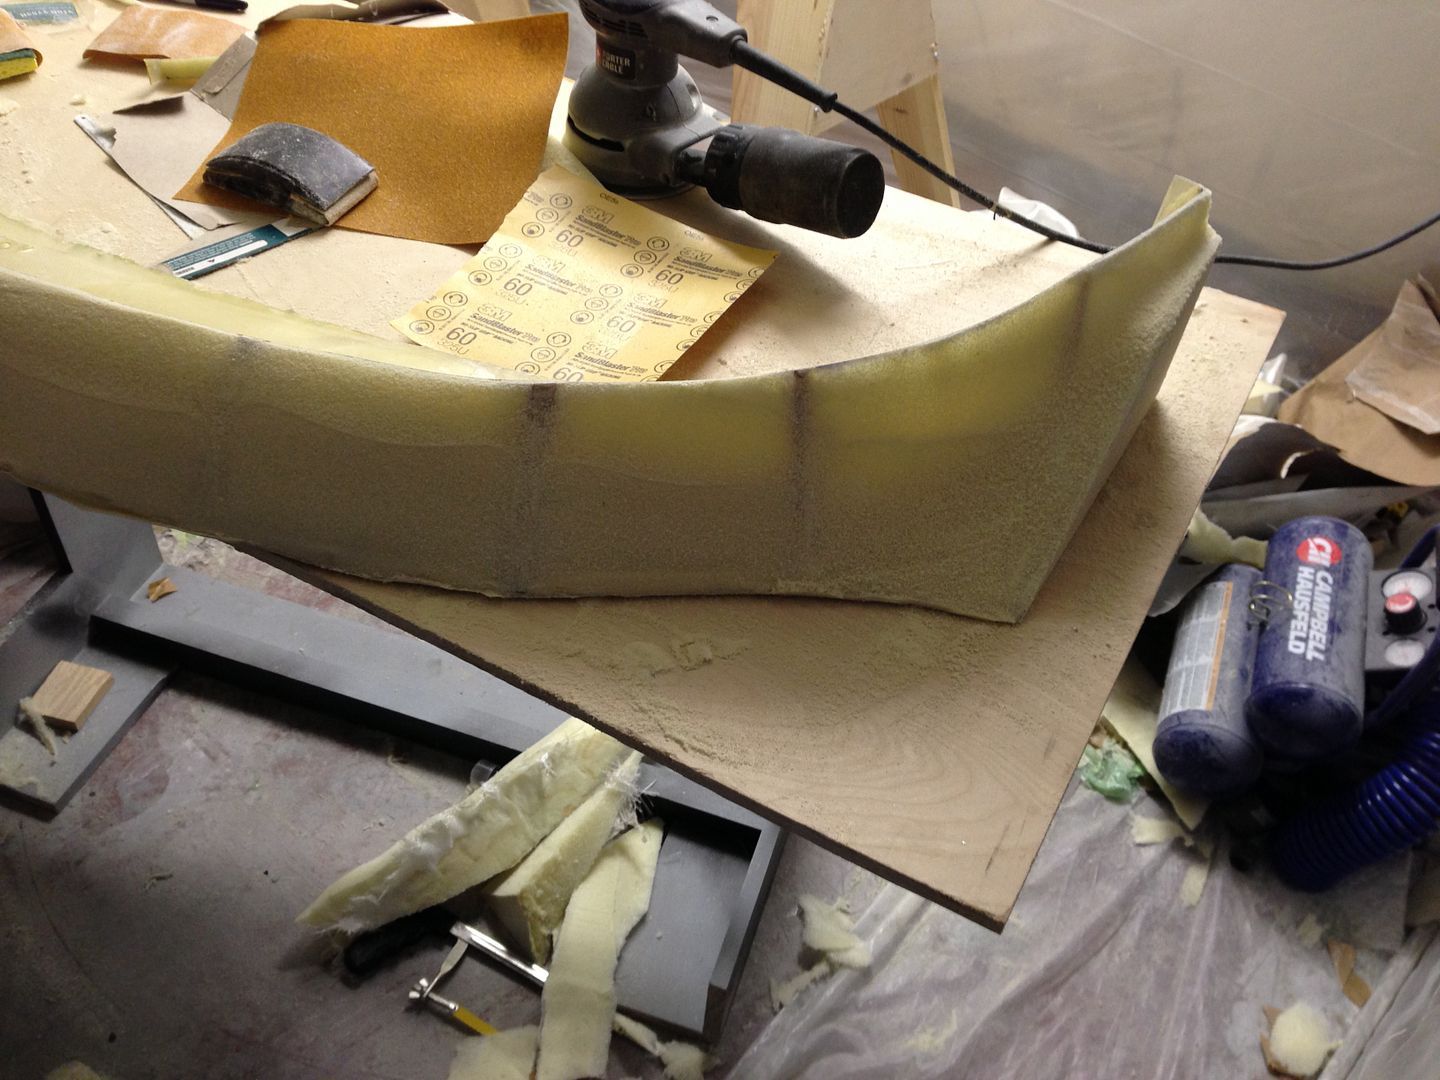
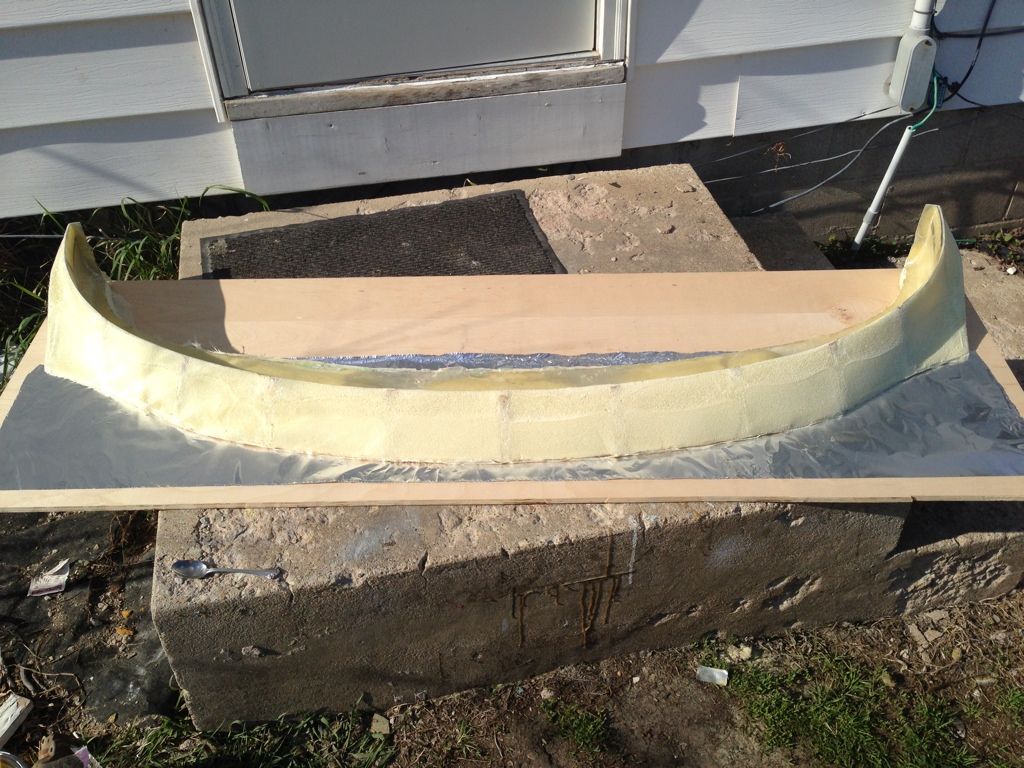
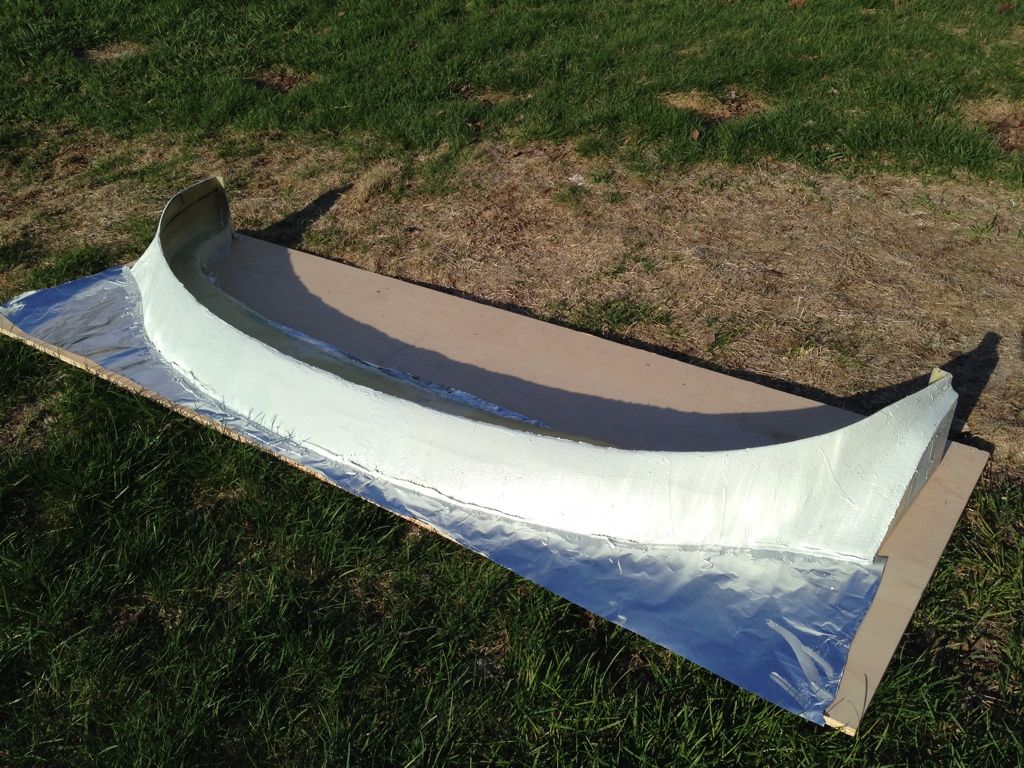
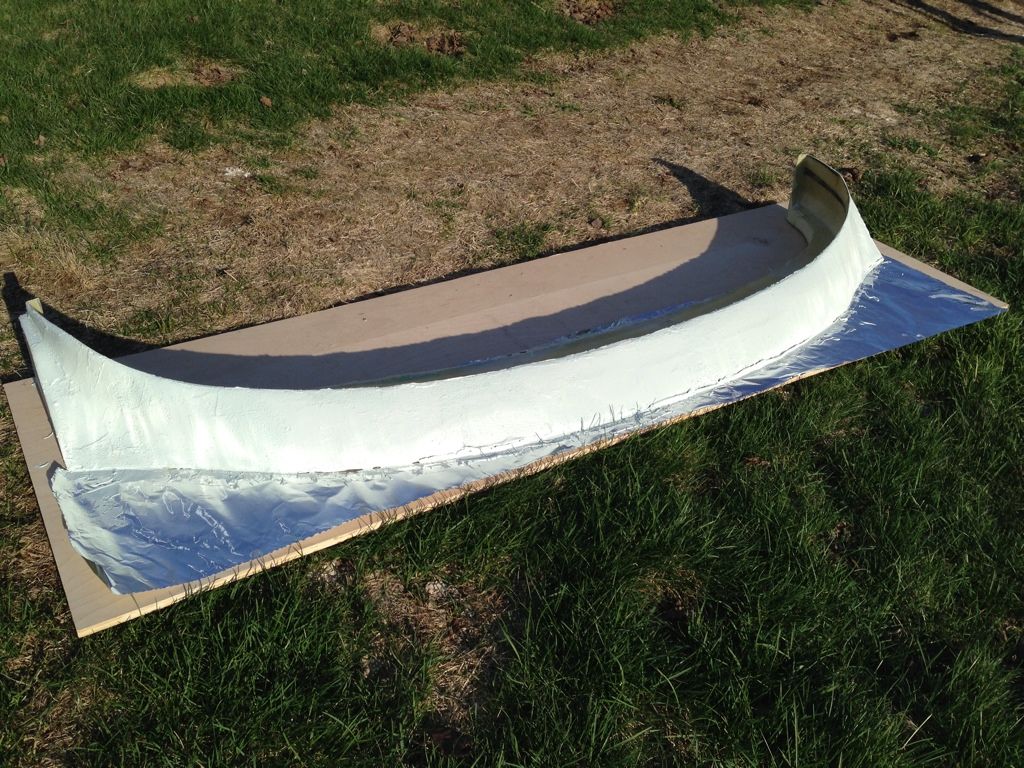
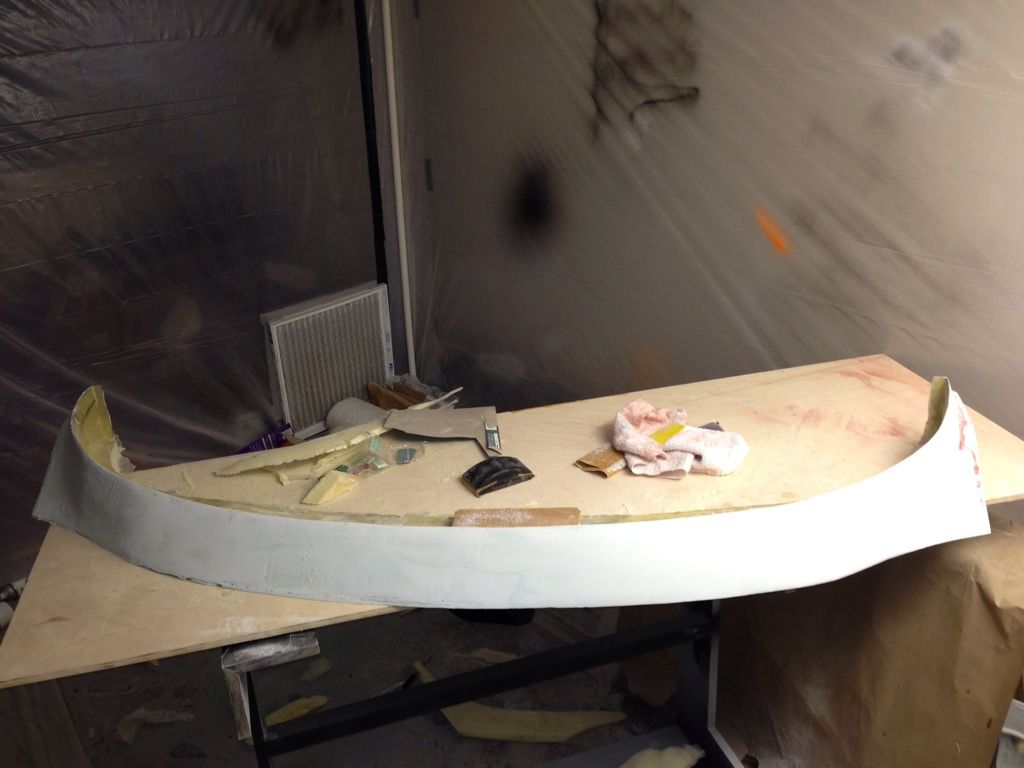
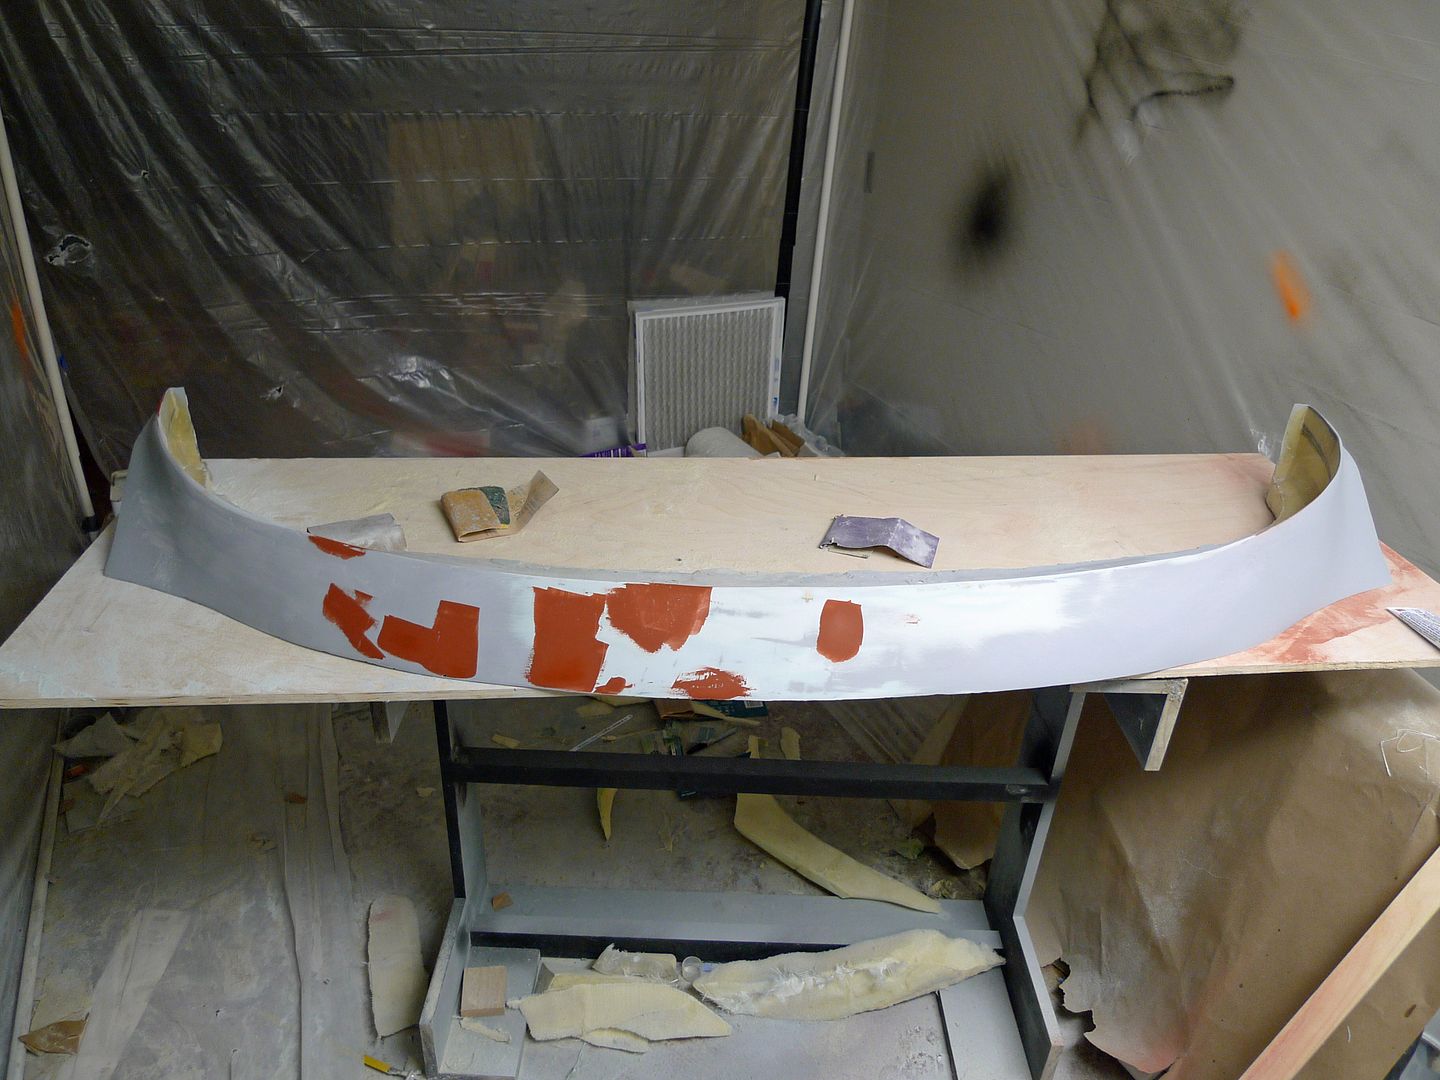
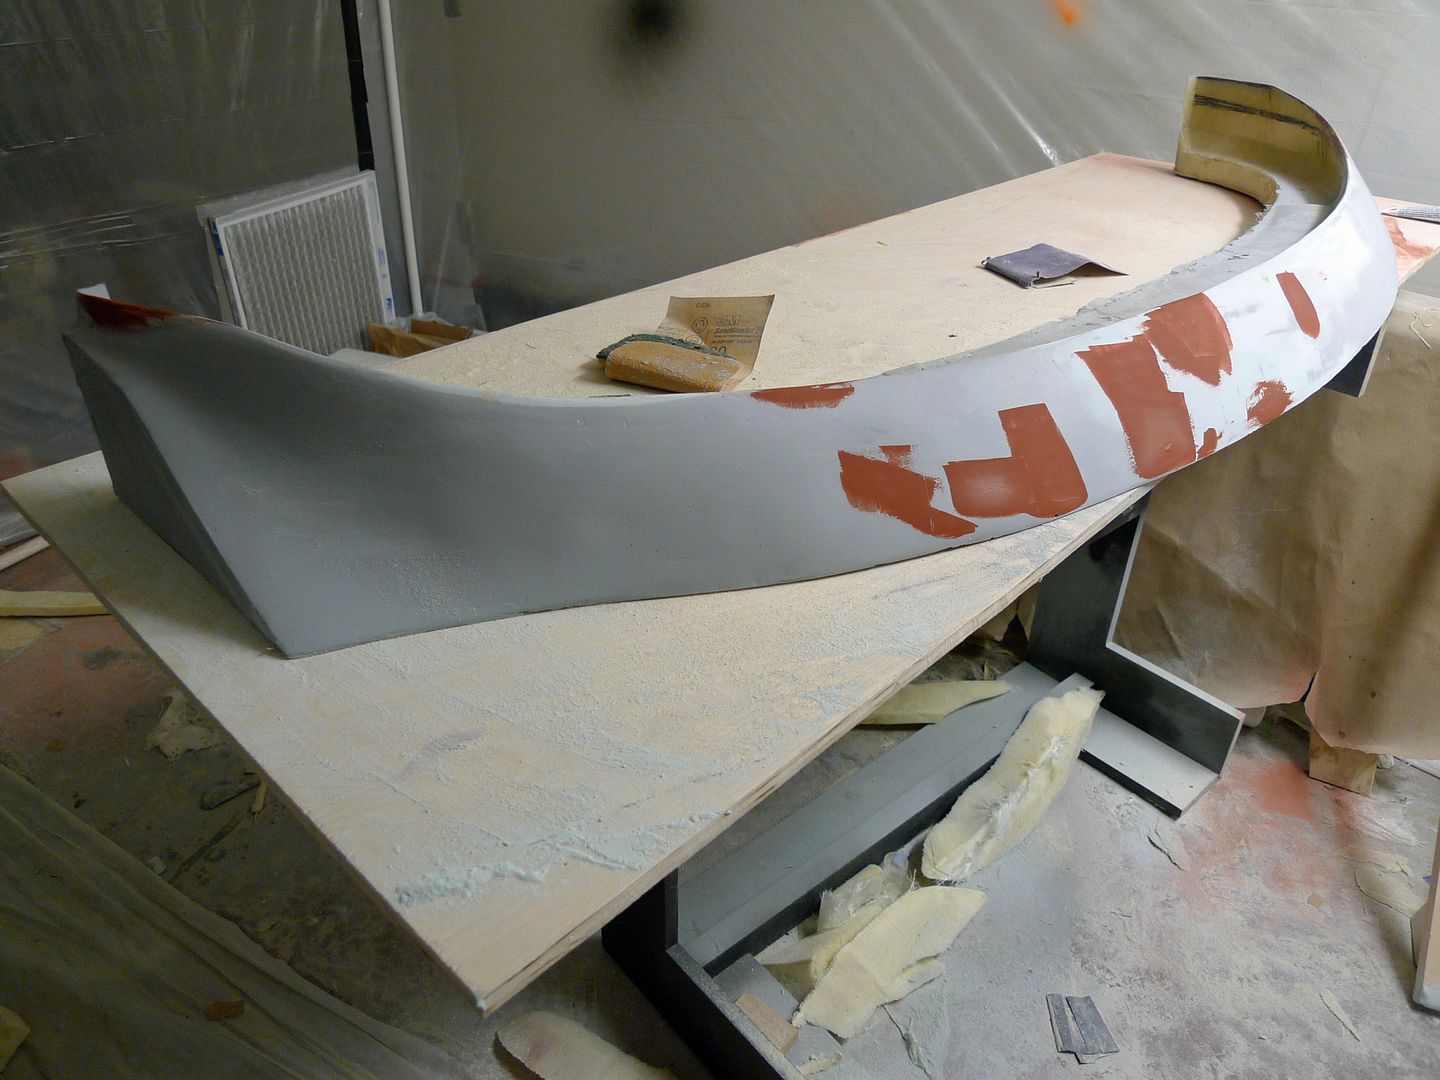
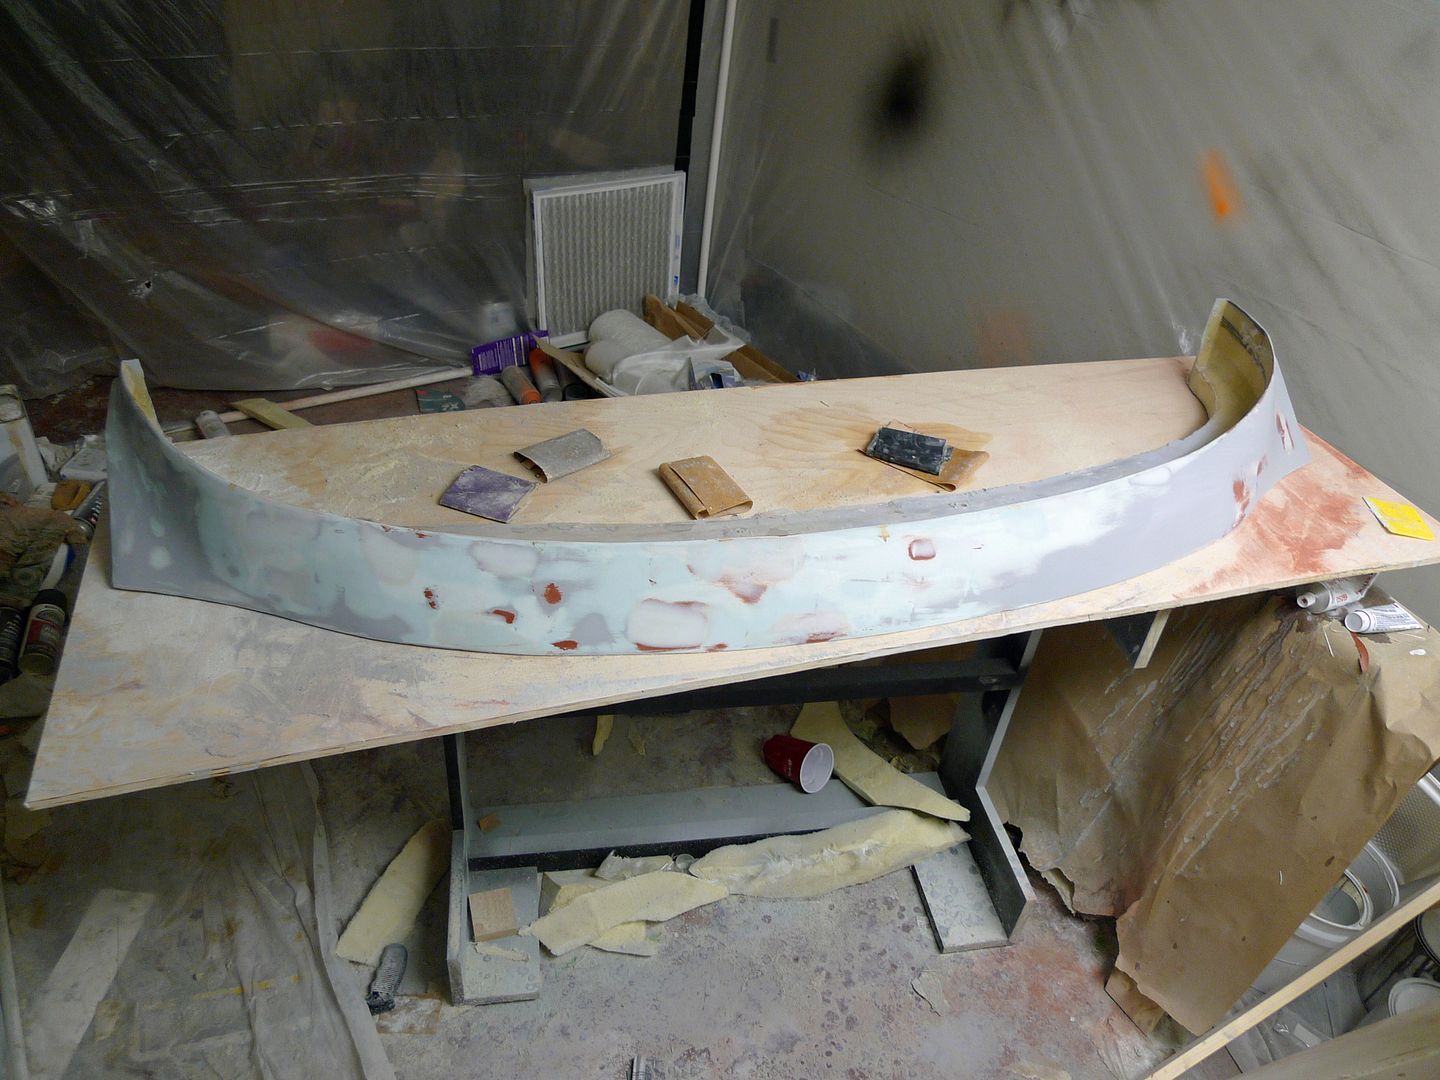
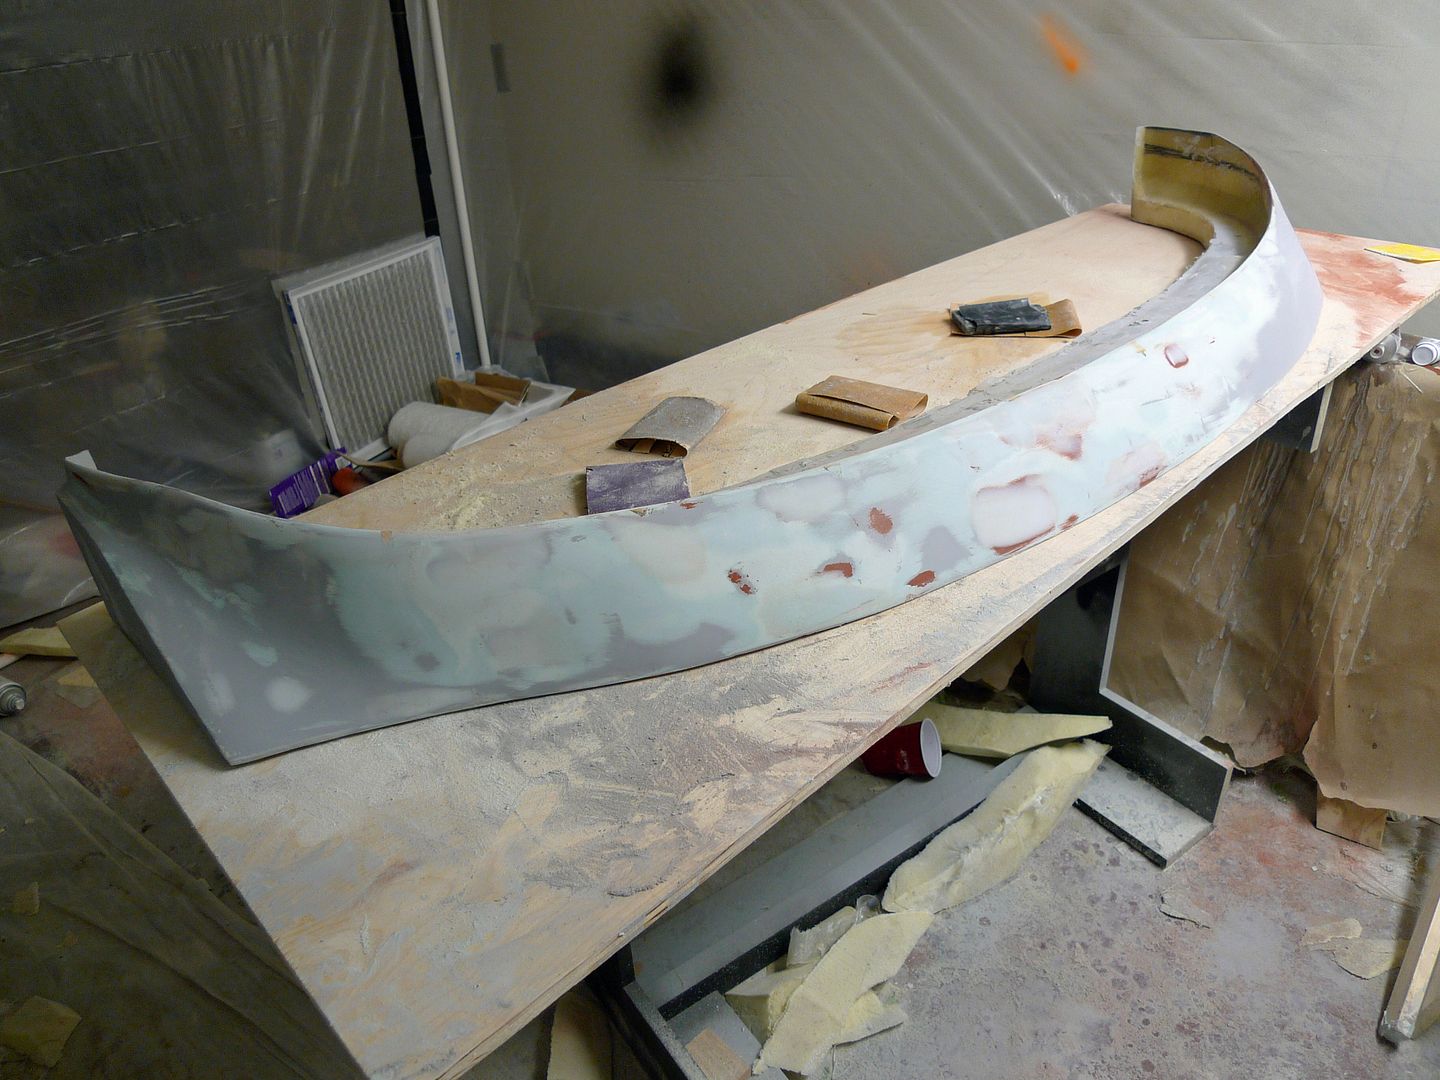
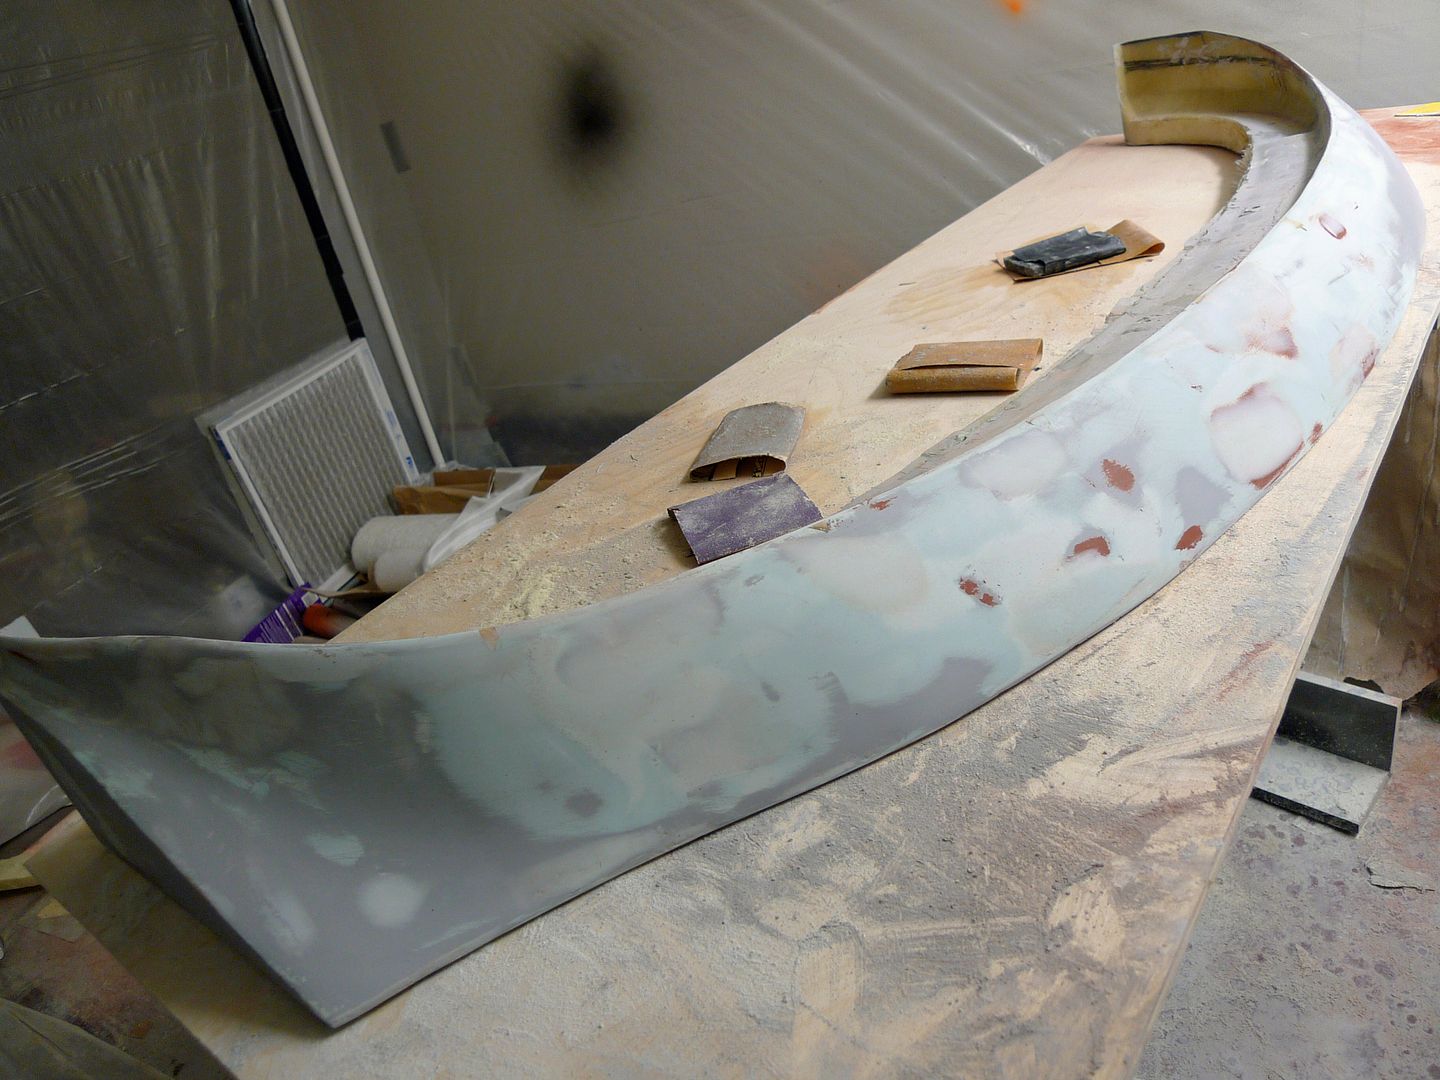
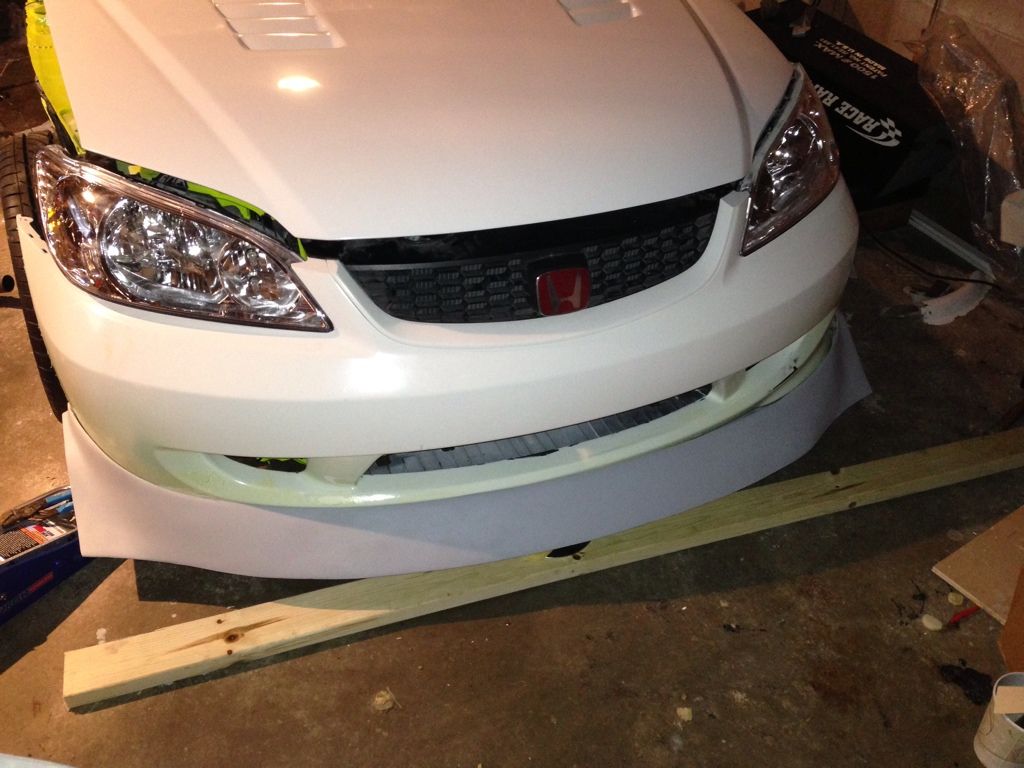
In order to get it perfectly flat with a nice symmetric curve across the front, I built a frame (my basement is so messy…I’m a little embarrassed to show these pics:o).

I’m using 1.5" wood block scrap for spacers to space the bumper while I build the lip. The curve doesn’t look symmetric in these photos because of the lighting, but it is pretty symmetric across the front:

The wife hasn’t made me tear down my indoor paint booth yet so this is where I spray the PVA release film (if you zoom in you can see my cheap compressor and gravity gun that I use to spray the PVA):

Then I laid down three layers of fiberglass mat:

Let that cure for 24 hr then popped it off:

Then I made some guides to keep both sides as symmetric as possible:

Here you can see I added a little reverse curve to mimic the Js Racing lip:

Here the guides are all glassed into place.

Next step is to mount the bumper back onto the car then mount my plywood frame underneath it to keep everything square, level, and lined up. Once everything is in place, then I will pour expanding foam into the frame and sand that to the final shape:

Ignore the saws all…:eek::rolleyes::tongue:

I mixed the foam and poured it into the mold:

I let that cure for a couple hours then poured a second layer:

Really starting to fill in…should only take one more layer of foam:

I demolded it and popped it off the bumper. After some rough trimming it looks like this (some of you guys can probably start to imagine how it will turn out):

I will probably have to shape the top edge of the lip just slightly to fit my brake ducts:

Little bit of shaping this evening:

Finished shaping the passenger side of the lip:

After a loooooooooong cold winter…first time this lip has seen the light of day:

After spreading a thin layer of Rage Xtreme over the whole thing:

Slow progress…smoothing and shaping:

Getting there:

Some more progress pics:

Last of the pinholes:

Very nice, thanks for posting your build pics. I like the overspray on the lawn chair!

Great write up, thanks for sharing. Looks great! Hope to see the rest of the build

Very cool.
I’ve been thinking of building lip spoiler.
Looks like a lot of work then again what composite work isnt

Thanks guys!
LOL at overspray. These are cheap Wal-Mart chairs…they stand in for a saw horse from time to time.

Here are some pics of the lip attached to my car (you can still see the PVA film on my bumper…still have to clean it off). I’m extremely happy with the way it turned out…I can’t believe I actually made this???

You can see in this pic that I did not clip the driver side of the lip in place…I was scared to I would crack it from forcing it in place.

The next step is to make a mold of it…I’m just scared because I have not successfully molded anything yet. The last two times I tried it destroyed the plug:(

The last time I failed because of a chemical reaction with the paint I was using. Can anybody recommend a primer to use to paint the plug prior to molding?

In addition to a good primer for the plug…

Would you make a flanged or flange-less three piece mold to reproduce this? The 3 sides include the surface you see in these pics, the back side that connects to the bumper, and the flat bottom.

Good on you for having a go, looks pretty good so far! And thanks for posting the progress photos, always good to be able to see other peoples methods.

I hear what you’re saying about having a non-compatible paint destroy the plug. I’m in the same boat, only used a cheap rattle came paint on my first small project and it big time took chunks out of the plug.

What most people would recommend is 2k paint. This will not be chemically reactive, so you shouldn’t have problems with the resins/gelcoat eating into the paint. Also it’s hard wearing so your plugs should be in good condition if you ever needed to make another mould in the future.

The key is to do a test before you paint the plug and layup your final mould.

I would recommend making one or two small test parts/plugs, prime & paint them in the 2k you plan to use on your actual plug, then do your mould layup just as you would on the final one. See how the tests come out… if all okay then you can go ahead and use the exact same process on your actual plug.

Looking forward to your next updates!

Edited to add: For a good primer to use, this will depend on your final paint. If you go with 2k paint, use a 2k primer (your paint shop will be able to get all this sorted for you). But there are other options, there are primers that you can spray and then polish directly ready to layup a mould. I can’t remember the name right now, but I looked into it and it’s not cheap. However you can save yourself some time by spraying only one product. Maybe worth it on a large part like yours.

As for the flange/flangeless mould I can’t really comment on that…

Thanks for the reply!

I’d really like to get a primer that I can wax and directly spray gel coat onto and build the mold.

First off, I think it came out great!

I always just spray my plug with a Slick Sand, wet sand it up to about 2000 grit (it’s shiny), Partall wax it, PVA it and start making my mold. Never had a piece stick to a mold.

As to flanges, I like flanges because they open the opportunity to resin infuse at a later date (if you’re going to make more). Sometimes the hardest part is figuring out how to make the flanges for the mold.

Ah, I just remembered the all-in-one polishable primer I was thinking of is Duratech: http://www.duratec1.com/dp04.html
(Couldn’t get Duracoat out of my head.)

I think that is the stuff you want!

GEcho - Does Slick Sand actually polish to a high gloss? I was just looking for info and didn’t see any mention of that, seems that it’s intended to be painted over? I’m interested to hear your experiences with that, good to have an alternative to Duratech Primer.

Duratec probably is the no1 choice. If you cannot get it, get a 2C PU paint,a nd have it cure for a week. After a week you can polish and mould it. PVA should not be neccesary, when using a good wax.

Wow, great progress BND. I like the shape, and it looks like you’ve done good work on the plug.
Duratec is a good choice for primer but I sometime just go to the local auto paint store and get high build polyester primer. This is pretty much what Duratec is (however they also have vinyl ester primer) and it can be wet sanded and polished. I’ve used PE primer for a number of plugs and had no problem making the mold.
Good flanges would also be important. There are a number of materials that can be used. Some use aluminum flashing, or plastic sheeting. I often use 1/16 balsa wood, though the wood either needs to be coated with the PE primer or what I do is cover the top with aluminum tape. I like balsa because it’s easy to get, cut, bend, and glue. I use hot melt glue to attach to the plug so in your case you could add a couple flanges to you plug and after one surface is molded, remove the flanges while leaving the mold in place and use the molded flange for the next piece of the mold.
One problem I ran into doing a full piece like yours, is making a provission for bonding the pieces together. Once you have the top and bottom pieces bonded (that is if they are molded separate), you will need to bond the back piece in place without things twisting or moving. I know there are a few ways to handle this but it is something to think about.

Great advice everyone! I really appreciate it.

I think I’m going to go with the duratec primer. I plan to purchase it from fibreglast.com once they send me a 20% discount code. This is the first time ever that I will be spraying paint with a compressor…so forgive me for asking basic questions, but here are a few that come to mind:

Do you think thinner (link below) will be necessary for the Duratec or will it be fine without thinning?
http://www.fibreglast.com/product/Duratec_Thinner_2306/Duratec

This 1.8 mm gun should work fine for primer, correct?
http://www.amazon.com/TCP-Global®-Brand-Professional-Regulator/dp/B001OZP0QO/ref=pd_sbs_auto_4