carbon fiber hand layup help

I’m trying to make some Carbon parts using by a hand wet layup- no vacuum. I know it might be easier to do it through Resin infusion but I’d like to try and get this process down!

V1.
lay down a coat of polyester resin on the mold
place 5.7oz 2x2 CF twill in mold
apply more resin with brush- then i wait a minute or two to let the fabric absorb more resin (well in my head thats what i think it does)
apply layer of 1.5oz chop mat
press FG in with brush, while adding more resin
then use a fiberglass roller
add second layer of 1.5oz FG matt
add resin with brush
roll out with FG roller

I have a few tiny pinholes doing this way

V2.
~12mil clear gelcoat cure to touch but still leaves finger print without any residue on my finger
brush on a wet coat of vinylester resin
lay down 5.7 oz cf 2x2 twill
use brush to press into place
fiberglass roller to remove bubbles
at this point its still resin rich where there is a pool of resin on top, in theory letting it sit for a minute or two, in my head i think the CF is absorbing more resin…
now add 1.5oz fg mat, add resin w/ brush, roll out air bubbles
add 2nd layer of 1.5oz fg mat, add resin w/ brush, roll out air bubbles

now this method i had the same results of the air bubbles except this time it was between my gelcoat and first layer of CF…

I really would like to avoid using the gel coat but i tried it to see if it would fix the air bubble problem.

On my next attempt i think i want to use spray adhesive some surfacing veil onto the front of the CF. this will keep my weave straight and hopefully eliminate the air bubbles in the top surface? Thoughts?

Questions:
Are you suppose to apply pressure with the fiberglass rollers? if so how much? do you want to see resin seeping to the top or is that too hard?

is the jump from 5.7oz 2x2 cf twill to 1.5oz chop mat too big and causing the air bubbles? Should I use an intermediate layer of FG cloth or something in between?

do you use the fiberglass roller (air bubble roller) on top of CF as well? I typically only use it on chop mat…

Any help would be great… my stock pile for “cosmetically flawed” Carbon fiber parts are growing and turning/being sold as Fiberglass parts…:frowning:

bump, i tried again and still same results

I’m having trouble getting cosmetically good carbon parts while doing a wet lay up. I’m using vinylester resin and doing a wet lay up.

Details:
Open face mold (aluminum)
temp- fairly cold 50-60*
Heat lamp on under side of mold to keep the mold warm

My procedure:
surface coat ~ 18 mils thick
3-4 hour to tacky state (fingerprints in resin but does not stick to my finger)
lay out 5.7oz carbon and press firmly (dry)
wet out CF
Apply 1.5oz mat, wet out, and use roller
wait 1-2 hours
apply final 1.5 oz mat, wet out, roll
24 hour cure
demold

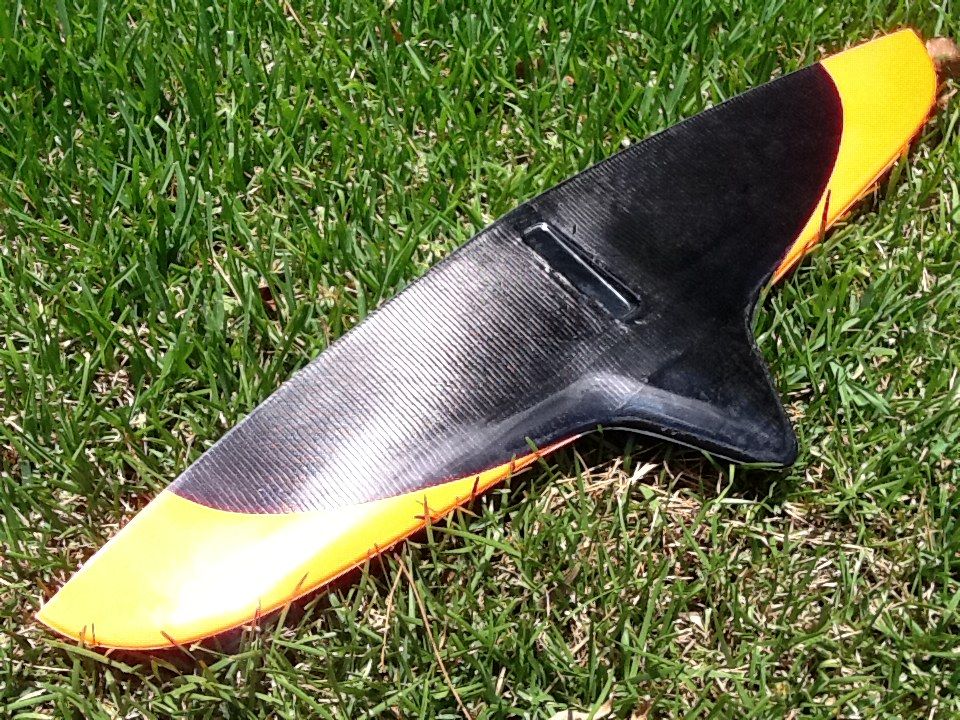
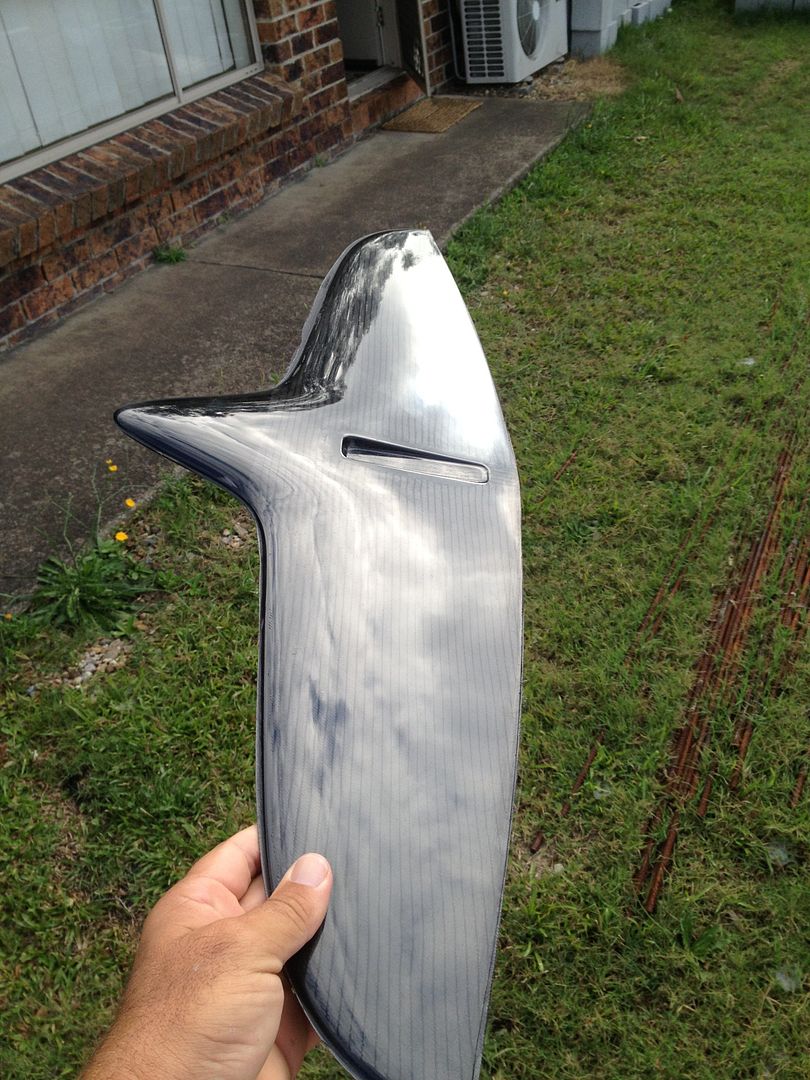
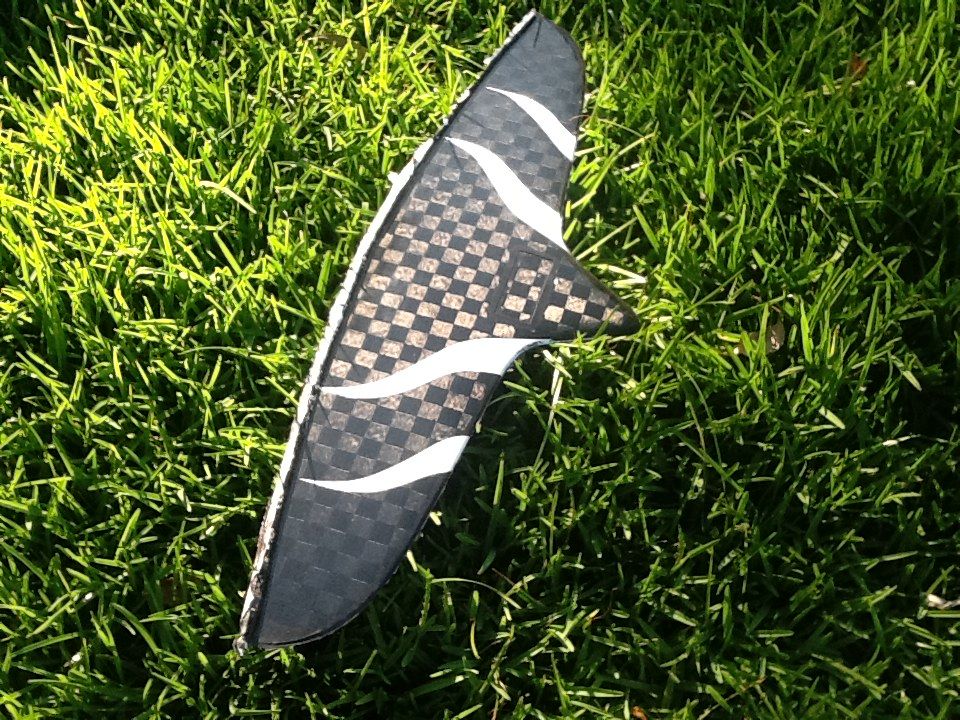
here are some pics


Any help would be GREATLY appreciated! I will most likely try infusing but i would still know how to correct this problem in the future!

Hi

I build rc gliders , I mostly bag all my planes in mold. But I do lay up multiple layers of twill for making control horns out of.
Also a lot of DLG glider builders do it this way.

Viel cloth works , but some are better than others. I prefer 75g compared to 25g.
The 25g if much harder to wet out , and traps bubbles exactly like your’s.
The 75g wets out very easy and you can see it happening as it wicks it way along fibres and between gaps.

The main thing I have found it using Thixotropic resin , this help massively with vertical drainage. And also helps it not fish eye on your mold once applied.
Apply a Liberal coat to the mold surface , then add the veil cloth and using a felt or fabric roller ( not foam) fully wet out. Roll it all perfect. Using a LED light on an angle to the surface go over the whole area looking for bubble. It will look fine , but the more you look you will find some :slight_smile:
Once all wet out perfect ( very wet). Then add the carbon.
DON’T add any resin to the back of it , this is what causes the bubbles to get trapped.
Just roll it gently and at a nice slow pace , and after a few minutes you will start to see the resin coming through. The raising of the resin ,and the capillary action carries out those small little A$$hole bubble that give us all the :mad:

You really only need 30/70 resin to cloth ratio in the carbon it self … So work out how much you need , and apply a large amount of it to the mold surface and the veil.

For best results , do some small tests on some glass… Say 100mm x 100mm
Easy to see what works best for the cloths you have :smiley:

Good luck

Tim

Looks like it simply needs more rolling to push the air out. If the mould shape does not suit a roller then you can also simply use your fingers like a squeegee and massage the first layer well.

WBT - 1 electric scissors is widely applied in cutting composite materials glass fiber, carbon fiber, aramid fiber, knitting, clothing, leather, carpet, plastics etc many fields.Adopting idiosyncratic tungsten steel blade make the product fills up the blank of handle electric cutting tools for composites , it have CE certification, excellent quality products have been sold to Europe,US and other countries.

i tried the squeege method and sat there for about 10 minutes going back and forth (the piece is less than 38"x13")

When i use the FG roller (with the rings) it doesnt seem to do anything since the 5.7oz CF is so thin… i have a ton of these with cosmetic imperfections, i really dont want to infuse the part. any suggestions or more specifically technique?

I spend 3x as long trying to wet out the CF then i do with the FG and the FG wets out much easier. If i squeegee the CF should i be applying a lot of pressure? medium?

Can someone also clarify this for me? After I wet out the CF, do i let that gel/cure before i move on to the FG layer? I kind of feel like when i go to the FG layer right after, it absorbs some of the resin out the CF? could that be the problem???

ps this is hydrox 100 VE resin if that makes any difference.

Don’t hand layup carbon- you can’t tell if you’ve gotten rid of the air like you can with glass. As you’re experiencing the hard way.

Only vacuum bag…

yeah im about to throw in the towel. but i’ve seen air bubbles in my vacuum bag technique too… (only tried once)i really dont want to infuse this as infusion is a pita to set up haha:p

as the old saying goes, “If it were easy everyone would be doing it.”

Nothing wrong with doing a carbon layup by hand, you just need some experience to get a feel for it.

Adding one more layer will make for a softer layup that rolls better, don’t press too hard as this will just force the resin away or out of the fabric leaving it with nothing to fill the gaps within the weave.

Roll lightly, enough to push the resin around but don’t try to crush the fabric. Plenty of resin rather than too little.

Use the correct type of roller, ones that suits the shapes you are rolling against.

I agree… Practice makes perfect.
Sounds like your going over board a little to much and creating bubbles when rolling or squeeging out.
Just do some small patches , using a felt or cloth roller and medium pressure and it will be fine. It all technique
Rolling fast or wrong roller and over rolling all create bubbles as well.

1 layer on 100g carbon with 40psi cnc cut foam core.

160g spread tow . This is bagged , but all test where done with out bagging to get a bubbles free Finnish. As tow’s are very tight and bagging won’t remove bubbles from surface or between weave.

Another thing that can help is wetting out between two pieces of plastic. You can squeegee on the outside of the plastic working bubbles out without incorporating air back in. Also agree with Timbuck on the use of small roller for wetting out.

Hang in there bubbles! I’m in the same boat with you! Trying infusion now!

Add a layer of what? CF? FG? veil? and to the front or back?

Well thanks for that, i guess i’ve been pushing too hard… I and too quick…

Also what roller should i be using? right now i have 1/2" roller 4" long from uscomposites (standard rings) or should i be using a different style roller like one of these http://esmfg.com/roller_heads.html (maybe the spike one?)…Also do certain diameters add more/less bubbles?

yeah, im definitely apply too much pressure… my last run I tried pushing harder… actually came out as one of the “better ones”

When you do this, how do you not mess up the weave? thats been the main reason why I have never tried this technique… Also im using 5.7oz twill and its OK to work with… yet i see videos on youtube and people are handling the CF much much rougher yet im struggling more… Did i get a bad batch or is uscomposties CF just a looser weave?

Also for those vacuum bagging after wet lay up, what pressure are you using? i’ve been hearing anything from full vacuum to 14-16… so far 14 has worked the best…

thank you all for your help!

Add a layer of any fabric to the back assuming you want the clear finish of your surface layer.

The roller should simply match your surface appropriately. A wide roller is fine for a flat surface or one with just curvature in one direction. There is no point is trying to use a wide roller on a compound curve surface where only the ends of the roller would touch. I hope that makes sense?

For roller types I prefer the threaded “bolt roller” but you may find a bristle roller will also work.

When it’s between the plastic the plastic holds the fibers in place. There isn’t any horizontal dragging of the fibers. You also get nice clean pieces to work with. When repairing boats this is very nice. You template out your repair, which might be in some tiny little hole or corner, wet out your cloth on one piece of plastic then put the other on top. Then use the squeegee to work the air out from between the plastic and the wet carbon. Once the air is out you can draw your templates out on the top piece of plastic. After you cut them out they are easy to handle because the plastic holds them in shape and makes it so there is no real resin. You can also get nice edges this way. You can then throw all your plys in a box and carry it off to your work area. You can then pull one side off as you put them on. Then once in place pull off the other piece of plastic. If you use a scale to weigh the dry carbon and the resin you can get good and consistent resin ratios

So i’ve been using this method with along with a clear gel coat and i think my results are a lot better. I just dropped the parts off to the painter today so fingers crossed!

I tried various methods with the plastic and it seemed to help. the best results were I yielded are from the following method: I apply my gel coat then wait for it to tack, apply resin, then lay the CF on top of that. I then apply more resin on top of the CF and let it sit for a minute or two. Next i put the plastic on top and squeege from the middle out. It definitely helps out a TON but still some tiny bubbles if you look for them (trapped between the gel coat and CF.

Now as far as technique, are