Attempt at an OOA cure using normal prepreg

Hello everyone,
I was wondering what everyone thought of my surface finish here on my project. Basically, I made a solid aluminum male mold that has an octagon shape to it. It is supposed to be a pencil holder. It’s the prototype, so I didnt nail it my first try.

For the layup, I used 5 layers of a 3k prepreg. I think the weave is satin. I didn’t debulk between layers, but I did have it dwell for an hour and a half at 200 F. Then ramped up to 300 for 4 hours. The inside of the box came out nice. The only problem was the resin did not fill some of the weave creating the pattern shown in the photo.

Is this type of finish pattern always going to happen? I haven’t seen that type of finish on the internet.

I have been looking into OOA prepreg in small qauntities is the Easy-preg from the UK which costs $172 a yard! not including shipping. http://www.easycomposites.co.uk/products/carbon-fibre/pre-preg/easy-preg-surface-layer.aspx

I was thinking of not using breather to get more compaction and using just non-perf film instead to capture the resin in hope it will fill all that in.

Any thoughts?

Thanks,
Tom

If enough people bunch up, you can buy a roll of Umeco VTF261. It costs £50 a metre, but you have to order a 50 metre roll. Easy-preg is a rebranded VTF261. It is pretty unique, and no other manufacturer has made anything like it. I need about 5-10 metres, the user morepower uses it too, and I know someone else that might want some.

I might be interested. Im going to try a few different tricks with stuff i have now first though.

I can’t tell whats going on in your photo.
Is that the part in the mould?
Is the mould male or female?
You say the inside of the box came out nice, but your photo IS the inside. (?)

De-bulks are critical in ensuring your plys are down. At a minimum, suck down the first ply, then every 3rd or 4th ply from there on out. What were you using for edge breathing?

CC-The part is a box. The mold is male. The picture you see is the inside of the box. The outside of the box isn’t as nice as the inside. It got a little wrinkled. Partly because i used two layers of breather which i wont do next time.

Cleuk-What is edge breathing? I just covered all carbon surface with peel ply, perf, then breather.

From what I can see of your photo it looks like there are small dry areas on the weave intersections, This is usually caused by being resin dry(ie not enough resin) on the first layer. Try a prepreg with a higher resin content(possibly on the first layer only).

Yeah, i thought about that. I was thinking of using no peel ply and see if i can keep some of the resin to stay on the surface to fill in the weave.

I see. The part is so small that you don’t really need breather. If anything it’s probably reducing pressure. Instead, put glass tows on each corner, on the flange surface, running into the outside of the mould and into a patch of breather under the valve.
I’m assuming the outside is what matters aesthetically, you should use a female mould.
What prepreg are you using?

Maybe its just me but I cant see the pic in any size so cant really see whats going on there. But debulk surely, always a good practice.
What pre-preg are you using? Is it an autoclave pre-preg? Most autoclave pre-pregs are designed to work in an autoclave at high pressure which forces air and volatiles into solution due to the pressure. This is then removed with the vacuum. Out of autoclave pre-pregs achieve porosity reduction by extraction prior to gelation of the resin so in effect the resin rheology is tailored for each application. Summary is not to use autoclave pre-pregs out of high pressure scenarios.
Btw, dont buy from Easy Composites if you’re in the US, loads of low-volume OOA pre-preg suppliers there Im sure

OOA pregs often have “air passages” or un-pregged tows of material so air can be evacuated in the early stages of cure. Most of the air evacuation happens in plane inter or intra (Between plys or in the actual ply itself). Very little “through plane” permeability takes place. This is why you need little glass tows or a breathable edge dam linking the laminate to you breather. I would stay away from peelply, as it is just soaking up resin. Temp and temp rates are critical in controlling resin/air flow.

I am not sure on what kind of prepreg I’m using. It is from my work. It’s not out of date, just not certified by the government anymore so they don’t care i use some. We do maintenance parts for military aircraft. Mostly metal, but I’m doing some composite parts for them this summer. The finish they get looks like the picture i have below.

I was going to layup a small flat piece next week and see what happens with no breather or peel ply and all the necessary pathways for the air to escape. Ill let it sit under vacuum for a couple of hours before throwing it in the oven. I’ll have the part dwell for an hour or so at 150F before going up and holding it at 300F. Hopefully I’ll get some better results.

Yep… If a few wanted to have some VTF I would be glad to have some of the material and if we had to buy a full roll for the lowest price I think it could be worth doing. Nothing really beats VTF261 for out of autoclave use.

1: Follow layup from the manufactuer. If they call for pref release, you need it to draw out voids, else they might call for solid release, and some sort of glass tows used to release VOCs and air from the release (meaning, tape is applied around the entire edge-of-part to seal the prepreg inside a bag of release…the only gas escape is tiny glass tows, which only allow gas to escape, but keep resin in. Peelply is optional, and should not affect the performance of the material in any way. It will even out the surface for clear coating, but shouldn’t draw out resin so that it creates voids.
2: if it’s an autoclave specific prepreg, you might never get the voids out.
3: debulk the first layer, and then every 3 layers. This will help get rid of wrinkles later. You can even do every 2 layers. Remember, you can not compress the first layer down by hand. Every layer after that will only magnify the wrinkles made by compressing the layers down in corners, etc.

Hello everyone,
New update today. I was able to do two small sheets for testing new techniques today.

Here are the two plates out of the oven.
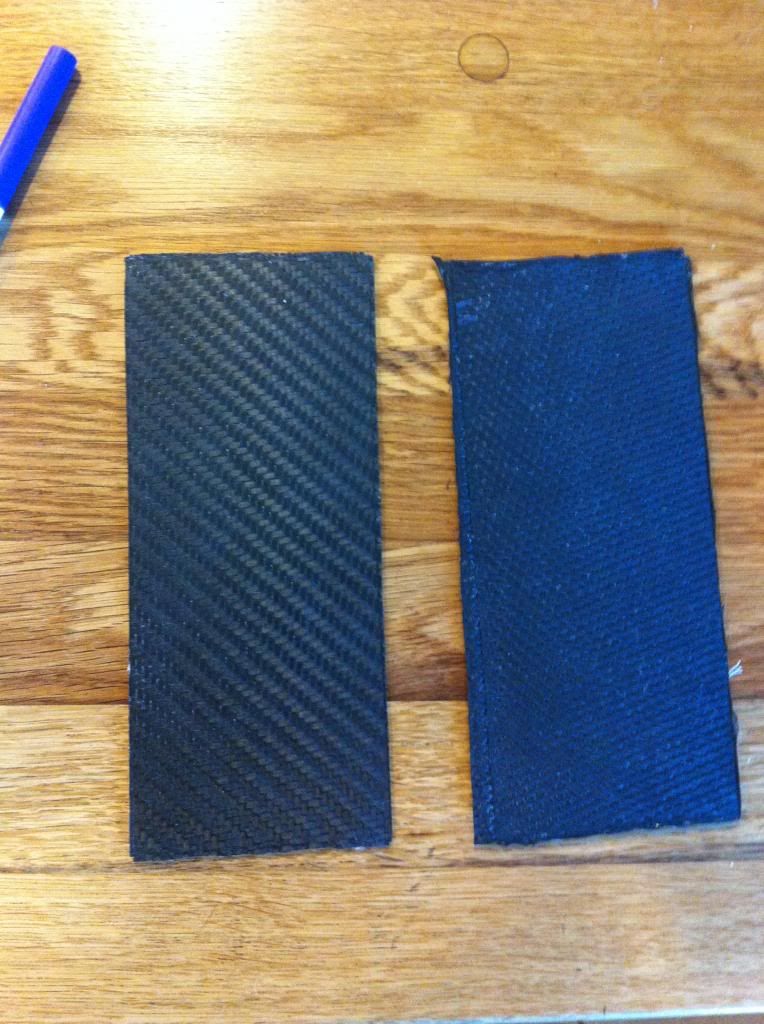
The layup was relatively simple. I used a 5.7 ounce 2X2 twill weave for one and I believe a satin fabric with a definitely heavier tow, as the final product was noticeably thicker than the twill one.
The two test pieces were 3"x7", with 5 layers each, They were placed on a waxed 1/8" thick aluminum plate.

I only used non-perf release film on the CF, I also used little strips of peel ply in place of glass tow to hopefully help extract the air from the material. The peel ply strips were connected to breather that was on the perimeter of the plate.

I debulked the 5 layers of prepreg for an hour and a half at room temperature.
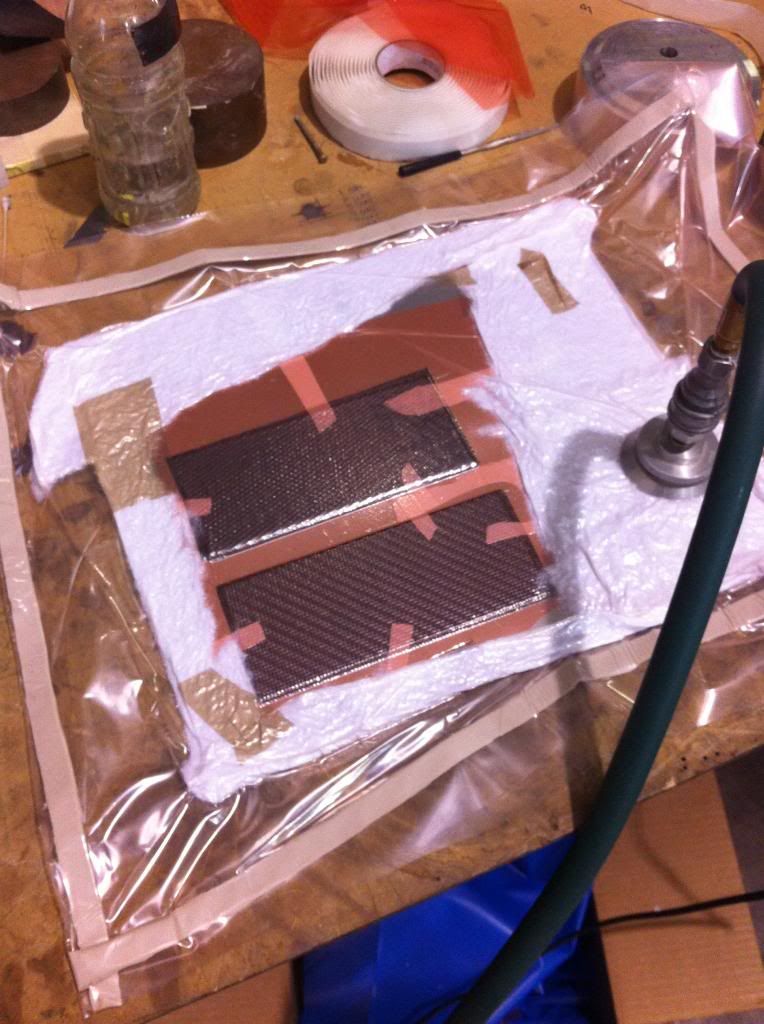
I then ramped it up to 150F and had it dwell for 90 minutes. Next, I ramped it up to 300F and held it for 4 hours and then I let the part cool down to 140F.

Here is the whole thing just out of the oven.
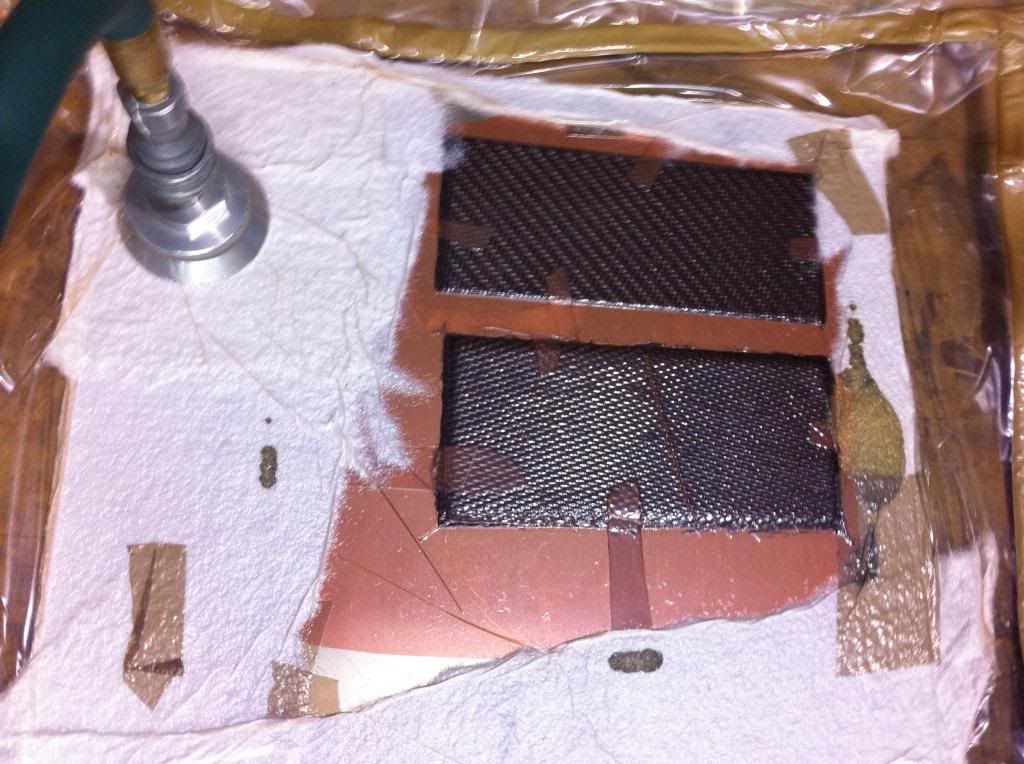
Right off the bat i noticed that the vacuum bag and relase film got sucked in between the fibers of both materials. I was alittle dissapointed in that part. I did notice however that where the peel ply strips were, they had a more uniform surface than the rest of the part.
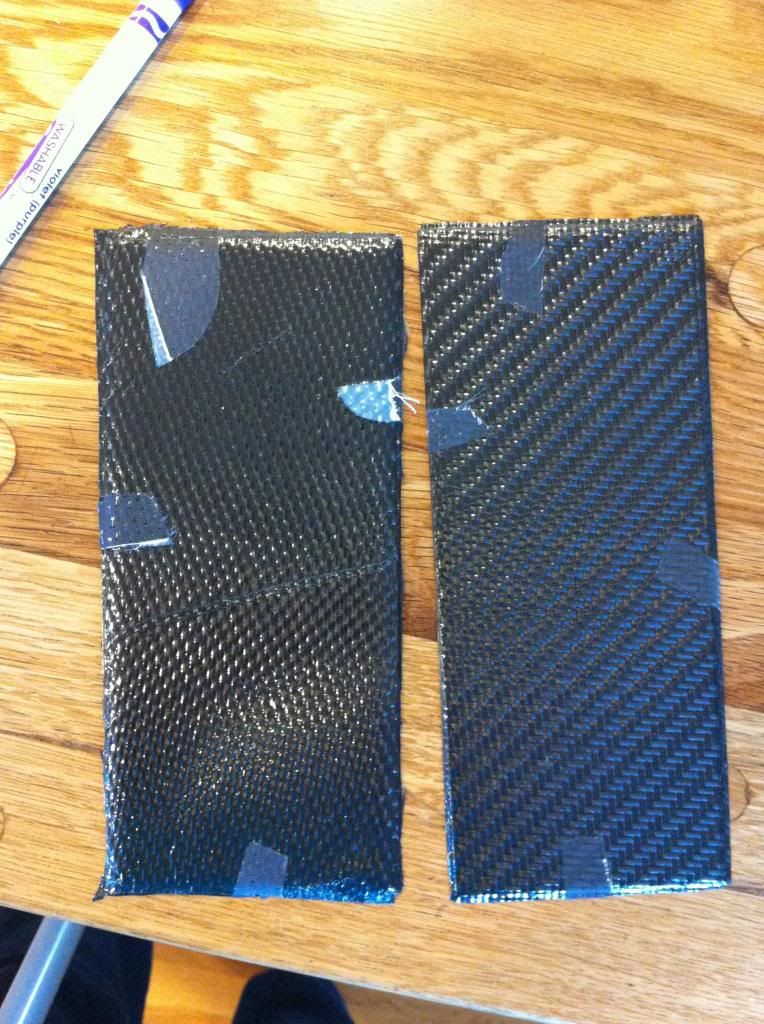
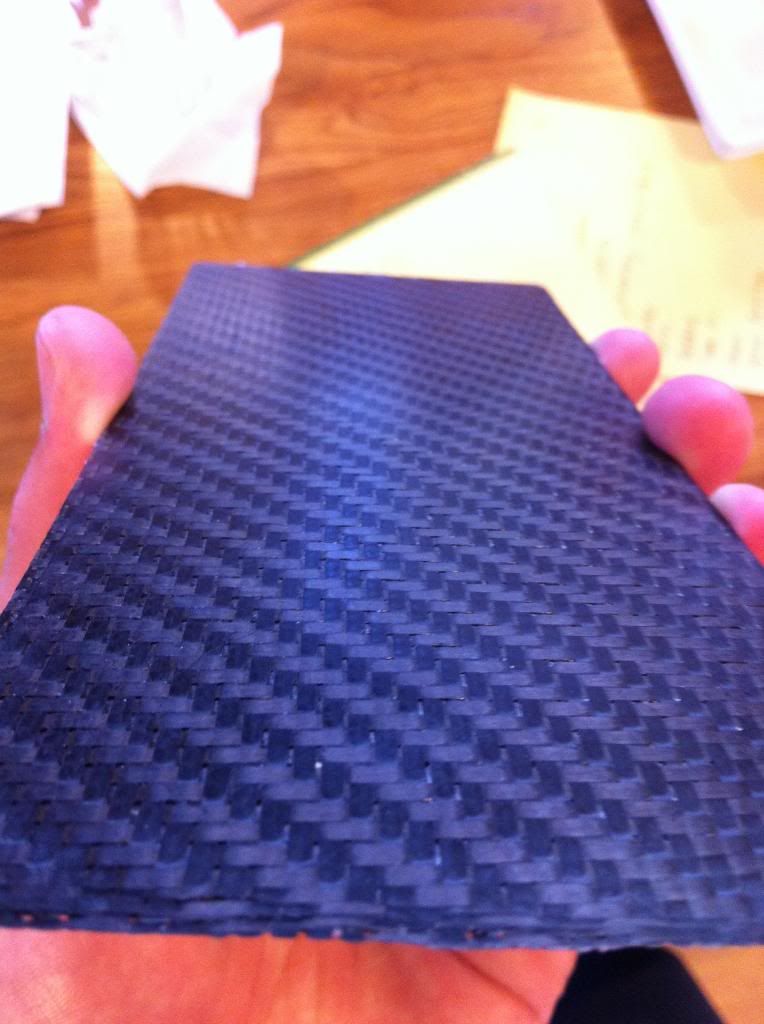
The tool side of the part was more interesting. The satin weave prepreg did not do as well as i expected. It was about the same, if not worse than the little box i made. I believe that prepreg had a higher resin system than the twill weave one. I think that is the reason why it did not do so well, and the fact that it had a thicker, heavier weave to it. This means less compaction of the fibers.
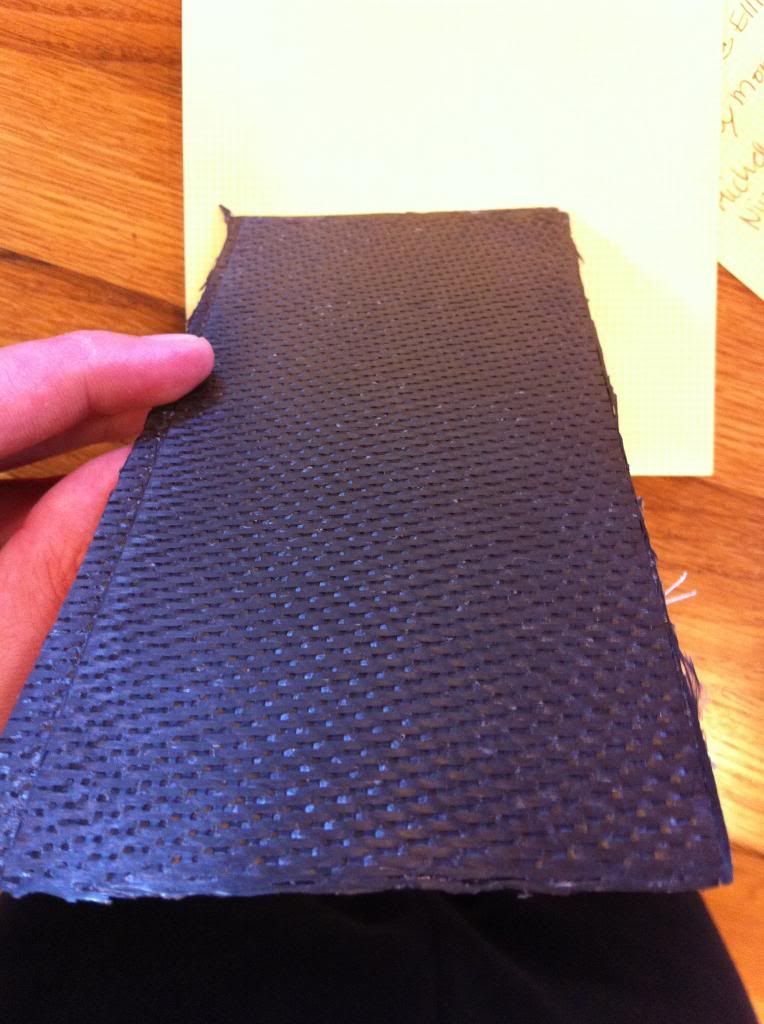
The twill weave prepreg turned out a lot better. I was expecting the material to be worse than the satin weave in terms of surface finish. The twill weave had much shallower voids on the surface, some portions have no surface voids at all which is kinda cool. The finish isn’t autoclave class by any means, but I do believe that it would only take a single coat of lacquer to fill in the gaps on this part.
I am not satisfied yet, I want to experiment with different combos of breather, peel ply, and release film. I did not debulk in between layers. I think I’ll try to do that next time. Most likely after the second layer.

Let me know what you guys think.

Before getting into anything else, is it the same resin system in each pre-preg?

They were two different resin systems. I know I probably shouldn’t do that, but I wanted to compare the two pieces side by side. They have the same curing schedule too.

Even with OOA carbon I debulk overnight… One hour is not a lot of time…

This is made directly off the alloy heel plate and I used a semi perm release. It was bagged with a perf release and debulked overnight. This is 6 layers and it is not a specific OOA Pre-preg. It is a low temp pre-preg RP400 from PRF and works OK but RF464 is more consistently better.

Okay, ill try debulking longer. did you delbulk the first two plies at all? Or did you only do it after the whole layup?

My next test will incorporate a bunch of different combos of breather/ release layups. See what happens there.

I laid it all down as I just wanted to try it as a test… But I did leave it overnight.