Another gel coat failure...what am I doing wrong?!?

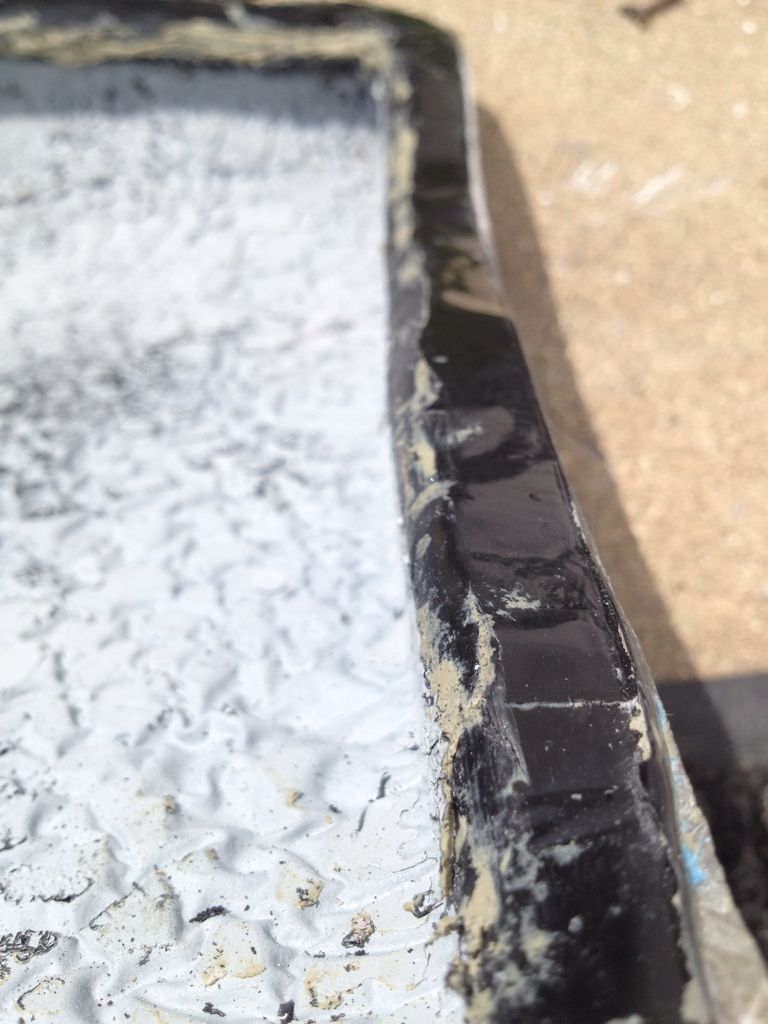
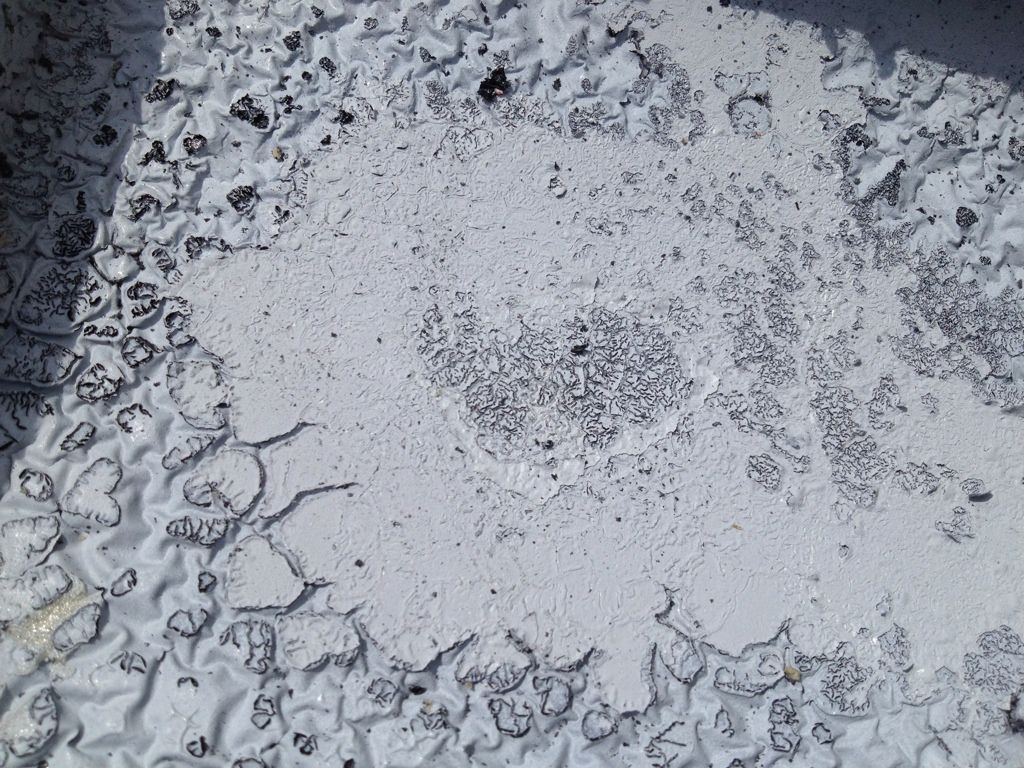
Can somebody help me understand what happened here?
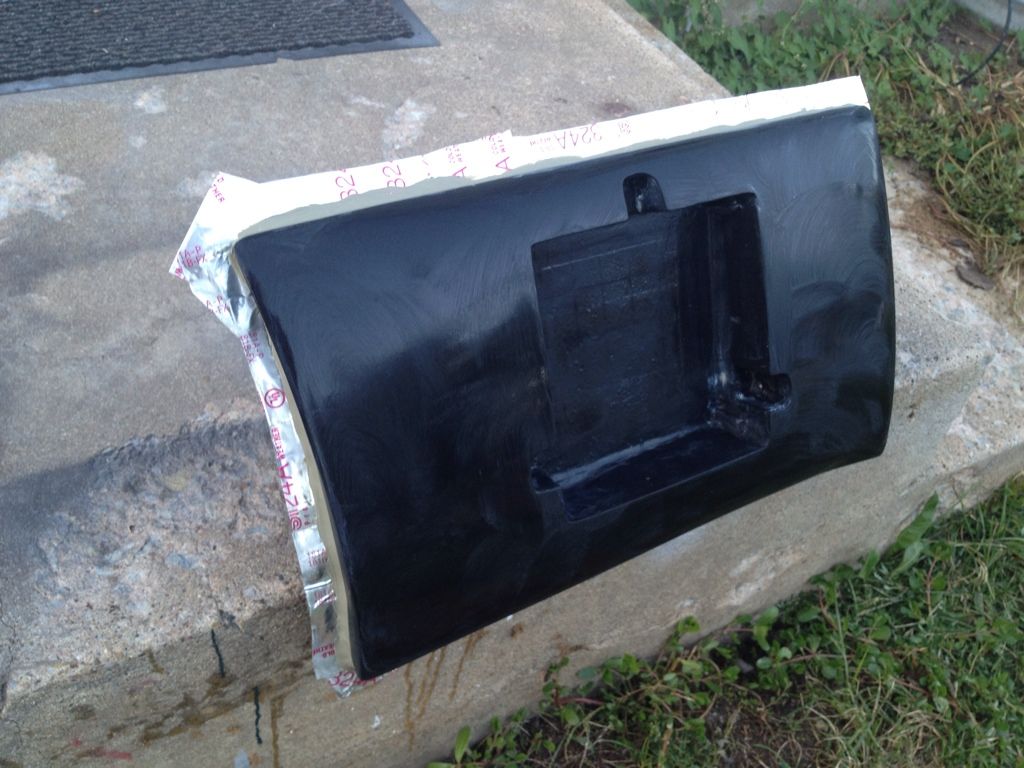
Let me first explain that I used rattle can “rustoleum” paint on this. Certainly that could have been the cause of the alligator skin, but the outcome looks similar to other failures I’ve had with gel coat.
First I flanged the plug and applied the first coat of wax. I repeated the process until there were around 5-7 coats of wax.
[/QUOTE]
Here is after brushing on the gelcoat…I used a digital scale and mixed it exactly at 1.5% MEKP. I let it set overnight. It wasn’t tacky when I lightly touched it 7 hrs later.

I laid down some chop strand mat:

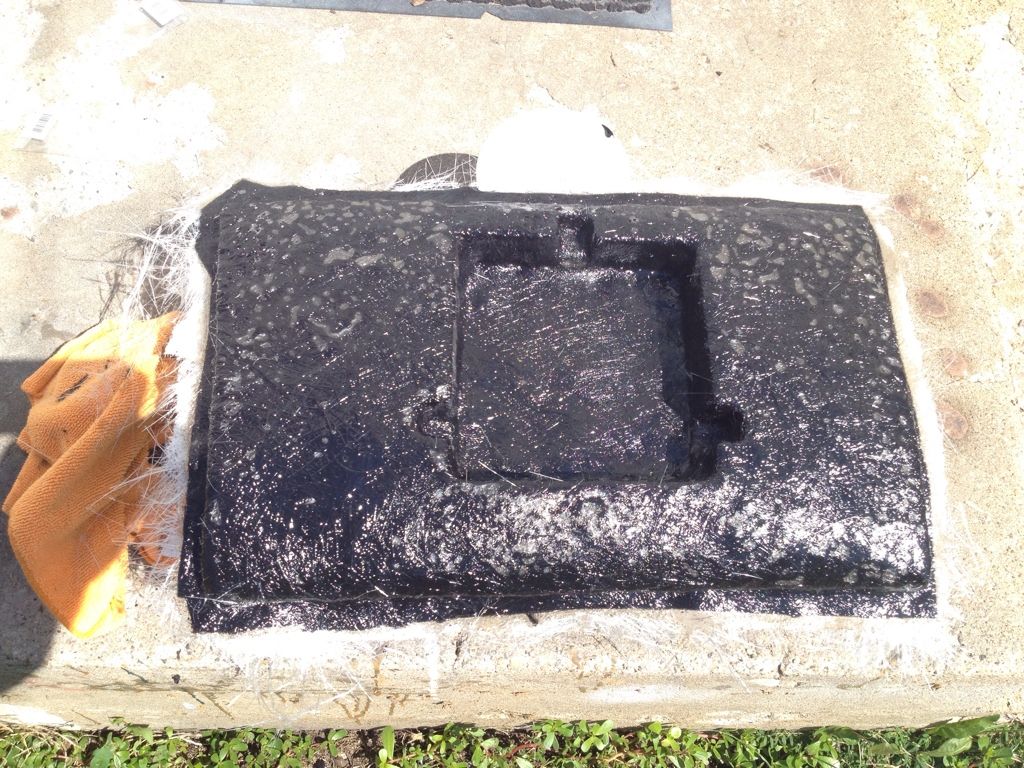
And repeated the process several times sanding in between.
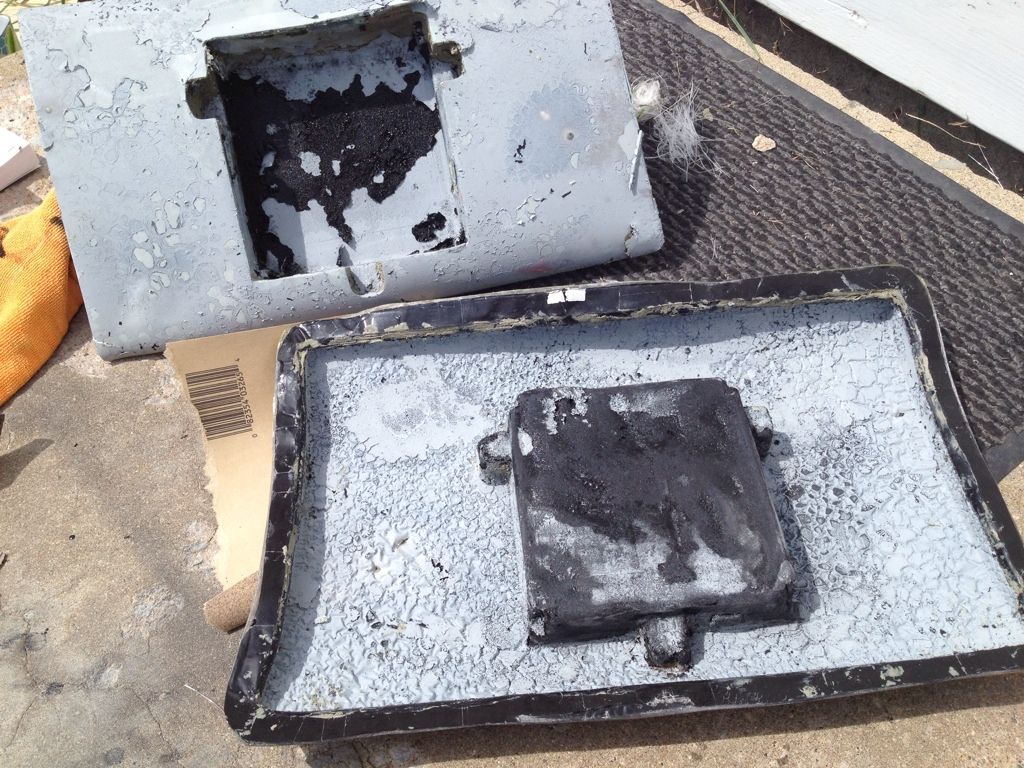
Then I pulled it apart and that is when my heart sank:(
Do you think this is because of the rattle can paint? Or some other issue with the gel coat??

I did not use PVA on this attempt.
The only part that is reasonably smooth is where the aluminum flange was:

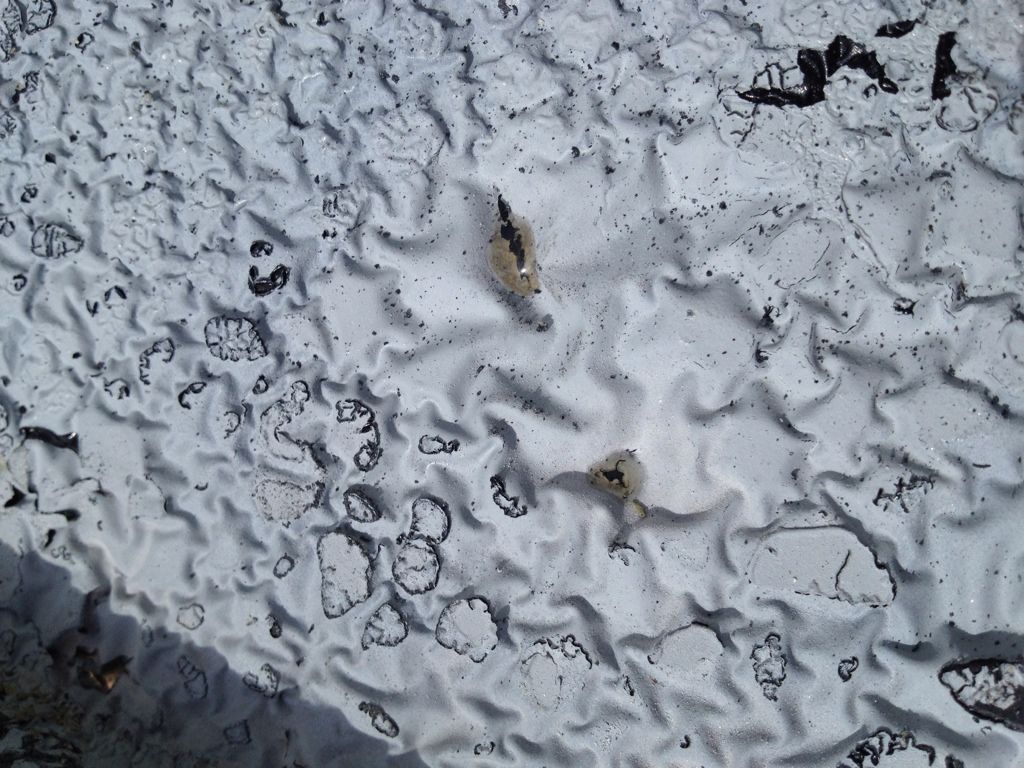
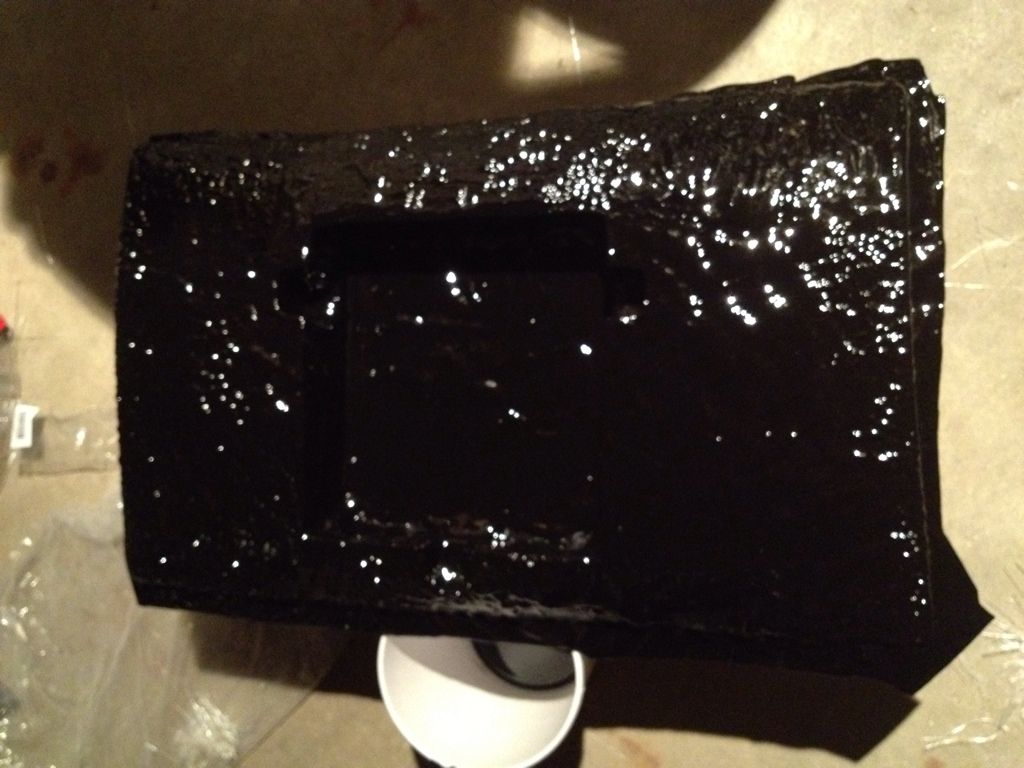
This is the smoothest part:
[/QUOTE]

My next project will be molding my rear seat delete and I want to figure out what I’m doing wrong before I screw up another plug. This one is irreplaceable:

Rustoleum has all sorts of chemicals in it. Rust inhibitors, catalysts, accelerators etc. Some of these chemicals are used to provoke a reaction to give the surface a hammered look.
Did you do a test patch? I think you’ll find styrene reacts with whatever is in rustoleum.

Do not use the rustoleum again, It is exactly what has happened. The styrene in the gelcoat has reacted with the paint. You would be better served using a Duratech based product, which is specifically designed for plug finishing. Some fabricators also use two packs and there will be fabricators on here that will make recommendations on the type to use that are available close to you. I also noticed that there seemed to be a lot of wax on the plug. Did you remove the wax? With critical non replaceable parts it may pay to use a PVA. It will require you to do some mould refinishing if you do. At best a light wet and dry and then polish.
I am an advocate for specific plug and mould refinishing surface finishes, what you think you will save money wise and ends up biting you on the you now what. Ensure when applying the gelcoat you apply the correct film thickness and catalyse the gelcoat at the correct percentage, according to your weather conditions. This will also take out another variable.
Just on the waxing. Apply the wax, allow it to dry and the with two cloths, the first one to remove the majority of the wax and the second to buff to a shine. Cycle your cloths between applications. Meaning throw the first one away after the first application and use the second one you used for the first buff up as the first one for the removal of the wax on the next wax application, and then so on. This will ensure you are not re-applying the wax. It will avoid wax build up ,that is very difficult to remove from your finished part or mould. Also allow approx 15-20 minutes between wax applications, don’t keep layering it on. Then allow a good 30 minutes or more to allow the wax to harden.

You can use Rustoleum, but you will also need to use PVA to create a barrier. Wax is unable to block chemical reactivity regardless of the number of coats you apply. If you don’t want to use PVA then you need to use something different to surface your plug.

Follow the directions for your wax. Some need to be buffed immediately. Others need to set-up before they are buffed.

Thanks for all the help. I’ve had failure after failure trying to make molds with gel coat.

I think I’ll play around with a small wooden plug to build some confidence back.

I use Rustoleum primer on all my plugs, I do not have a spraying capabilities for a 2K paint. Before I begin making the mold, I put on 6 coats of wax, then 6 coats of PVA and have not had an issue.

PVA is a chemical barrier. However, it is a pig to get nice and glossy. I only recommend it on:

-1. Very dubious surfaces
-2. Sanded surfaces
-3. Surfaces that do not survive styrene attack

Yours falls into the 3rd category. Rustoleum, and other enamels, are of no use. Basicly all 1 component stuff is doubtful.

Either use a 2 component PU product (not acrylic based, like so many car paints, so VERIFY) or indeed use a polyester product, like Duratec products. You could even apply polyester topcoat (waxed gelcoat) then sand and buff.

And make tests. You will arrive at a set of materials that works for you. Unfortunately I cannot give you specific names (not familiar with what is available over there) but I hope someone can.

The first photo which shows the wax applied to the part - was that when you had finished applying release wax? Did you put the gelcoat straight on top of that?

That is what I started off doing as well… thinking along the lines of “okay, I can see the wax buildup on the part - must be good to go!” That is completely wrong!! There should be no wax visible on the surface - all you should see is the surface of your part, which is hopefully nicely polished. That won’t only give you a nice looking part, it will be easier to release as well.

Also - leaving the wax piled on like that will actually make for a much more difficult release. Because the wax is not smooth it will have some mechanical grip on the gelcoat. The reason for applying multiple coats of wax is not to increase the thickness of the wax layer, but to ensure no spots are missed. For instance one coat of wax may be one micron thick. 10 coats may be 1.5 microns thick. The goal is not to build a thick layer, but to ensure 100% coverage. One coat would provide a fine release (if you had complete coverage, which is not likely). Good info here about mould releases and wax: http://www.rexco-usa.com/why-molds-stick/

Looks like you also learnt the hard way that it’s a good idea to do test pieces first… definitely a good idea any time you’re using a new process/product/materials/etc. Don’t more on to your actual plug/mould until you are 100% sure your process is good.

And to add to the critique (just for learning purposes, believe me), there are more than plenty air bubbles in your first layer of glass. Get a bubble buster, and work the complete area. That will definately improve your work.

Thanks! I will definitely look into bubble busters. It seems like in the past when I tried to pop bubbles they would just slide around under the chop strand mat and not “pop”.

BTW, do you have a good recipe for mold fabrication…ie something like the following:

  1. gel coat laid thick in one pass…allow to set for 12-24 hr
  2. shredded fibers saturated in resin and stuffed into the corners and recesses
  3. 3/4 oz chop strand mat x 1 layer
  4. 3/4 oz chop strand mat x 1 layer
  5. allow to set for 12-24 hr
  6. 1.5 oz chop strand mat
  7. heavy weight bulking mat
  8. wood and/or metal for mold rigidity
  9. heavy weight bulking mat

I’m not a fan of too much resin(and fillers) in corners, because of the possible heat build up, and shrinkage, so I try to avoid that as much as possible. And woods and metals in the layup, because of the print you may get. Bonding of those can be done on the flanges. Create stiffness with the form of the mould or thickness of the layup.

When working with poly/vinylesters I like to build up slow, to avoid heat an shrinkage:
2 layers gelcoat,
1 layer 225 csm
1 layer 450 csm
2 layers 450 csm,
4 layers 450 csm,
etc. all allowed to set.

But a mould building resin is faster :wink:

Indeed it all depends on what materials you use. Which is why it is hard to give a general guideline.

For RM2000 it can be:

-Gelcoat GC206 or 207 (spray version) applied in 2 layers, 2x 400 mu wet.
-Vinylester RM842 with CSM0,75oz (fine tex). Bubble bust like your life is depending on it.
-4xCSM1.5oz with RM2000 or RM3000,wet in wet (very important)
repeat last step for thicker moulds

Any metallic support grid bonded with MS polymer sealant.

Cover the backside of the mould with cheap topcoat/flowcoat. Ask your supplier for “off colour” batches, or out of date material.

Can you recommend a good bubble buster? The csm is notorious for trapping air underneath it.

How are you applying the resin?
If you are applying the resin to the dry fibre then you will trap air!
Apply the resin to the gelcoat or to the part first, then apply the glass fibre and wet again. Simply meaning bring the resin though the laminate, do not try and push resin from above to go down it will trap air. The tendency will be that you have all of the air trapped below, all of the resin above will not allow the air to pop.