Advanced technique questions

New guy here with some questions. I’m curious on how one makes parts with seal grooves ect. Like a Dirtbike valve cover. Or a clutch cover with bolt hole grommets to keep someone from over tightening the bolt.
I’m currently using an airtech 22 vac and bagging everything. I have much to learn and a long way to go.

The small valve cover seems simple enough if it wasn’t for the oring seal on the bottom. Thanks and aloha

Here is an example

Actually it’s not to hard at all to make a seal/o ring groove. In some cases you can make two tools for this purpose.

One for the frame seal and one for the laminate portion.

Here’s a simple scenario.

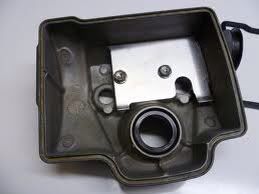
Picture a clutch cover that has 1/4" thick flange with a 1/16" o ring groove that’s 1/2" wide. Then the cover being a pan would be 4" deep and say 5" diameter with a KTM logo. Lol j/k.

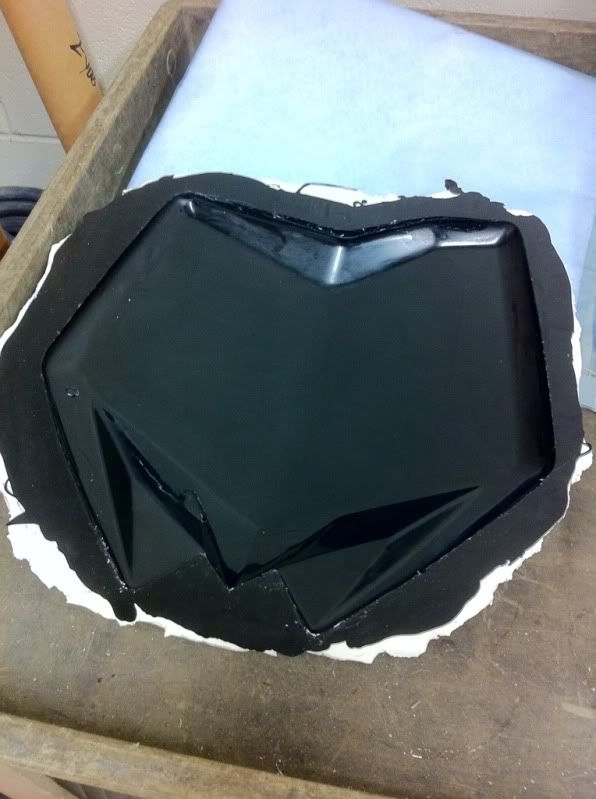
Your tooling could be a pour style splash mould tool for the flange. Just a simple foot print of the flange of the cover with the o ring groove. You could mix resin graphite powder and flock or chopped carbon bits. And simply pour into the mould until its just over full. Let cure and using a router level the top of the flange flush to the tool.

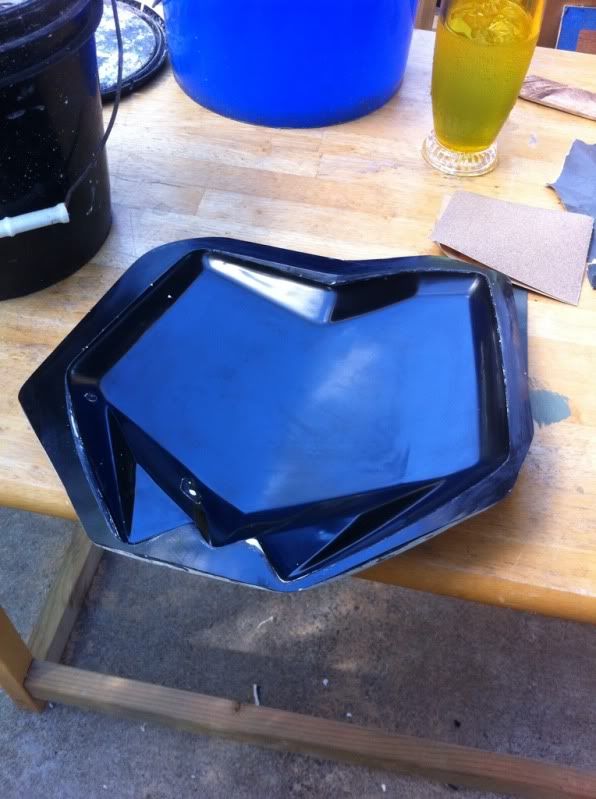
Your second tool would be the clutch cover bowl portion that allows for the flange as well. Wet lay up your carbon and set the flange inside the tool over top the laminate. Then vacuum bag the assembly.

I’m not quite sure I’m following. Lol no ktm here man. Ok I bought my wife one.
Can you draw me a picture? Haha maybe with crayon.

You on Oahu?

Yes sir. Here is said scooter. 2006 husqvarna 530rr. 1 of 50 ever made,

Hey Dallas,

Do you mean that you would make the flange part first using the resin mix, let it cure, then place it on the actual cover part so it is attached/glued while the cover is curing? Sounds like a good idea even if you meant something different. :stuck_out_tongue:

Nice bike Husqvarna. Why the interest in a carbon clutch cover? I reckon some carbon fibre bodywork would look nice!! :smiley:

I’m building a supermoto at the moment, planning on custom carbon fibre bodywork. The bike is a KTM 380 EXC… well the plan is for CF panels, but if it doesn’t turn out I’ll just do fibreglass. Either way they’ll be custom shaped. Already started on making the plugs for my build, thinking about doing some other small pieces later on so I’m interested to see your progress! :slight_smile:

Yes… And I’ll be in Oahu shortly

You moving here or just visiting?

Here is my first real mold I made this week. And it’s in the bag right now. I bagged a few other small parts previously but just layed up the fabric on them.


Yeah I know way too much resin lol practice makes perfect

Ok guys at the risk of you puking at the sight of my abomination I’m gonna post it anyway. I made two huge mistakes that I can see. 1. My first I put wayyy too much resin down first. Not allowing the fabric to lay down all the way. 2. At the bottom I didn’t make relief cuts to let the fabric sit in the “v” angle. Lessons learned. Of course the hard way. Haha I also noticed some pin holes in the good areas. Maybe a few quick passes with a heat gun before applying the second layer will fix that problem.
I also noticed in my mold a small area of waves and a pinhole where I sanded it. I’m assuming this is where I applied the tooling gel coat way too thin. So I’m scrapping the whole thing and starting over. Oh well

Ahwell, it’s all experience - you’ve got to start somewhere. Just as well it wasn’t a larger piece I suppose!

So how did you apply the surface coat on that piece? Just brushed straight on with no heat gun? Folks also seem to suggest putting down a layer of glass veil before the carbon, to help with pinholes.

Also did you leave the vacuum bag on until the part was fully cured? Maybe you can leave some more creases/folds in the bag through the centre of the mould so there’s enough loose bag to get right into the corners. I would have thought the vacuum would have been enough to hold down that piece of fabric? In the photo where you’ve bagged the part, it looks like there’s still air trapped in there? Is it possible that the breather/bag is getting pinched where it comes off the mould flange?

Looking forward to seeing your progress and the next version!

A vacuum bag is no help for fighting bridging. Therefore the placement of the fiber needs to be more accurate. Experience helps.

In your case I would not ditch the mould yet, but do a few more layups. The first one is never the nicest…

A gelcoat helps sticking the fiber in. (the same time it can be annoying, if the fiber sticks in the wrong place). Laminate the first layer wet, the rest normal, the last dry-ish. Focus on fiber placement. Vacuum will not move the fibers.

Im actully intrested in how to achecive a grove for a gasket or seal as a sr20 rocker cover has been on my mind along time!

Couldnt you stick the vacum bag to the mould and pleat the bag, looks like you have a flange?

Well I bagged another today. Turned out much much better but still not good enough. I think I got my problem figured out. This is plain weave correct?

Husq,

You are correct, that is plain weave.

-C

Husq,

You are correct, that is plain weave.

-C

Thanks for confirming that. I took great care in bagging this one. Then i figured it out. How could I miss that, I think the plain weave is too tight for these contours

Plain wave is just fine for these contours. You still have bridging before adding the resin. Use spray glue and little by little press the fabric on the mold, you can use a spatula for corners.

Well it’s not cut out yet. But at any rate I took great care in laying each layer and made sure it was pressed in all the corners.

What do you guys think? Is it me or is the plain weave (5.7oz) too tight. Also I know 2x2 twill will conform better than the plain, but I only have 7oz. So at what ratio does a twill become just as difficult as a plain. For example. 5.7oz 3k plain = 7.0 3k 2x2 twill

Difficult to say. But 7 oz is definately more dense, so also less pinholes. Give it a try. Laminate your first layer wet! Start with resin. Not with fiber.