Thanks for the comments guys, yes, I intend to make the chassis, tube spaceframe along the lines of the original, need to source a donor car for engine/box/shafts etc and for that I am after a Crashed 3.4 ltr Caymen S, 300 hp should make it go ok.
Re Hours spent… uuuummmmm! I should think somewhere in the region of 800-1000hrs I always try and do something every day, some days I can spend all day on it and others just 30 mins, but it all helps. Not having a wife or kids also is a huge help in a project such as this, although the girlfriend has clamped down on me working till 10 at night on it!
chris, what have you done at the back of the centre (roof section) where the tail section will meet/join, is that a joggle that the tail section will sit on top of? It isn’t very clear from your pics as there are not any detail pics of that area.
Dont forget to put some kind of interlock or dowel in the multi piece moulds so that they will line up every time and will reduce any twist between the sections.
Out of interest, why on the latest mould section that you have done, did you not put a damn to mould against at the back of the cantre section? this would have made the mould stiffer and at the same time given you a sruface to attach whatever ends up as the back bulkhead of the xxxxpit inside the car.
Good work, I keep checking your flickr stream almost daily to see progress!
Hi Matvd,
Yes it is a joggle where the tail meets the main body I scribed the join line then used a router to machine it out, then cleaned up with filler etc, The tail section sits on top of this.
I intend to put some stainless pegs in where the sections interlock (this I didn`t do with the tail section stupidly but will have a fiddle when I come to produce some parts from it)
I can see where you are coming from re the flange on the rear of the last mould, the only issue is the rear bulkhead is not vertical, it rises vertically then sweeps back, I intend to make a seperate bulkhead mould (out of steel sheet) and sandwich it between the roll hoop and outer roof skin, leaving a nice flush bulkhead with the roll cage hoop to the rear of it, this should add strength to the finished roof/rear bulkhead and also look nicer and provide me with a bit more room inside. When the tail section is in the closed position it should cover the roll hoop (he says fingers crossed!!!)
I am still learning mind so any ideas welcome!!
regards Chris
MrNoo… my wife stays up till 10pm working with me. But then again she is half owner of the business. We both don’t want kids or have them so that does help. 1000 hrs… that’s lots of time but the results look every hour worth it.
Chris, just looked at your photostream for the first time in a week or so, cricky you have made a bit of progress!
I was wondering tho, why did you not split the nose section from the main section that has the windscreen in it? did the origionals not have a seporate nose section? It would have made working on the car much easier at a later date and mean that damage can be repaired/replaced easier.
The front section is bonded to the chassis, the original Piper car had a seperate front fitted using Dzuss though, I thought it would spoil the lines of the thing!! There is not a great deal in the front end, pedals and rack etc and hope to be able to get at these through the front hatch if needed! Ill dare say i will wish I had made a detachable front for it years down the line, also thought it should make getting all the door gaps etc spot on and screen fit more accurate. Also I don`t wish to make the front too thick as it will then start to get heavy being bonded to the chassis should allow me to get away with a thinner laminate and yet still be strong.
regards Chris
Fair enough, I have never look close at a real one (not enough to notice that the nose isn seporate) I just assumed that the nose was seporate! well we all know what assumtion is … the mother of all fcuk ups!..
Well its certainly looking good there anyhow. keep the pics flowing.
Sensational Chris, well done and thanks for the Flickr link.
Must have been difficult working in your cold conditions, are you able to raise the temp to something reasonable?
fantastic progress chris, looks like you only have one mould section left to make, the lower nose section that has the intake ducts in it. You must have spent a lot of time on that over the last week to have soo much progress… keep up the work… looking forward to more…
Matt
what vacuum system are you using?
I am not, it is just poly wet lay up for the moulds, the airline fittings you see on them are to be used to help “release” the finished parts, just connect the airline and open the tap. Am undecided as to what to use for the lay up of the finished body, will prob just do a Poly/CSM layup to help break in the moulds then use some Swabblack or T35 poly gel and wet lay up some 2/2 twill glass using epoxy (they seem to use this method with the gliders I fly and they are light/strong and show liitle signs of delamination after extended periods of time)
I do have a heater in the workshop but this has been the biggest headache during the winter we have had, trying to get everything warm!
Matvd, will update with some more pics only my phone is US so will take my camera, have managed to get all the moulds off/cleaned up, took a bit of work and damaged the plug but the moulds are fine.
regards Chris
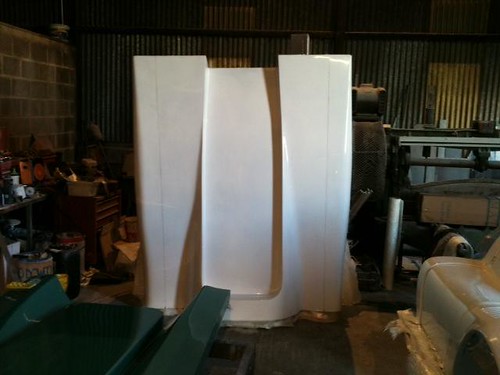
Well, moment of truth today, popped the body from the moulds, came out a treat, ended up using 4 layers of 450g/m CSM with a 2x2 twill 300g/m glass for final layer, am very happy with it. Will prob do another (try and get a real lightweight one) when it warms up, early summer. Anyway a couple of pics for you

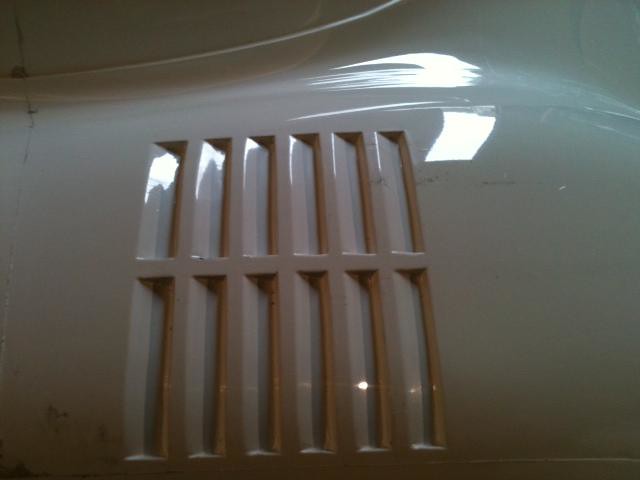
And the wheel arch vents that I thought i`d poss have some issues with regarding release, came out just fine.

regards Chris
Chris, Congratulations! I’ve been watching your flickr posts almost daily. I’m amazed with how quickly you’re moving along. Thanks for sharing!
Fantastic chris. That first body is probably a little heavy but better that than too thin and weak for a first item. A good way to test out your moulds and the results look very good.
Keep posting the pics up. Im loving your work and the speed at which your doing it all.
Wow, looks like a great first part.
chris has now made the tail section in GRP as well, looks fantastic.
Have a look on his photostream or even better, get some pics posted here chris!
Yes, sorry for delay, managed to get a tail section out, did a much lighter lay-up, 1 300csm +2x 450 + 1 380 2x2 twill and it does seem about right, suspect I will do another front section to this spec. Enough gassing, some pics for you.
first one is of it laid up ready to be released

rear section

close up, needs a good trim etc yet

So this will be the end of the fibreglassing for a while now, have a spaceframe to make but will keep you updated with progress from time to time
I do and will post pics on my Flickr page http://www.flickr.com/photos/47153142@N03/sets/72157623861979360/
best regards Chris
Having made a soapbox with gallons of polyester filler and knowing the time it took to do something to a much lower standard than you have achieved, I take my hat off to you. unbelievable commitment, hope it all works out nicely 
Excellent job, any more updates, would love to see the finished project. It has spurred me on with my projects seeing someone doing it on a larger scale.
Dave
Wow, looked through all the pics on flickr. Outstanding work!
